A few weeks ago, we introduced the common integration patterns we see used for B2B SaaS. Then, we looked at event-driven integrations, perhaps the most common type for teams using Prismatic. Next, we dove into scheduled integrations. In this final post on integration patterns, we'll consider the synchronous integration, including an in-depth look at an example integration.
What is a synchronous integration?
A synchronous integration may be what you need if you have data from a third-party app that you must have right now. For example, you need to send data to a third-party to process, but you need confirmation that the data was processed completely (or response data) before you can proceed with your next task. An integration of this type calls a webhook URL and then waits for a response.
Perhaps you have an accounting app that needs data from three CRM systems. The app could authenticate and make individual calls to each of the three systems, or it could call into an integration flow that gathers the data from each system and consolidates those records into a single dataset. In the latter case, the accounting app would send off the request for data and then wait until the integration consolidates the data.
If a synchronous integration is working quickly and has very little to no lag between the call and the response, then the integration should work well. However, if the integration takes a while to run (much data to process, an app fulfills requests slowly, etc.), the integration becomes susceptible to network disconnects and timeouts.
If you regularly experience issues with a synchronous integration, you may be ahead to recreate it as a two-way asynchronous integration. Then, the first part of the integration can send off the request to the webhook URL and "hang up." When the integration completes the process, it can "redial" or "callback" to return the requested data.
Example of synchronous integration
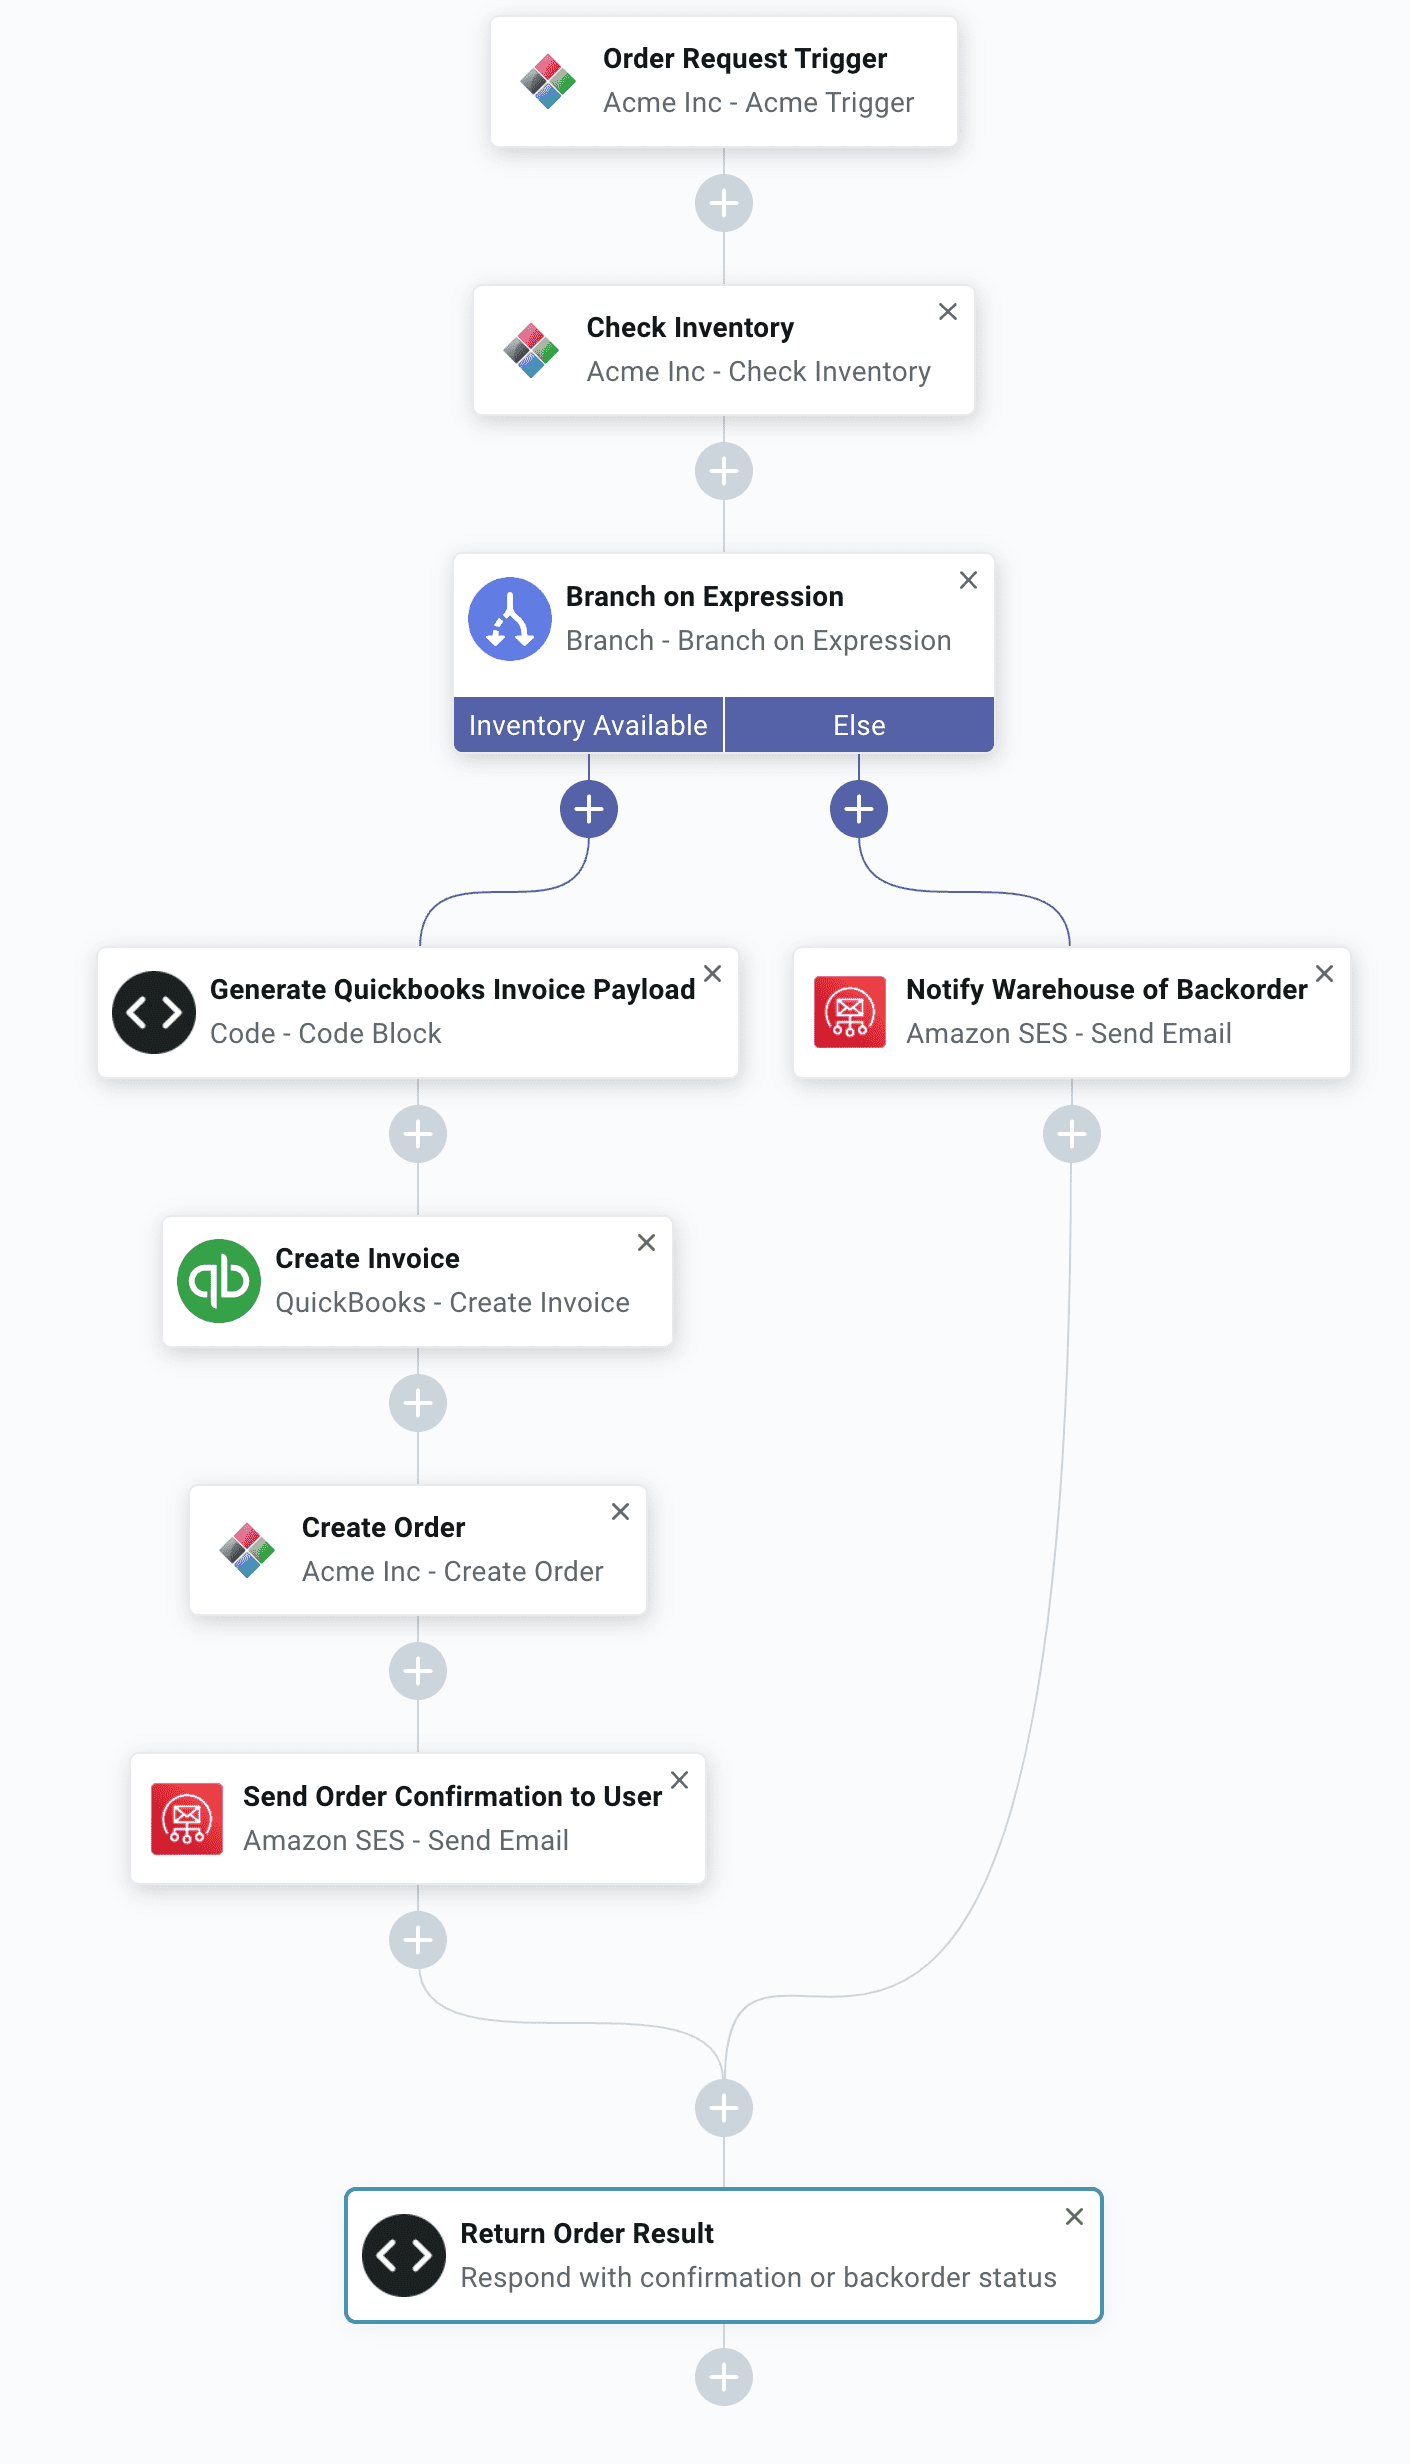
Now let's look at one synchronous integration in detail. This example is a two-way integration that starts with an order request in the Acme app (which we are using as a stand-in for your app) and finishes with an order status notification to the same Acme app. It uses actions from a custom Acme component, the QuickBooks component, and the Amazon SES component.
We set this up as a synchronous integration because we want to update the order page in the Acme app with a status after we've confirmed that status with the inventory system.

Here are the steps:
- The webhook in the Acme app sends a new order request to the endpoint (Order Request Trigger).
- Using the data from the order request, the integration uses the Check Inventory action to see what's in the warehouse.
- Based on the inventory status, the flow splits into a left and right branch.
Left branch (if the inventory is available)
- The integration transforms the order data to build the payload that QuickBooks needs to create an invoice.
- The integration creates the invoice in QuickBooks (Create Invoice).
- The integration creates the order in Acme (Create Order). Please note that integration didn't create the order until it was sure that the inventory status would support it.
- Using functionality from Amazon SES, the integration sends an email to the user who submitted the original order request to confirm the order.
- The integration notifies the Acme app (refreshes the page) with the order confirmation data. This step is what makes the integration synchronous. If you left out this step, you could instead run this integration asynchronously. When run asynchronously, the trigger returns an execution ID immediately, and then at some later point when the integration completed, you could have the web app update with the confirmation message.
Right branch (if the inventory is not available)
- Using functionality from Amazon SES, the integration sends an email to the warehouse, notifying it of the back-ordered item.
- The integration notifies the Acme app (refreshes the page) with the news that this item has been back-ordered. Once again, you could set up the integration to do this asynchronously by using an execution ID.
The decision to set up an integration for a given use case as synchronous instead of asynchronous comes down to the underlying business requirements. The good news is that it's not too difficult to switch a synchronous integration to an asynchronous one (or vice versa) should the situation require it.
Conclusion
Whether you need to create a synchronous integration or one of the other types we've covered in the last few posts, Prismatic's powerful integration designer makes it easier than ever. Contact us or schedule a demo of our solution.


