What are Productized Integrations?
As a B2B software company, your customers expect seamless data synchronization between your application and the other systems they use. A productized integration is built as a core feature of your product, designed for self-service deployment by multiple customers, rather than as a one-off solution for a specific customer.
What is an integration?
An integration is a collection of logical flows and steps that move data between your app and another app that your customers use. When you build an integration, you can build it in the low-code designer or as a TypeScript project in your preferred IDE. An integration built with code is called a code-native integration (or CNI).
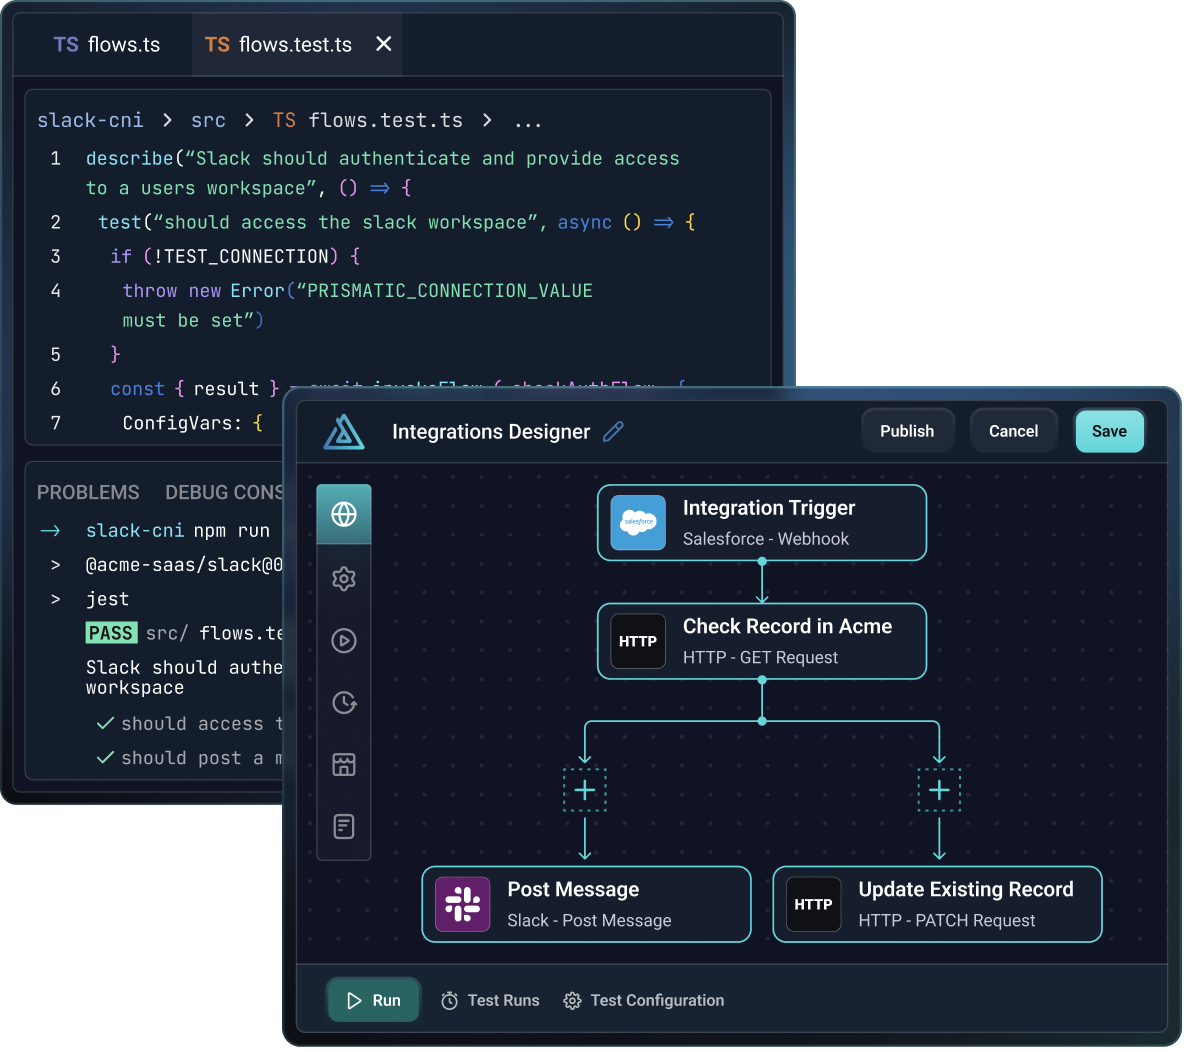
An integration starts when its trigger fires. Triggers can either follow a schedule or can be invoked via a webhook URL.
You can use a combination of actions from common built-in components and your own custom components to build an integration.
What does "productized" mean?
When you productize an integration, you build it as a repeatable, configurable product feature rather than a custom solution for one customer. This means:
- Configuration-driven design: Integrations use config variables so they can be deployed to multiple customers with different settings
- Self-service deployment: Customers deploy and configure integrations themselves through an embedded marketplace
- Repeatable experience: Every customer gets a consistent, polished integration experience
Some integrations have a single flow (one trigger and one set of steps), while others group multiple related flows together into a single deployable integration. For example, if you have a third-party service that sends data via various webhooks, it makes sense to have a single integration with several flows, each with its own trigger but sharing config variables.
Why productize integrations?
Productized integrations offer several key advantages:
- Customer acquisition: Prospective customers are more likely to choose your application if it integrates with the other systems they use
- Faster time-to-value: Integrations reduce onboarding time as customers quickly see their data reflected in your application
- Customer stickiness and retention: When your app becomes part of customers' workflows through integrations, they're less likely to churn. Self-service deployment makes integrations accessible to all customers, not just those who can afford custom work
- Upsell opportunities: Depending on your commercial model, you can leverage integrations to increase contract value
How do customers deploy integrations?
When an integration is completed and published, customers can enable it through the embedded integration marketplace, or your team members can deploy an instance of the integration on the customer's behalf.
Most commonly, you embed the integration marketplace in your application using Prismatic's embedded SDK. The marketplace requires minimal code and appears native to your app, providing customers with a self-service experience.
When customers deploy an integration, they're guided through a custom configuration wizard that you design. The configuration wizard collects customer-specific settings (API keys, endpoints, preferences) needed for that integration instance.
Can I also build custom integrations?
Yes! In addition to productized integrations, you can build custom integrations for specific customers with unique use-cases. Custom integrations are built similarly to productized integrations, but are not designed for self-service deployment. Instead, your team deploys custom integrations directly to the customer, or assigns the integration to the customer and allows them to deploy it from their end.
How do I build integrations?
Prismatic offers three ways to build integrations:
- Low-code designer: An intuitive drag-and-drop interface for both developers and technical non-developers. Use pre-built connectors to create workflows that sync data between apps.
- Code-native integrations: Write integrations in TypeScript using Prismatic's SDK, leveraging your preferred IDE and development tools.
- Embedded workflow builder: Embed the low-code designer in your application to allow customers to create their own custom integrations.
Not sure which approach is right for your team? See Low-code vs code-native integrations for a detailed comparison.
Next steps
We recommend that you follow our low-code Getting Started tutorial to familiarize yourself with integration development and deployment.
Once you understand the basics, explore these related topics:
- What is the embedded marketplace? - Learn how customers self-serve integrations
- Low-code vs code-native integrations - Choose the right build method for your team
- Config wizard - Design the configuration experience for your customers
- Connections - Manage authentication and credentials