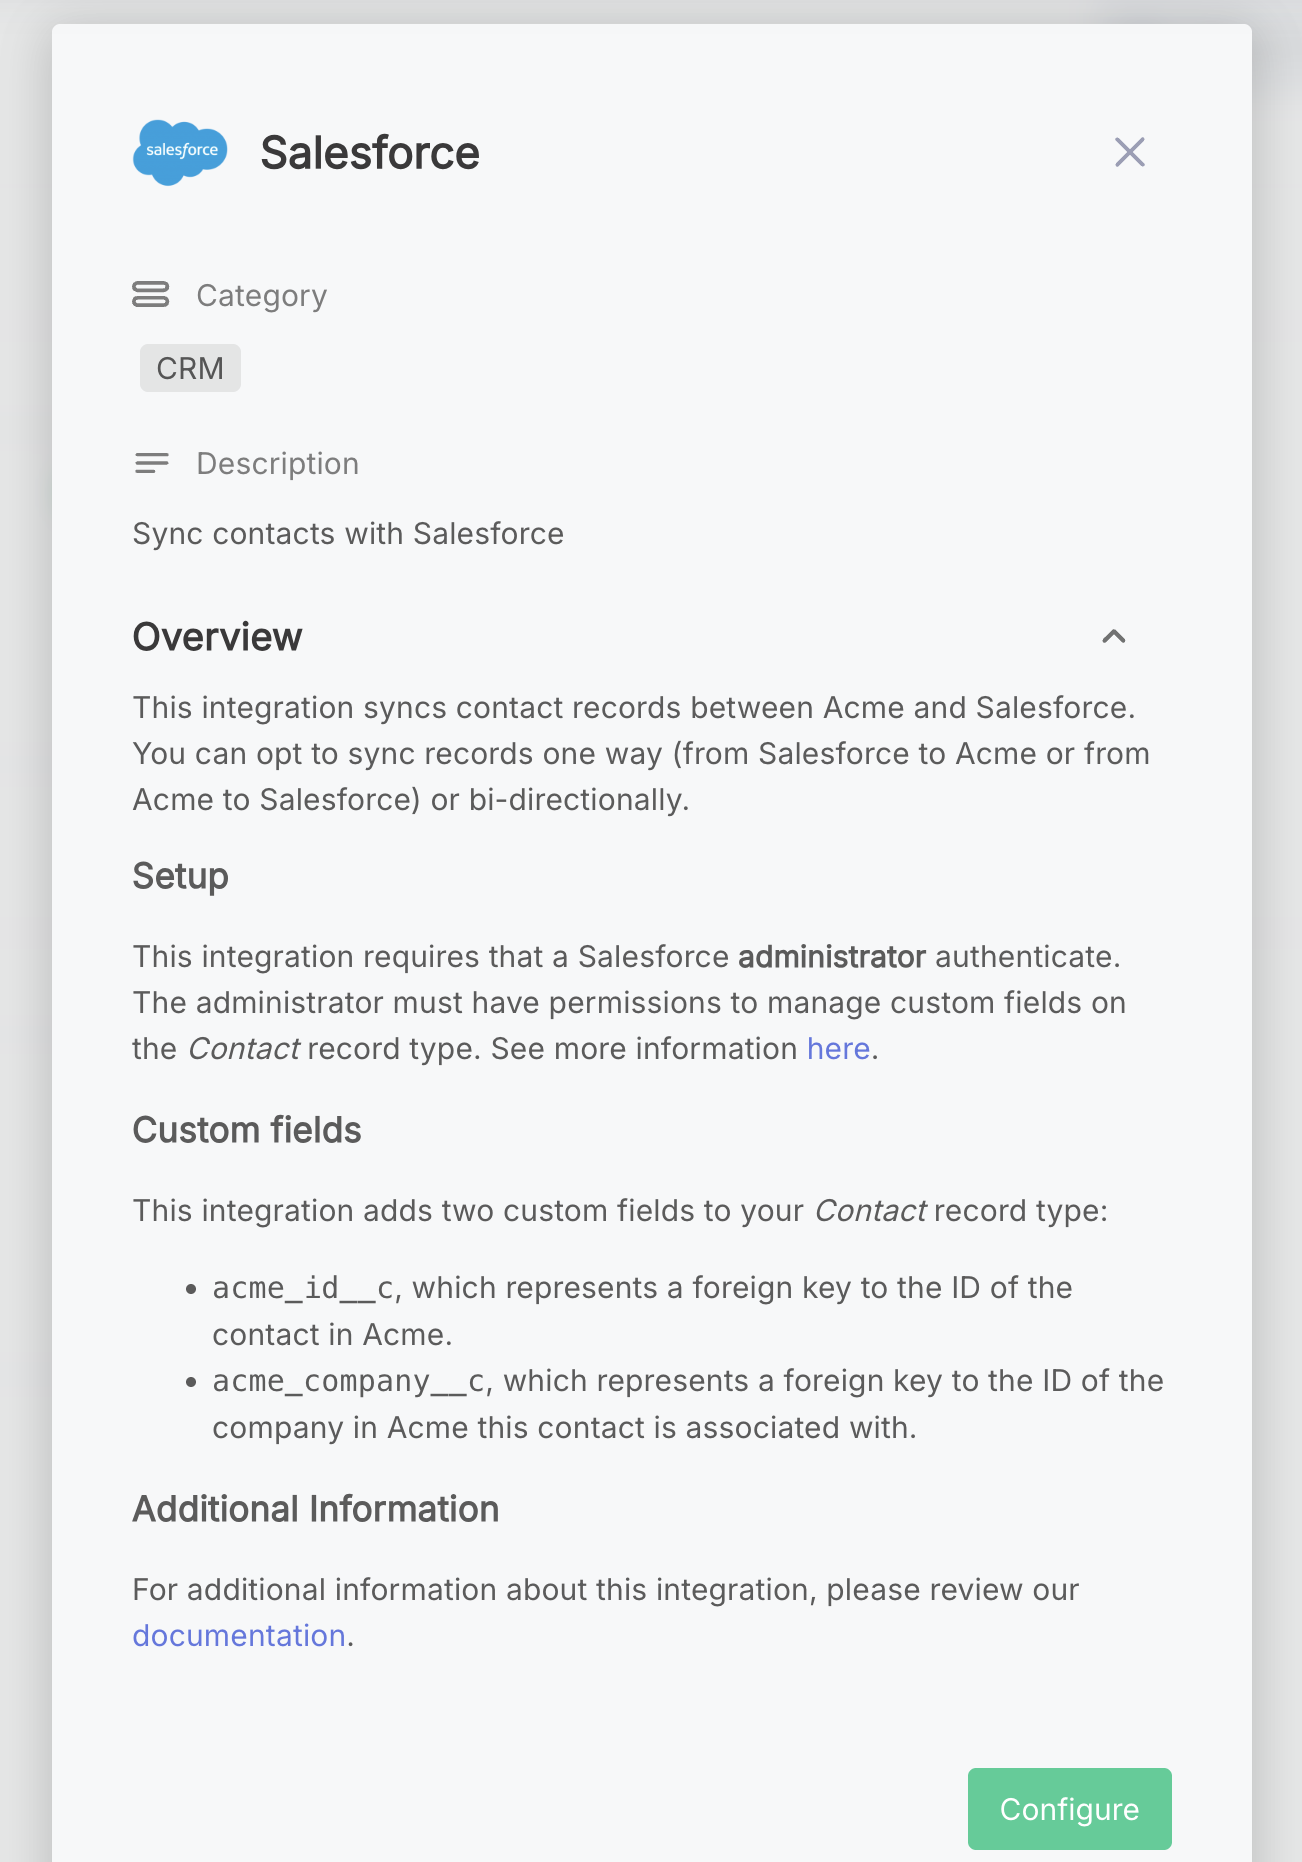
Preparing Integrations for Marketplace
Once you've built your integration, it's time to offer it to your customers through the embedded marketplace. Before you do that, however, you should take a moment to polish your integration, so it's as user-friendly to set up as possible.
Here are several recommendations to prepare your integration:
Name your integration after the third-party app you're integrating with
Generally speaking, you can name your integration after the third-party app you're integrating with. Your customer is already logged into your app and is aware that they're enabling an integration between your app and the third-party. They're also aware that you provide integrations, so including "integration" in your integration's name is extraneous.
-
✅ Hubspot
-
✅ Slack
-
✅ Salesforce
-
❌ Hubspot Integration
-
❌ Acme -> Slack
-
❌ Sync records Salesforce <> Acme
Give your integration an icon
Ensure you've added an icon to your integration. Typically, you can use the icon of the app you're integrating with.
If you're integrating with an app that is in our public connector library, you can download and use an icon from our documentation. If you're integrating with another app, try to find a square PNG between 128 and 512 pixels wide.
![]()
Give your integration an eye-catching description
Your integration's description is what appears just under your integration's name in the embedded marketplace.
The description is plain text and should be a short summary of what your integration does.
For example, Sync contact records with Salesforce.
Longer, more detailed information about your integration should appear in the marketplace overview.
Provide context and helpful text in the marketplace overview
The marketplace overview is seen when a user selects an integration from your marketplace (but has not yet clicked Configure). The marketplace overview supports markdown syntax, and you can add headings, lists, hyperlinks, images, and more to your overview.
This is where you should add additional detail about how your integration works, what information is transferred, what setup is required, etc.
Add helpful text and links to your integration's config wizard
Within the config wizard, you can add helpful headings, text, images, hyperlinks and more. You can add any HTML you'd like to your config wizard.
If, for example, setting up authentication in a third-party app is a complex, multi-step process, you can include a step-by-step guide complete with screenshots and links to documentation.

Ensure your integration's configuration is data source-driven
Configuration of your integration should be low-effort on the part of the end user. Where possible, pull data from the third-party you're integrating with using data sources.
For example, your SharePoint integration may require a SharePoint site ID. Rather than having your customer open their SharePoint account and copy/paste a site ID, use the List Sites from SharePoint data source to allow them to select a site from a dropdown menu.
Custom data sources can be written to dynamically fetch data from third-party apps and can be used to build dropdown menus or custom field mappers using JSON Forms.
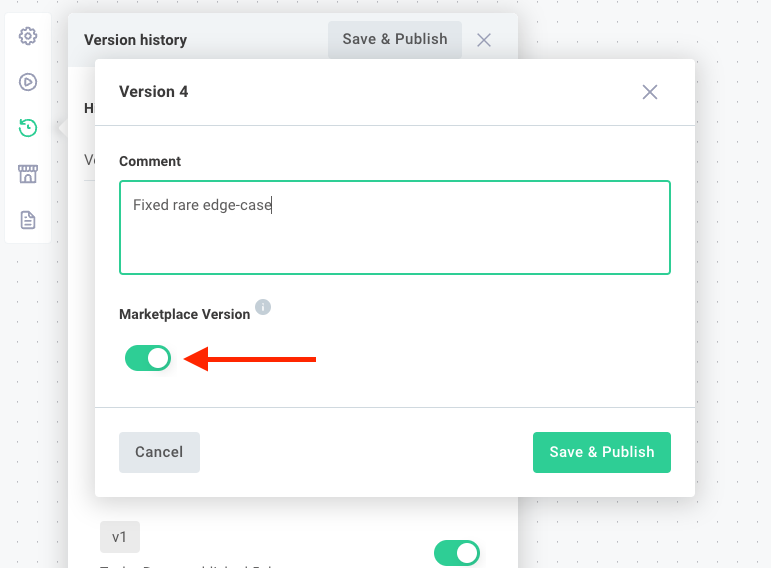
Updating integration marketplace version
Your customers have access to the version of the integration available in the integration marketplace. You can update the version in two ways:
- Select the Marketplace configuration link on the left-hand sidebar of the main screen and select your integration, and then select a version of your integration to present.
- When you publish a new version of your integration, you can choose to update your integration marketplace version from the publish drawer in the integration designer.
Removing an integration from the integration marketplace
To remove an integration from the integration marketplace, open the Integration Marketplace page from the left-hand sidebar. Select the integration you would like to remove, and then click Remove Integration on the bottom of the page.
If you remove an integration from the integration marketplace, instances of the integration that customers have activated will not automatically be removed. You can safely remove an integration marketplace offering without affecting existing deployments, and instances will still show up on the Instances page.