Low-Code vs Code-Native Integrations
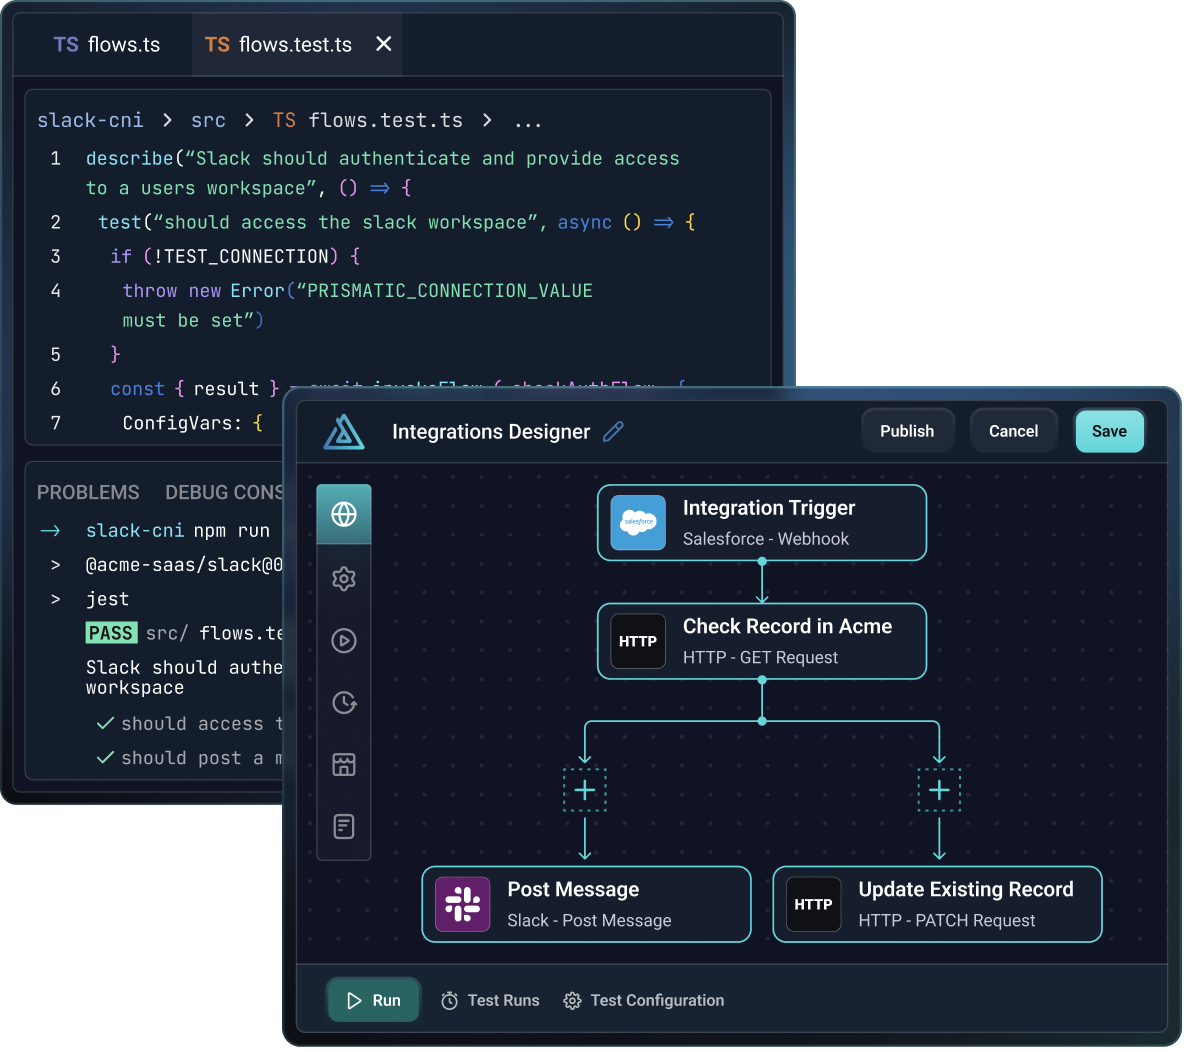
The Prismatic low-code designer and code-native SDK are both excellent tools for building, testing, and deploying integrations. When using the low-code designer, you build integrations by adding triggers, actions, loops, and branches to a canvas. When using the code-native SDK, you write TypeScript code to define your triggers and flow logic.
Depending on your team structure, technical expertise, and the complexity of the integration you are building, you may choose to use one or the other.
Quick comparison
| Topic | Low-Code | Code-Native |
|---|---|---|
| Build method | Integration builders add triggers, flows and steps to an integration using the low-code integration builder. | Integration builders write triggers and integration logic in TypeScript using the code-native SDK. |
| Flows | A low-code flow is a sequence of steps that run in a specific order. | A Code-Native flow is a JavaScript function that executes when the flow's trigger is invoked. |
| Config Wizard | Config wizards are built within the low-code builder. | The config wizard is defined in TypeScript using the code-native SDK. |
| Testing | Integrations are tested from within the integration designer. | Integrations can be tested within Prismatic or locally through unit tests. |
| Step results and logs | Step results for each step are collected and stored and can be viewed later. | Code-native integrations are "single-step", and logging can be used for debugging. |
| Best fit for | Hybrid teams of developers and non-developers | Highly technical teams who prefer code |
When to use low-code
You may want to reach for the low-code designer when:
- Your team is looking to save development time and has non-dev resources that are technical enough to build integrations.
- It is important for your non-developer team members to have a visual representation of the integration.
- You would like your customers to build their own integrations using embedded workflow builder.
When to use code-native
You might want to use code-native when:
- You have a highly technical team that is comfortable writing TypeScript.
- Your integration requires complex logic that is easier to write in code.
- You want to unit test entire integrations rather than individual actions and triggers.
- You want to use a version control system to manage your integration code.
Key differences
Build method
With the low-code designer, you drag and drop components onto a canvas to build your integration. You select actions from pre-built components, configure their inputs, and connect them together to create flows. This visual approach makes it easy to see the structure of your integration at a glance.
With code-native integrations, you write TypeScript functions that define your integration logic. You import components and call their actions programmatically, handle data transformations in code, and use familiar development tools like your IDE, debugger, and version control.
Flows
In the low-code designer, a flow is a sequence of steps that execute one after another in a specific order. Each step runs an action from a component, and you can add loops, branches, and error handling to control the flow of execution. The designer shows you a visual representation of this sequence.
In code-native integrations, a flow is a JavaScript function that executes when triggered. Within that function, you write imperative code to call actions, transform data, make decisions, and handle errors. The function receives a context object with information about the execution and returns a result.
Config wizard
In the low-code designer, you build the configuration wizard directly in the web interface. You add config variables, organize them into pages, and configure their types and validation rules through forms.
In code-native integrations, you define the config wizard in TypeScript using the SDK. You declare config variables as part of your integration code, specify their types and defaults, and define pages programmatically.
Testing
Low-code integrations are tested within the Prismatic web app. You can run test executions, view the results of each step, and see logs and data transformations. The designer shows you exactly which step failed and what data was passed between steps.
Code-native integrations can be tested within Prismatic the same way, but they can also be unit tested locally. You can write Jest tests for your flows, mock component actions, and test your integration logic before deploying. Since code-native integrations are TypeScript projects, you can use all the testing tools you're familiar with.
Step results and logs
Low-code integrations capture detailed results for every step in a flow. You can view the inputs and outputs of each step, see which actions ran, and inspect the data at any point in the flow. This makes debugging straightforward - you can see exactly where data was transformed or where an error occurred.
Code-native integrations are treated as a single step from Prismatic's perspective. The entire flow function runs as one unit, and Prismatic captures the overall result and any logs you write. For detailed debugging, you can add logging statements throughout your code, or use local unit tests to debug specific functions.
Next steps
Ready to start building? Choose the approach that fits your team:
- Low-code getting started - Build your first integration with the visual designer
- Code-native getting started - Build your first integration with TypeScript
- Low-code designer overview - Learn more about the visual builder
- Code-native overview - Learn more about the TypeScript SDK
- Converting low-code to code-native - Migrate an existing low-code integration to code-native