Get Started with Low-Code
Overview
This tutorial will guide you through fundamental integration development concepts. You will:
- Fetch data from an API
- Understand how data flows between integration steps
- Use loops to iterate over retrieved records
- Use logical branches to determine record processing logic
- Send specific records to another system (this example uses Slack)
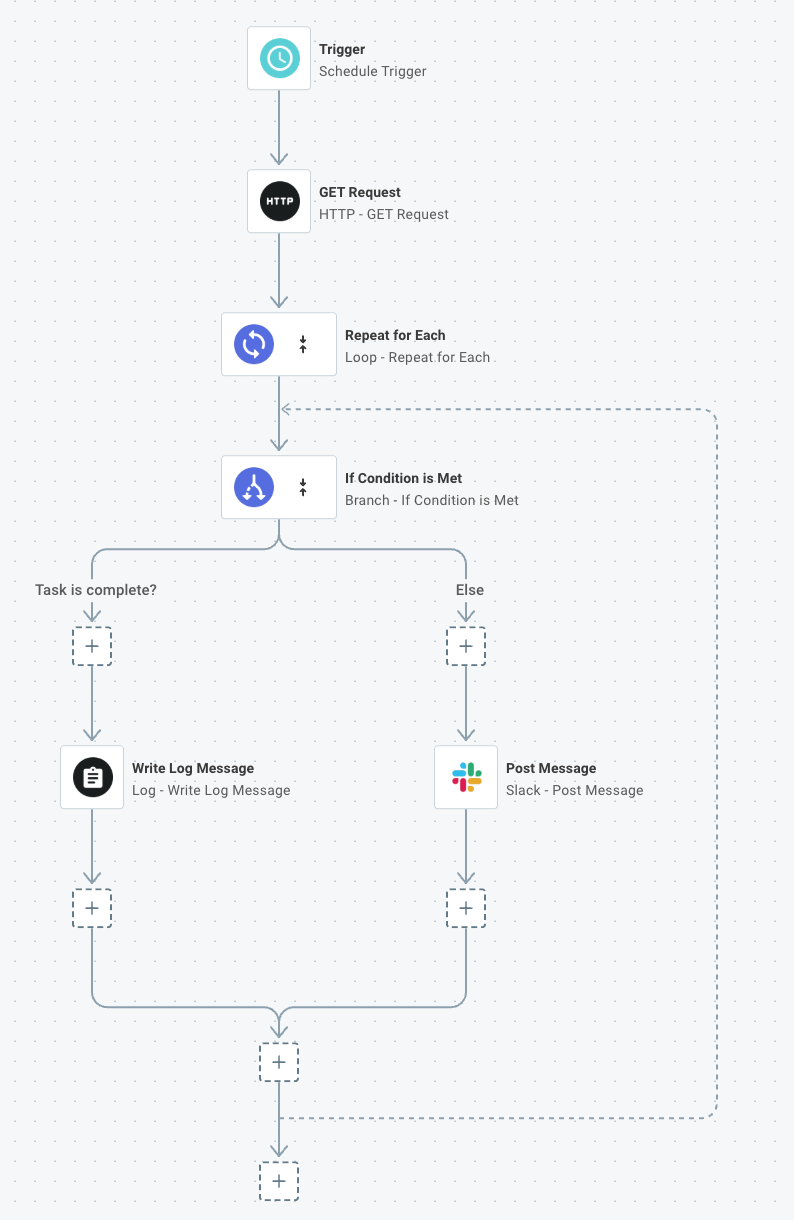
Integration overview
The integration you'll build will retrieve data (a list of to-do tasks) from an API, loop over the list, identify tasks marked "incomplete", and notify you via Slack of any incomplete tasks.
We'll use a placeholder API for the to-do list data - https://my-json-server.typicode.com/prismatic-io/placeholder-data/todo.
You'll design this integration to be configurable, enabling the same integration to be deployed to multiple customers with unique API endpoints, Slack credentials, and channel names.
Let's build!
You're encouraged to follow along with the video above or the steps below.
If you'd like to import a completed integration, you can download this integration's YAML definition here.
Note: This YAML definition assumes that you've created a customer-activated connection for Slack with an ID of slack-connection.
As you build, you'll retrieve data from this API endpoint: https://my-json-server.typicode.com/prismatic-io/placeholder-data/todo
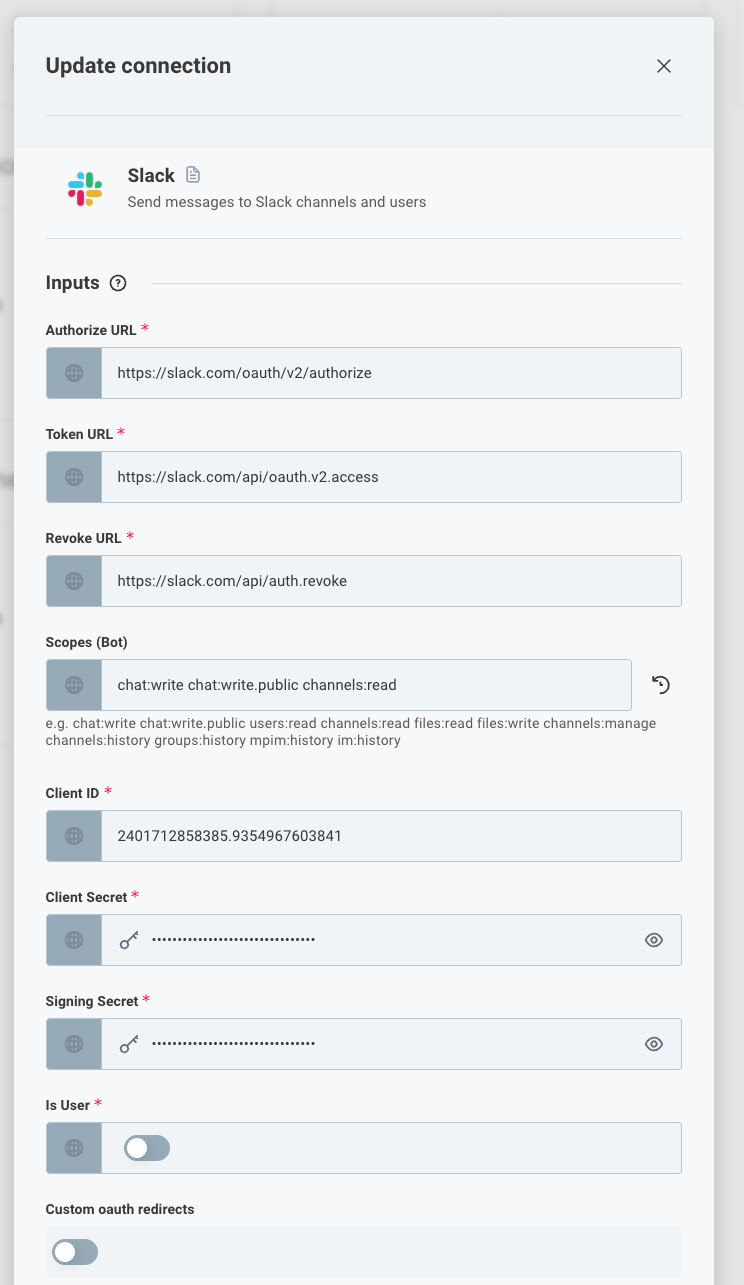
You will need to create a Slack app and have access to a Slack workspace, which you can do for free at https://slack.com/.
Ensure you assign your Slack app the chat:write, chat:write.public, and channels:read scopes.
Documentation for creating a Slack app can be found here.
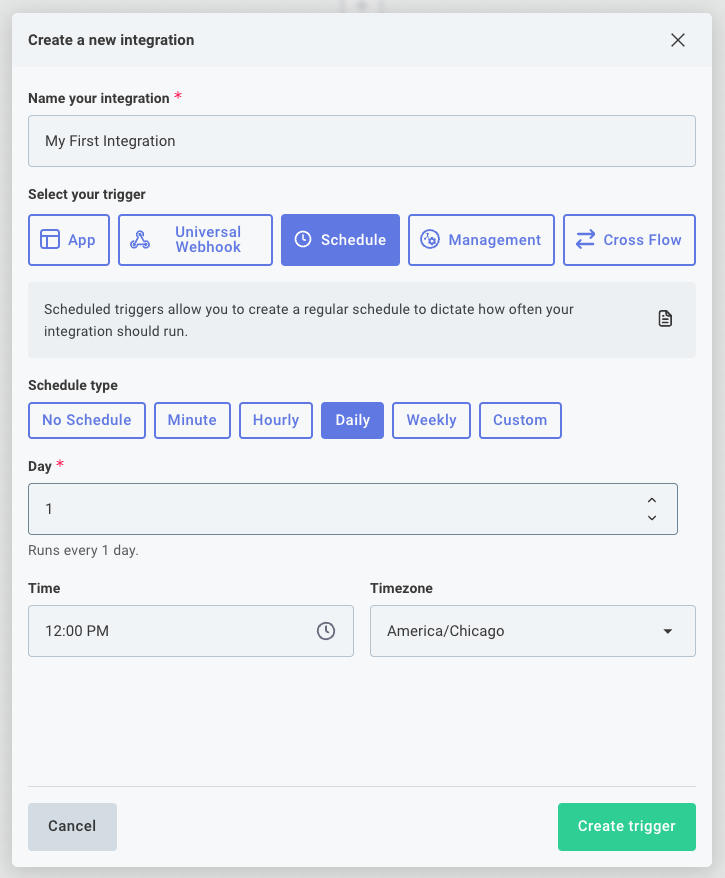
Create a new integration
From the integrations page, click the New Integration button. Select Get Started under Low-Code to create a new integration from scratch. Then, name your integration "My First Integration" or similar and select Schedule as your trigger. Select how often you'd like your flow to run.
Fetch data from an API
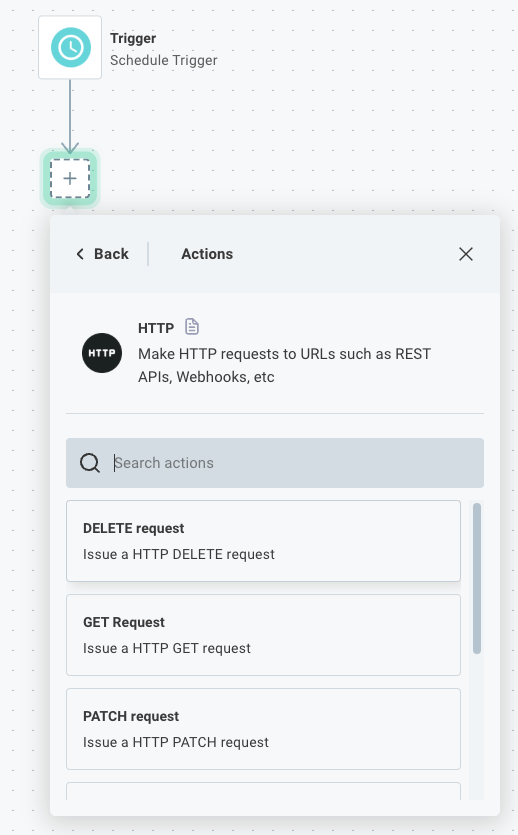
Next, add a new step to your integration by clicking the + button below your trigger. Search for the HTTP component and add a GET Request step.
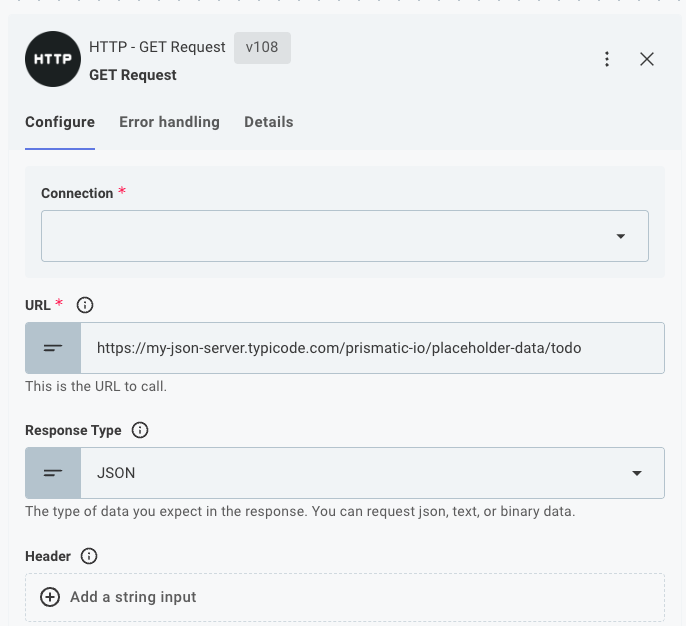
Configure your GET Request step to fetch data from the to-do API endpoint - https://my-json-server.typicode.com/prismatic-io/placeholder-data/todo.
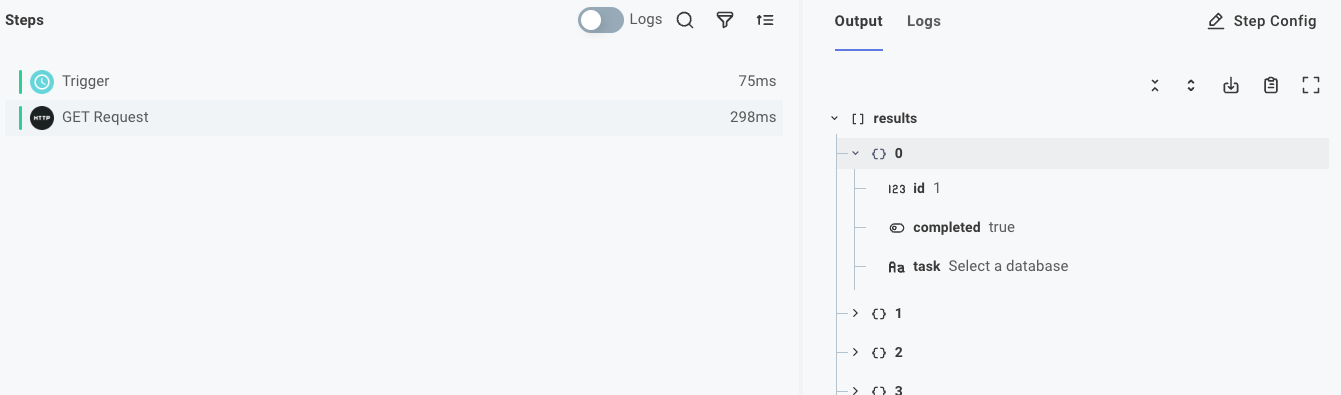
Finally, click the green Run button at the bottom of your screen to test your integration so far. If you select the Get Request step in your test runner drawer at the bottom of your screen, you can expand the results section in the Output tab on the right to see the data retrieved from the API.
Loop over the records
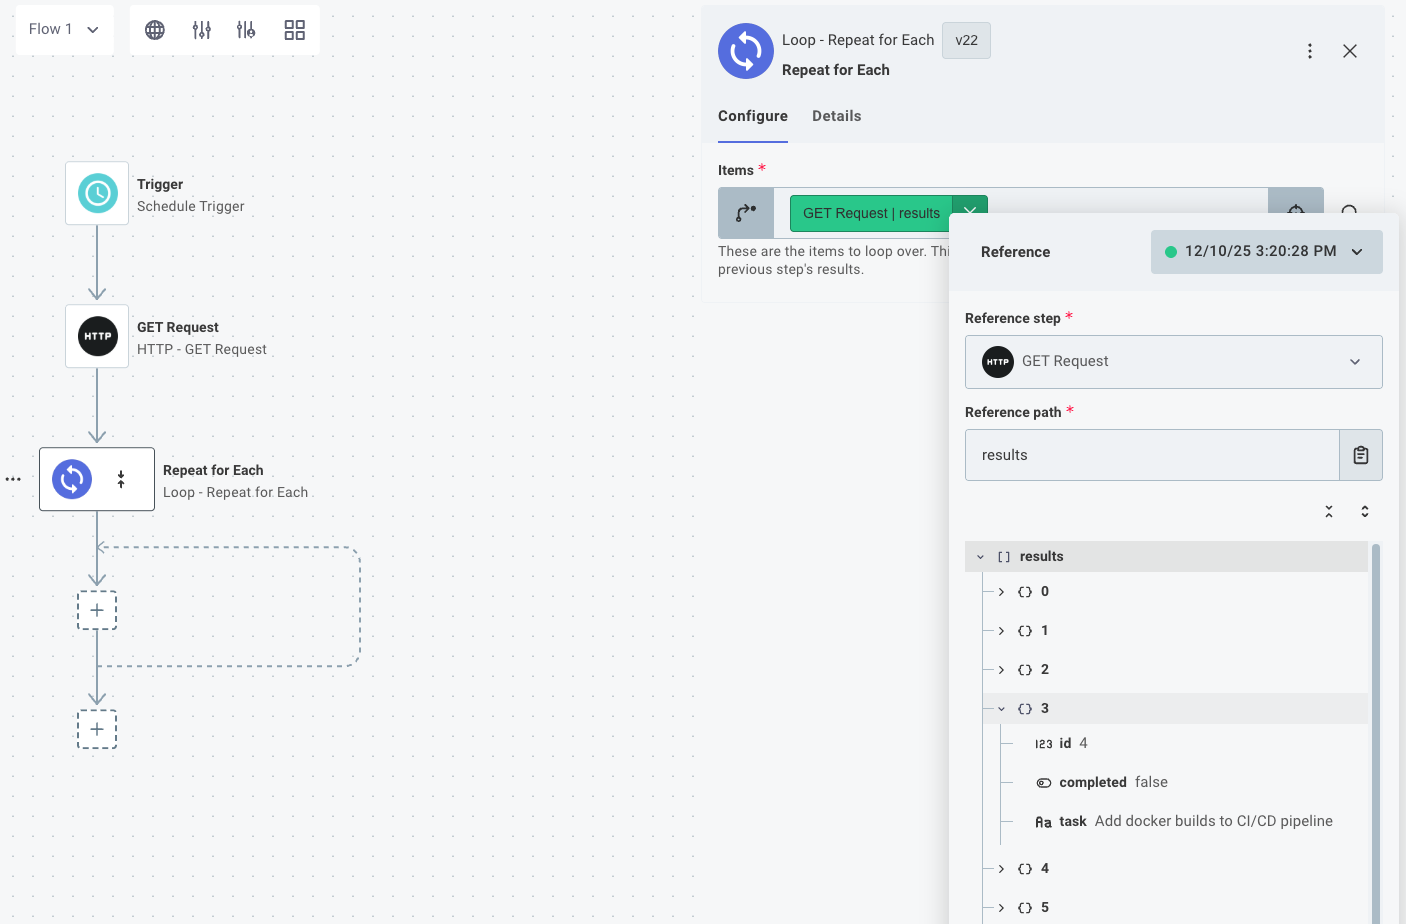
Now that we're fetching a list of to-do tasks, we need to loop over each task to determine which ones are incomplete. To do this, we'll add a Loop step to our integration. Add another step under your GET Request step, this time searching for the Loop component and its Repeat for Each action.
Configure your loop step to loop over the results property of the previous step. You can do that by clicking Configure Reference in the loop step's configuration panel and selecting the results property of the Get Request step.
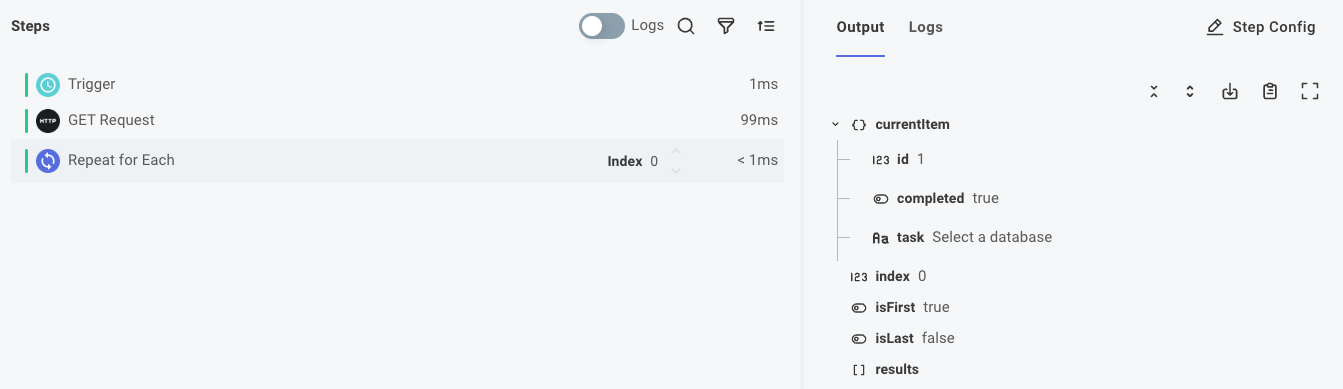
Run a test of your integration again. This time, you'll see that the loop step has a currentItem property in its output that contains the data for the current item being processed. We'll use this property in the next step to determine if the current item is incomplete.
Identify complete items
Now that we're looping over each item, we need to determine if the current item is complete or not.
completed is a boolean property on each item that indicates whether the item is complete.
Add a step within your loop - select the Branch component, If Condition is Met action. Configure the branch step to have a condition called Is Complete?. Select the loop step's currentItems.completed property as the Field input and under Operator select is true.

Now, items with completed: true will follow the Is Complete? branch, while items with completed: false will follow the Else branch.
Send incomplete items to Slack
Next, we want to send a message to Slack for each incomplete item. Until now, the steps we've added have not required additional connection configuration or credentials. This step will require additional setup.
Get started: Configure a build-only connection
To start building quickly, navigate back home and then to the Components screen, search for Slack, and configure a Build-Only connection. Build-only connections let you test your integration right away without needing to set up a full Slack OAuth 2.0 app upfront.
You can use the build-only connection as you build your integration, but you'll need your own Slack OAuth 2.0 app when you're ready to deploy to customers.
Add a Slack step
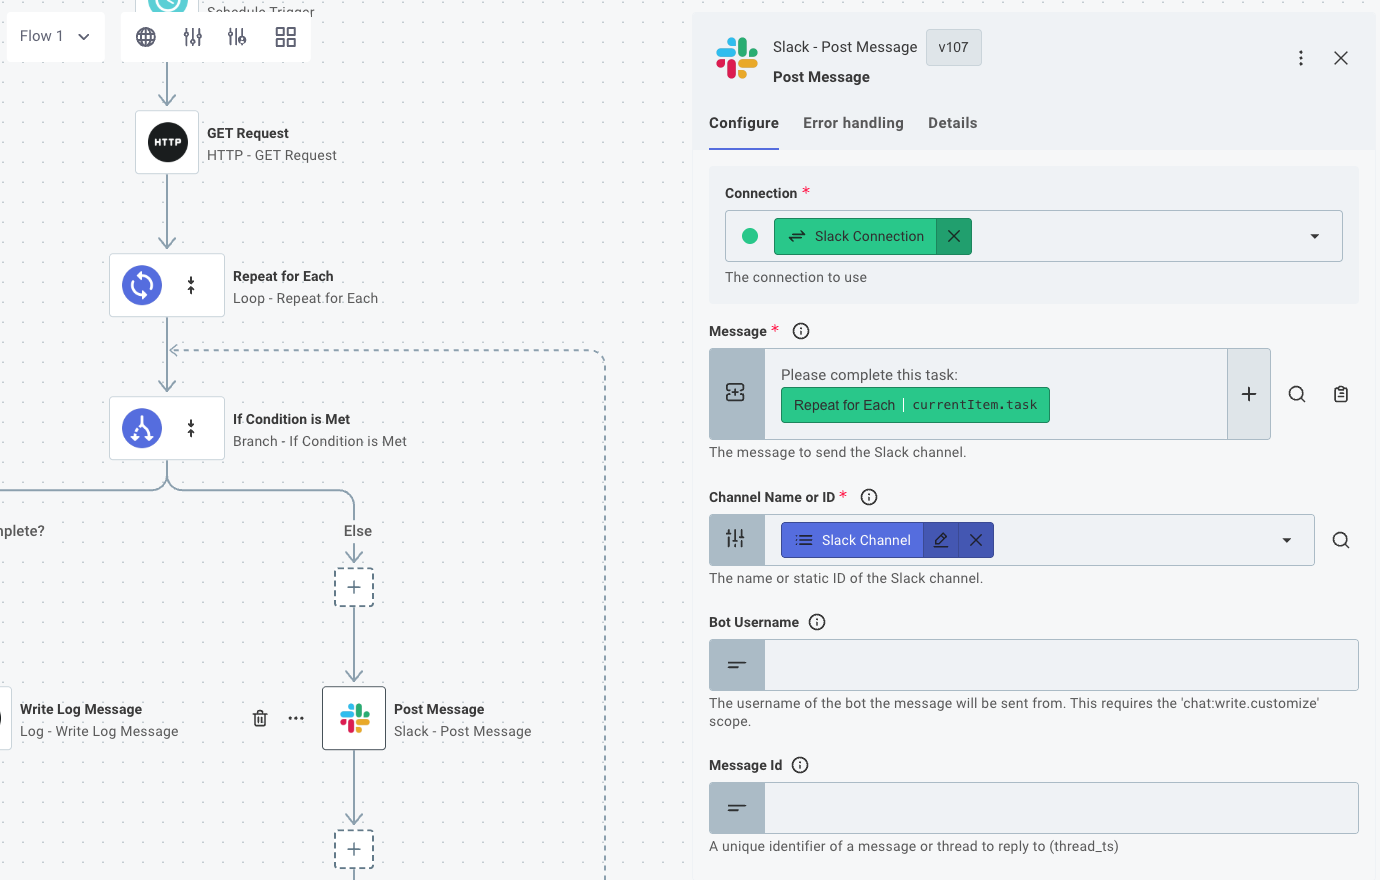
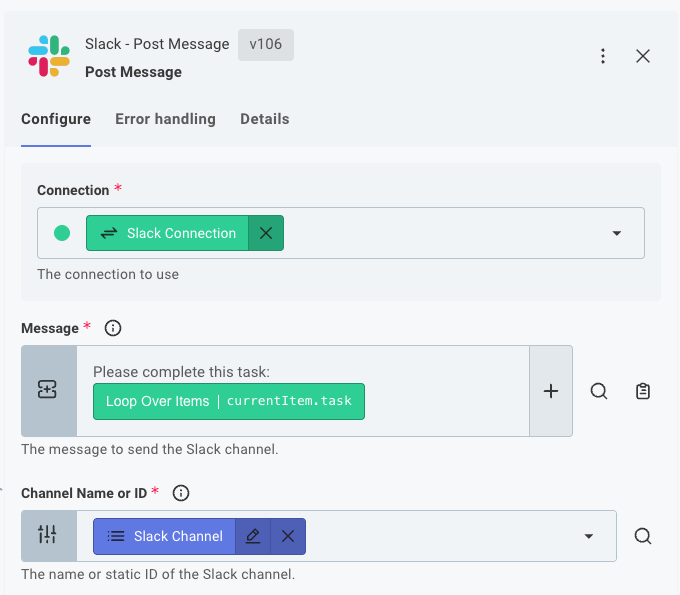
With a connection established, within the Else branch, add a Slack component, Post Message step.
Now, configure the Slack step to send a message to a channel in your Slack workspace.
For now, hard-code a channel name like general in the Channel Name input - we'll make that dynamic shortly.
Your Message input can be a template, concatenating a string like Incomplete task: with the currentItem.task property.
Run a test of your integration. You should see messages in your Slack workspace for each incomplete task.

Make the integration configurable
Now that we have a working integration, let's make it configurable so we can deploy it to multiple customers. We'll make the Slack channel name configurable, as well as the API endpoint we're fetching data from.
First, we'll make the Slack channel name configurable. Click the Config Wizard button at the top of your screen and create a second Config Page. Name it something like "Slack Configuration". Then, add a new Config Variable. Name it Slack Channel and choose Picklist as its Data Type.
We want our config variable to be a picklist of all the channels in our customer's Slack workspace. We'll use a data source to make the dropdown menu dynamic. Select the Slack component's Select Channel data source, as shown here:

Next, add an additional String config variable called API Endpoint and give it a default value of https://my-json-server.typicode.com/prismatic-io/placeholder-data/todo:
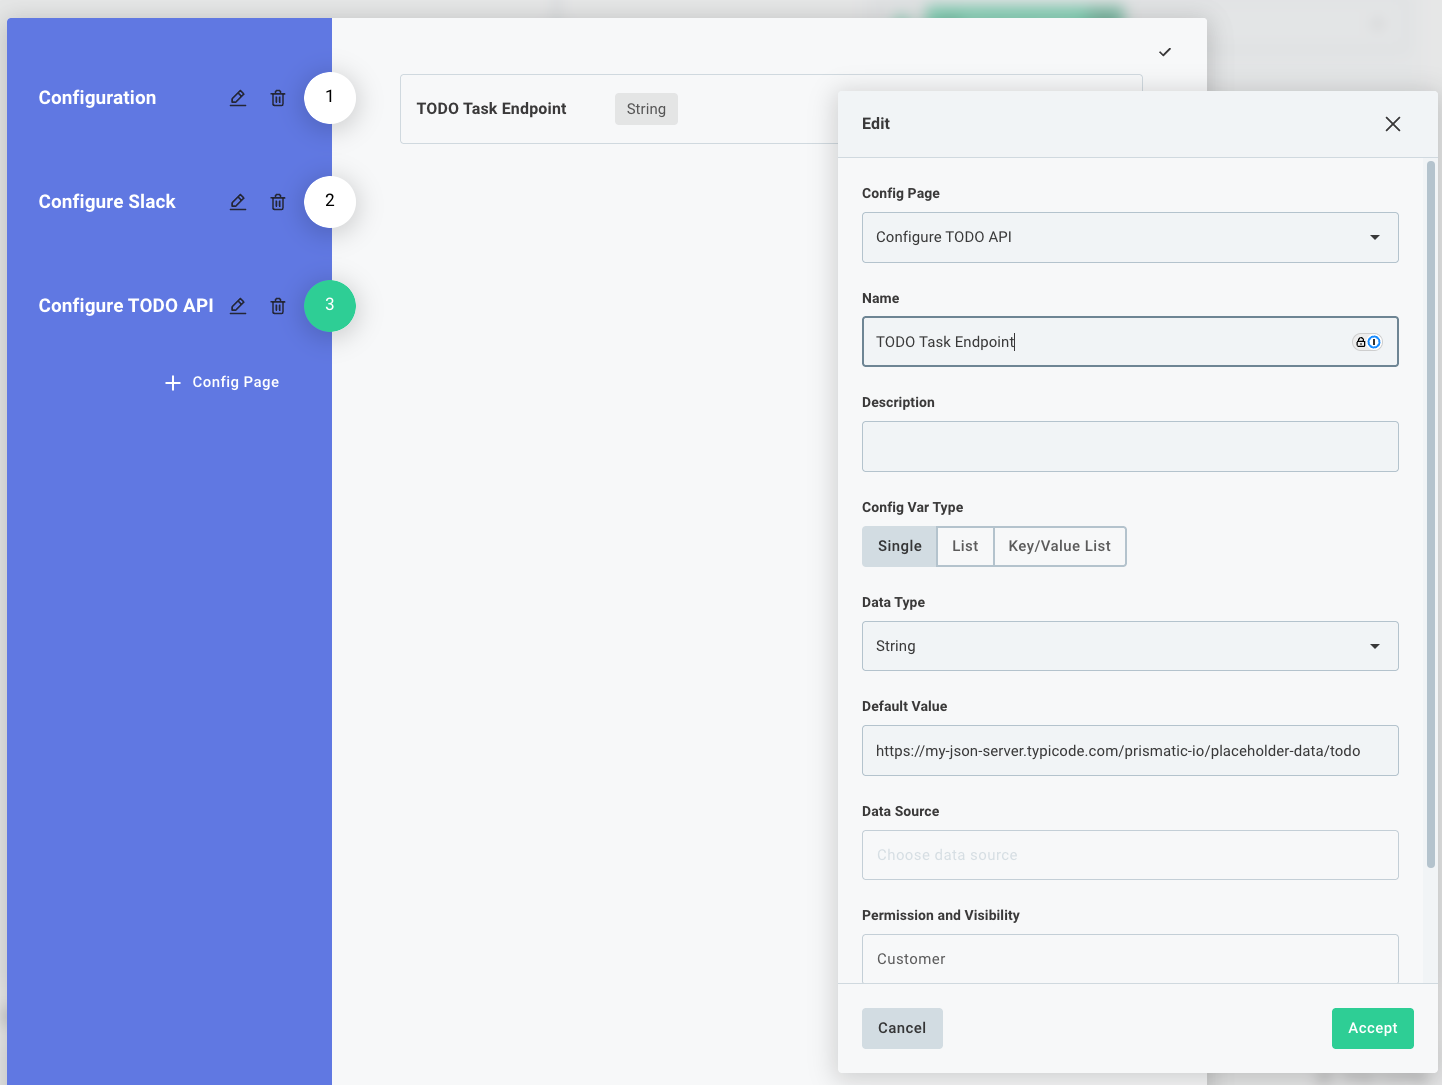
Finally, we need to update our integration to use these new config variables. Update the HTTP step to use the API Endpoint config variable as the URL to fetch data from. Then, update the Slack step to use the Slack Channel config variable as the channel name to send messages to.
Run a test of your integration again and verify that it still works as expected.
Create your own Slack OAuth 2.0 app
Once your integration is ready to deploy to customers, you'll need to create your own Slack OAuth 2.0 app. This is important, because you want your customers to see a consent screen that clearly identifies your company as the app developer, rather than Prismatic.
We strongly recommend creating a customer-activated reusable connection for Slack. A reusable connection can be shared across multiple integrations and used in workflows your customers build with the embedded workflow builder, so your customers only need to authorize Slack once.
After creating a Slack app in Slack, enter your connection information in a customer-activated connection.
Next steps
Congratulations! You created your first integration! Here are a few things you should try next:
- Send your message to a different system, like Microsoft Teams.
- Swap out the HTTP GET action for a different data source component (perhaps pull from an SFTP server)?
- Write your message out to a file in Dropbox or Amazon S3 instead of Slack.