Low-Code Integration Designer
Are you new to the low-code designer? Check out our getting started guide to build your first integration.
When building an integration, you can use either the low-code designer or create a TypeScript project in your favorite IDE using the Code-Native SDK. This article explains how to build an integration with the low-code designer.
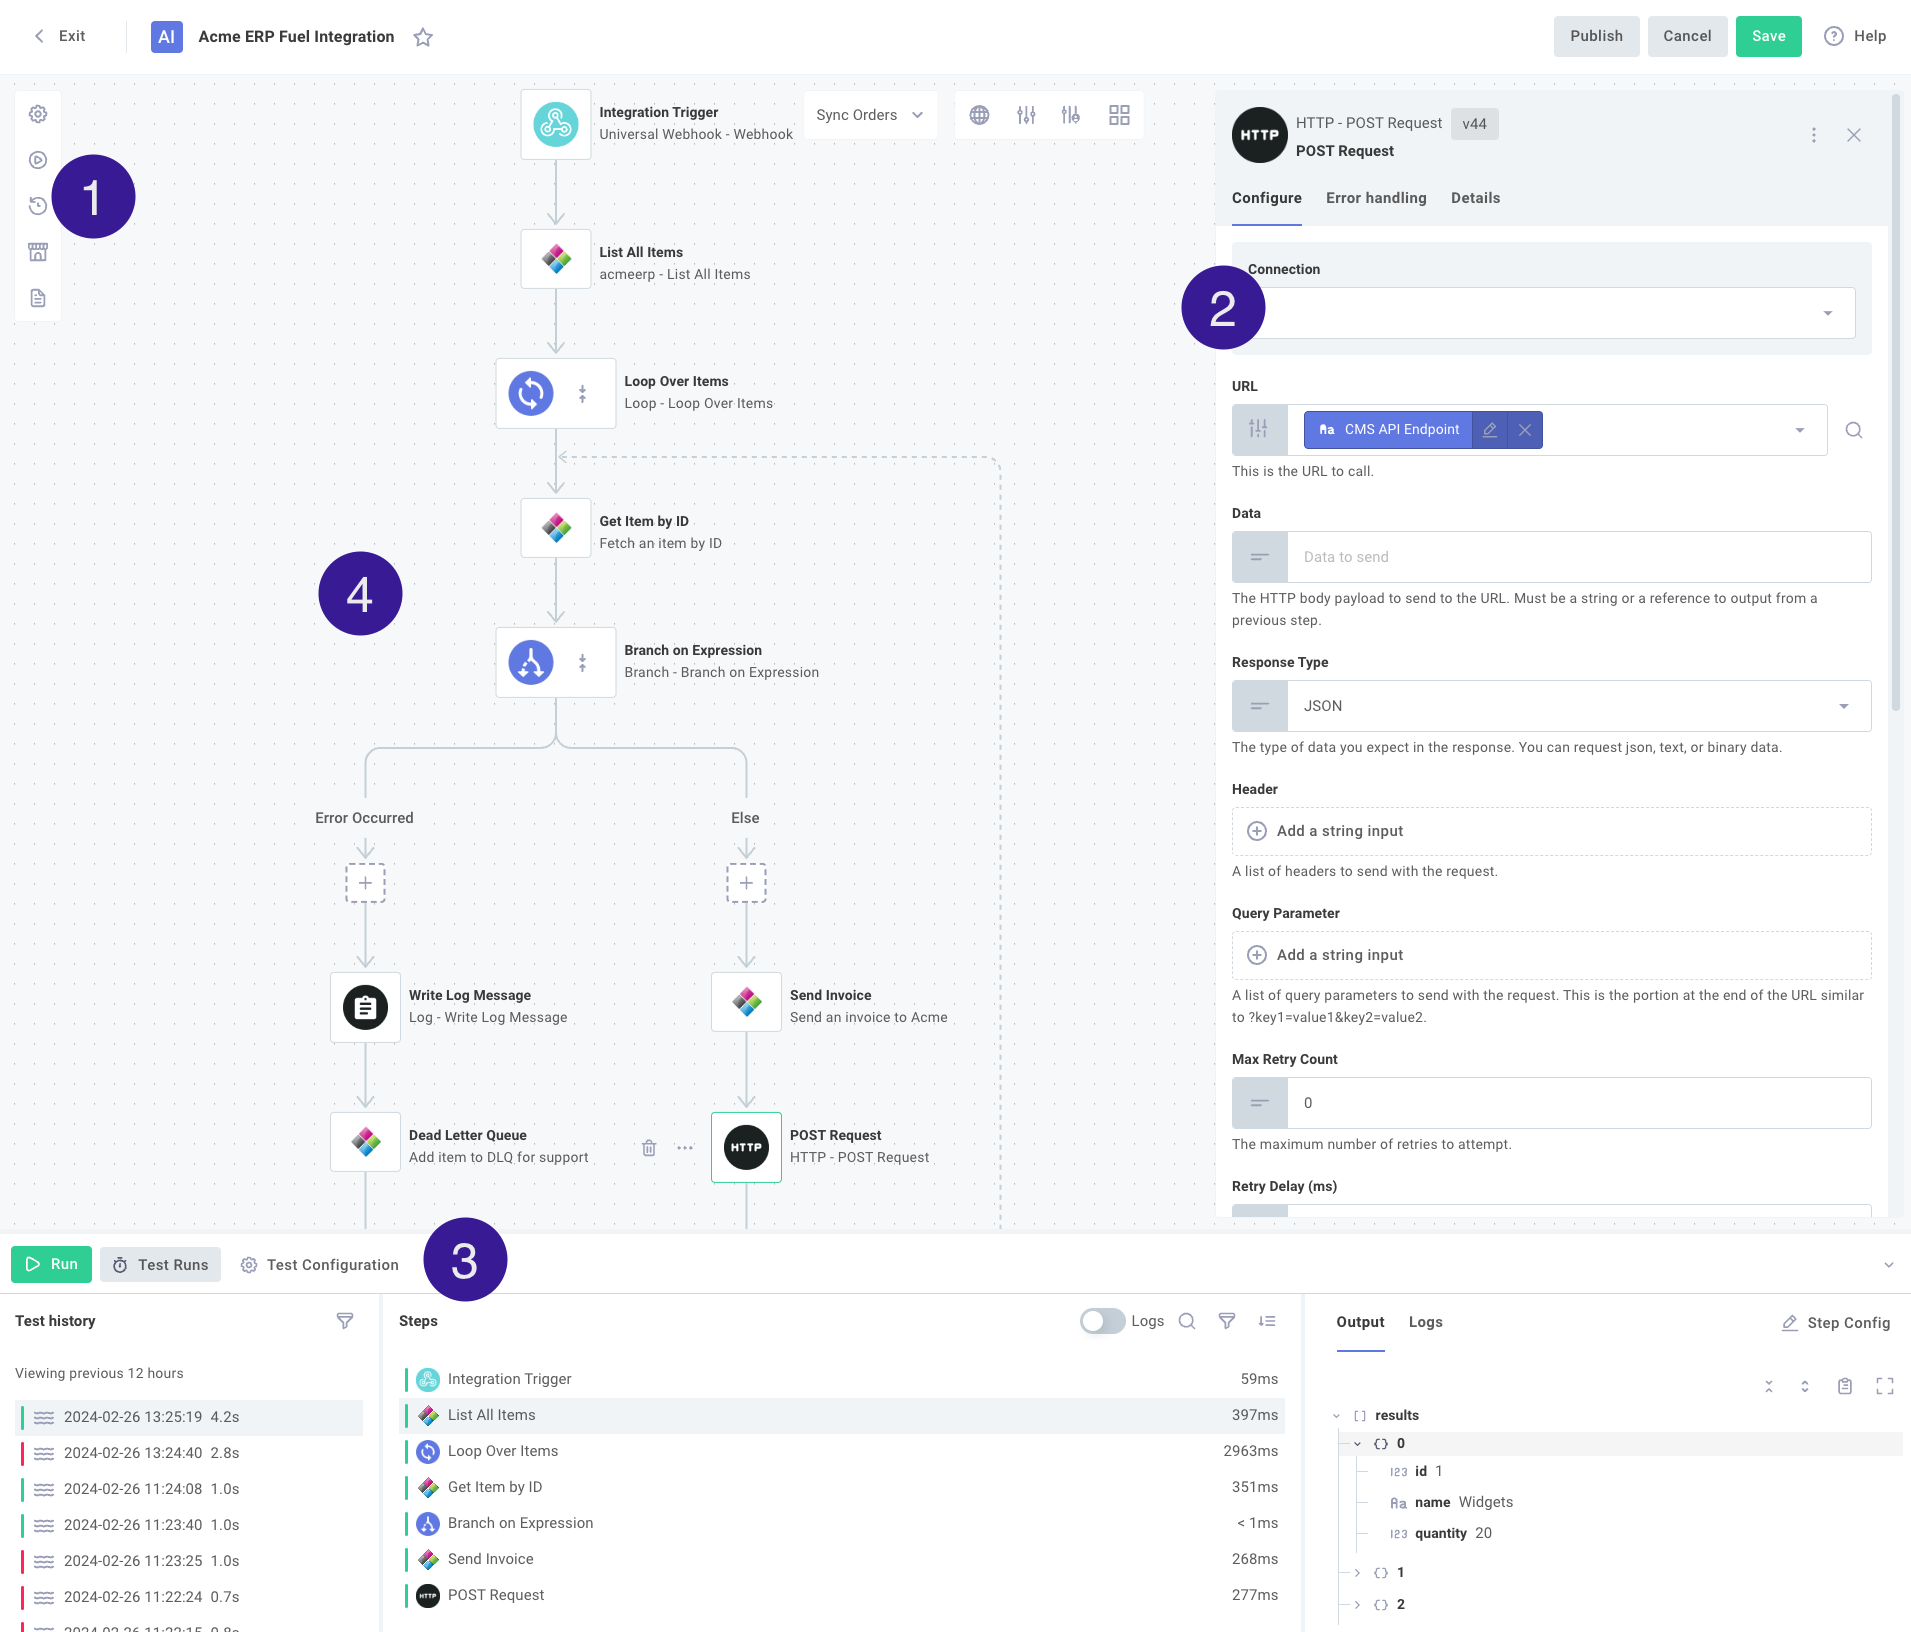
After creating a new integration or selecting one from your list of integrations, you'll find yourself in the low-code integration designer. Here, you can build, test, and publish integrations.
The integration designer has four main features:
- Configuration menus that let you edit your integration's name, description, and other metadata, publish versions, add integrations to your marketplace, deploy instances to customers and more.
- A step configuration drawer that lets you configure integration steps and modify runtime/webhook settings.
- A testing drawer that lets you run integration tests, supply sample payloads, and view test results.
- The integration editor pane, which occupies most of the page. Here, you can add steps to your integration, create branches and loops, and arrange the flow of your integration. You can also create multiple flows - each with its own trigger and series of steps to execute.
Creating a new integration
To create a new integration in the web application, click Integrations in the left-side menu, then click the + Add Integration button in the upper-right.
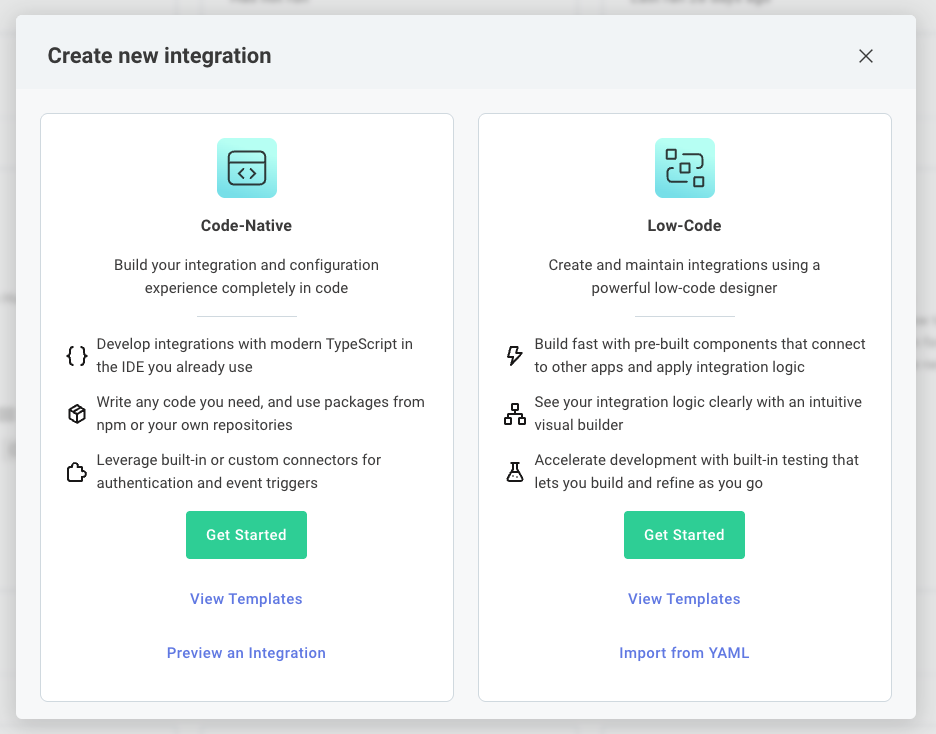
When creating a new low-code integration, you have several options:
- Select Get Started to create a blank new integration
- Select View Templates to start from an existing template - either one you've created or a Prismatic-built example.
- Select Import from YAML to import an integration from a YAML file or clipboard (integrations are saved as YAML definitions behind the scenes).
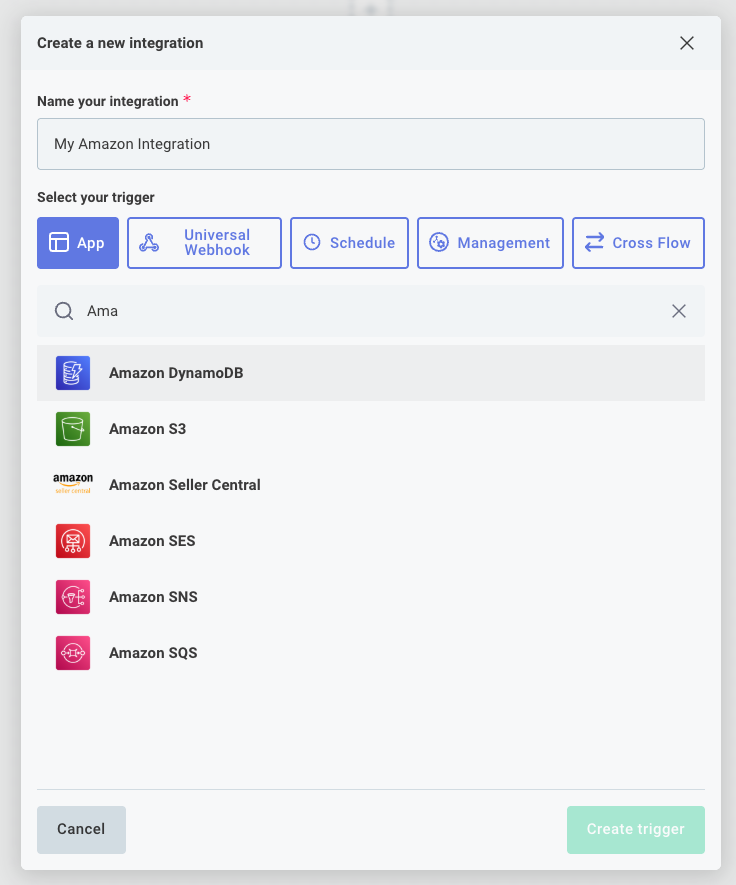
You'll need to provide a name for your integration and select a trigger for its first flow. The trigger determines when your integration's flow will run, and you can modify it at any time.
Assigning an icon to an integration
To make integrations more visually appealing in the integration marketplace, you can assign them icons. To add an icon to an integration in the designer, click the icon space to the left of your integration's name:
![]()
Assigning labels to an integration
You can assign multiple labels to an integration through the Integration details menu in the designer:
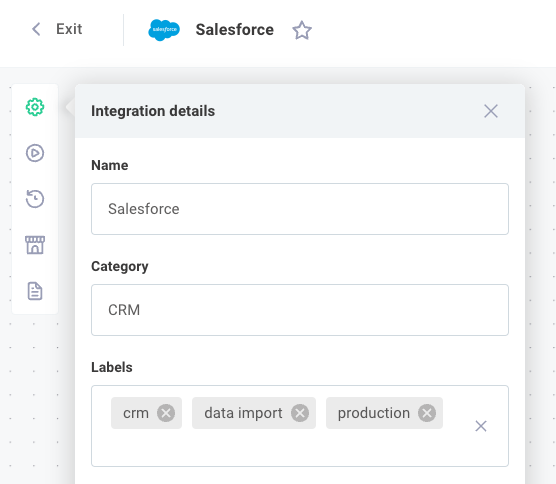
Categorizing integrations
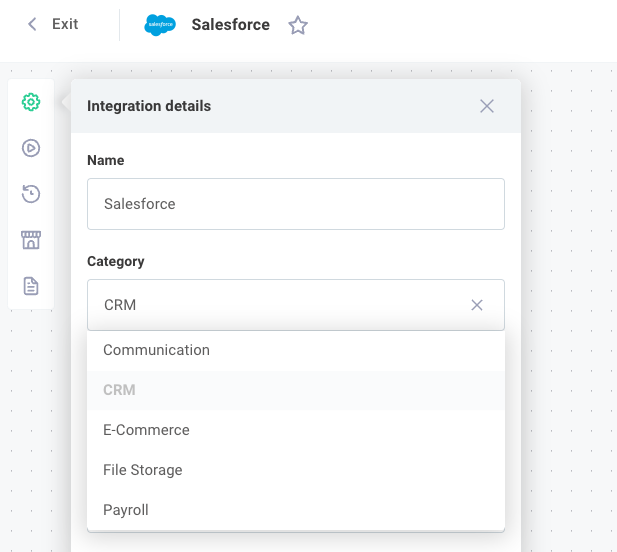
Integrations can be assigned categories for easy sorting and filtering. For example, you might have several "ERP" integrations and some "Inventory Management" integrations. Categorizing integrations helps your team and customers in the integration marketplace view integrations sorted by category.
To set a category for an integration, click the Integration details button in the top-left of the integration designer:
Publishing an integration
Publishing an integration marks it as ready for customer deployment.
To publish an integration, open the Version history tab on the left side of the page. If you have unpublished changes, you'll see an Unpublished Draft listed among the integration's versions. Enter a note describing your changes, then click Save & Publish to release a new version:
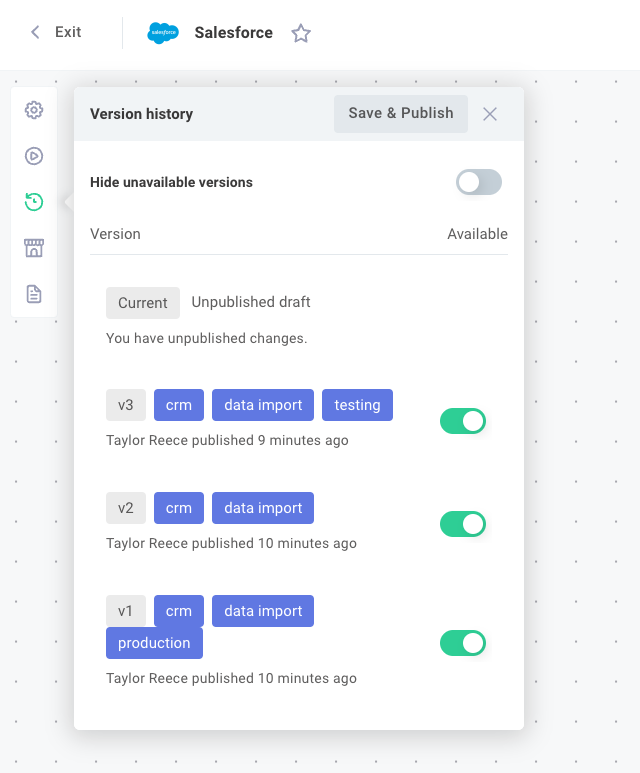
Integration versions can be marked Available or Unavailable using the blue toggles to the right of each version. Marking a version Unavailable prevents it from being deployed as an instance to customers.
Integration templates
Many integrations share similar patterns. For example, if you're importing opportunities and accounts from multiple CRM vendors, the data fetching steps will differ, but the steps that send data to your application will remain consistent. Rather than recreating these common steps repeatedly, you can save time by creating an integration template for your team to use when building similar integrations.
To convert your integration into a template, first publish a version. Then, open the Integration details modal and select Available as Template.
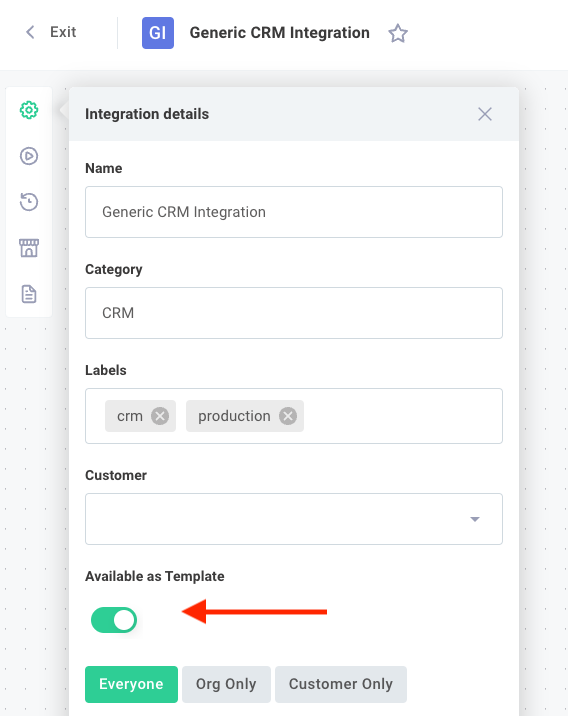
You can make the template available only to organization users, or if you offer the embedded workflow builder, you can make it available to customer integration builders.
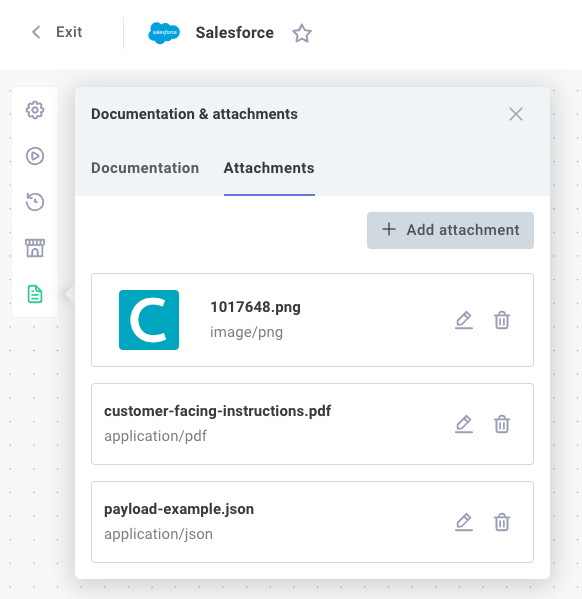
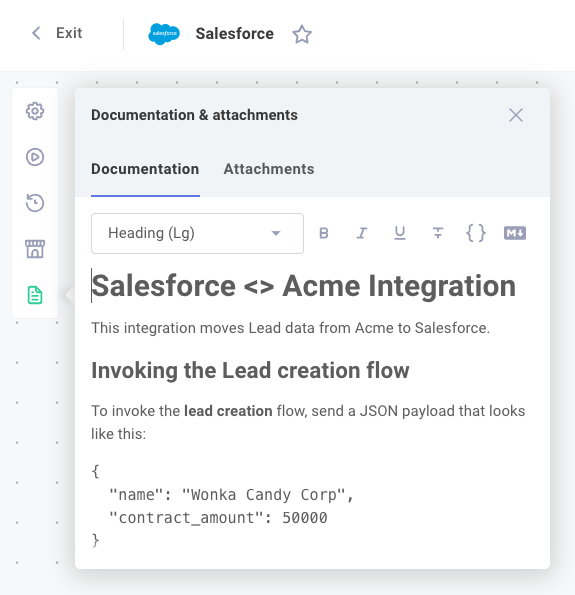
Integration attachments
Your team can share integration-related documents by clicking the Documentation & attachments button on the left side of the integration designer.
Internal integration documentation
Sharing documentation, specifications, and notes about an integration with team members is valuable. You can add internal (non-customer-facing) notes and documentation by clicking the Documentation & attachments button on the left side of the integration designer. This space allows you to share notes, links, and other documentation with your team.
Integration metadata
You can programmatically attach metadata to your integration, which is useful for assigning properties not covered by integration categories or labels.
Metadata must be JSON-formatted and is accessible only through the Prismatic GraphQL API.
To set metadata on an integration, use the updateIntegration) mutation:
mutation setIntegrationMetadata {
  updateIntegration(
    input: {
      id: "SW50ZWdyYXRpb246MGVjNDlhZmYtNjE2YS00NmU2LWExMTQtN2RjOThjY2Q1MzU4"
      metadata: "{\"price\": 100, \"compatible_plans\": [\"professional\", \"enterprise\"]}"
    }
  ) {
    integration {
      metadata
    }
    errors {
      field
      messages
    }
  }
}
You can read this metadata as a property of an integration record:
query getIntegrationMetadata {
  integration(
    id: "SW50ZWdyYXRpb246MGVjNDlhZmYtNjE2YS00NmU2LWExMTQtN2RjOThjY2Q1MzU4"
  ) {
    name
    metadata
  }
}
Important notes about metadata:
- It must be a valid JSON string
- Maximum length is 4096 characters
- Only accessible via the API, not visible in the UI
- Not included in an integration's YAML definition
YAML definition
Integrations are represented in YAML behind the scenes. To view the YAML that defines your integration's flows, steps, inputs, connections, and config variables, click the Integration details button at the top-left of the integration designer and select View YAML.
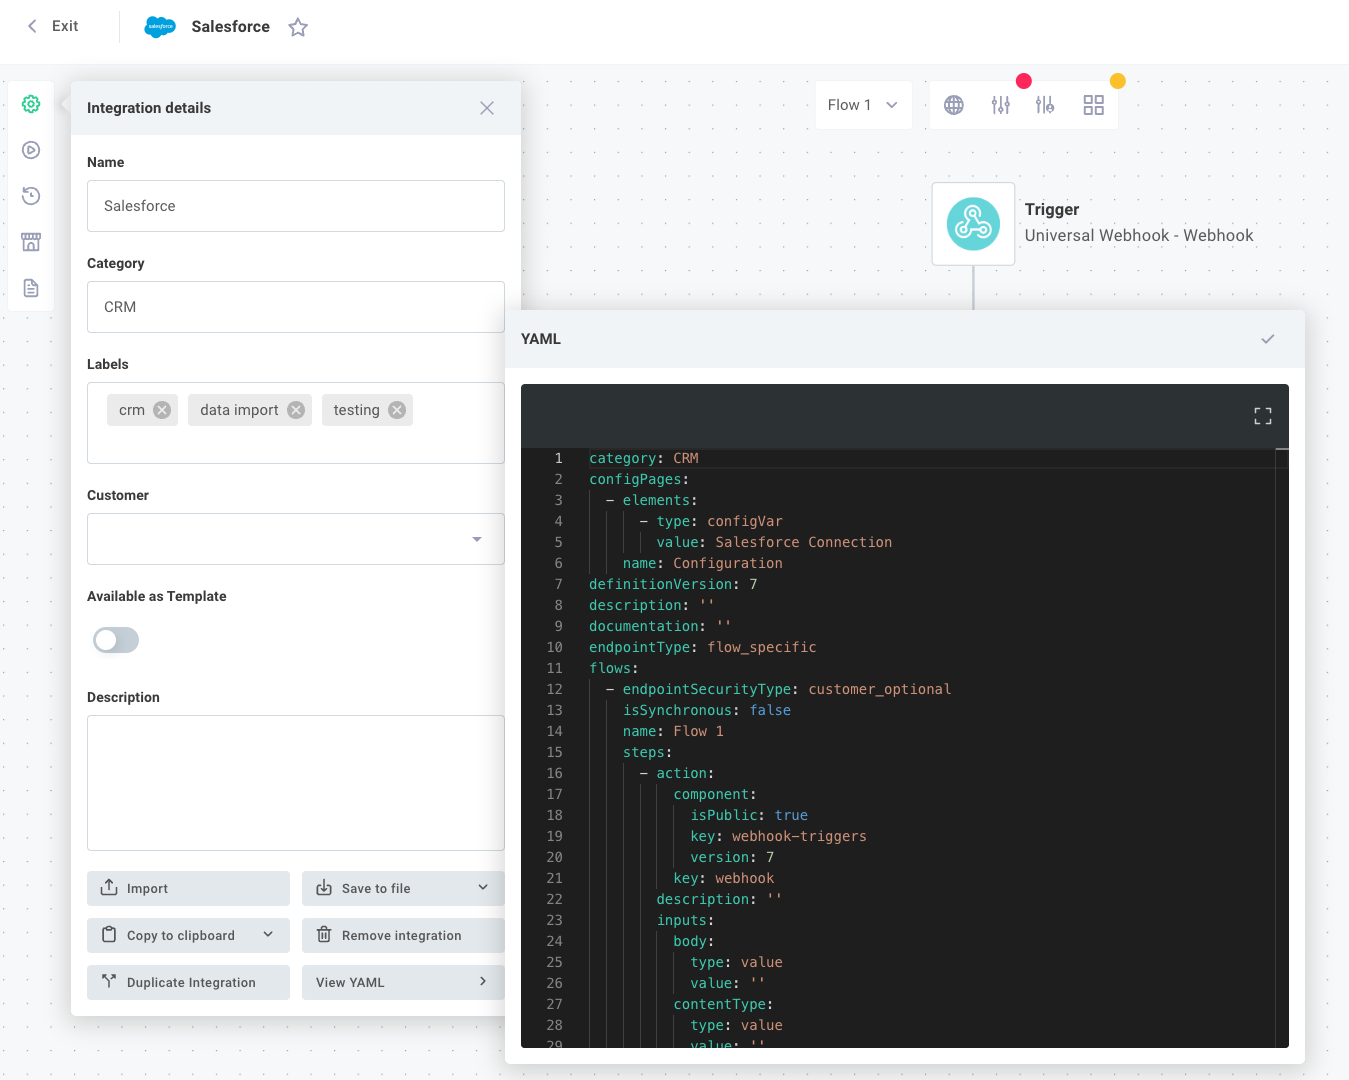
When exporting an integration for import in a different region (e.g., US to EU), make sure to click the latest component versions button, as component versions may differ between regions.
The YAML shown corresponds to the currently displayed integration version. To view the YAML of a previous version, open the VERSION HISTORY drawer and select an older version.
To identify differences between versions, compare their YAML definitions using your preferred diff tool (VSCode includes an excellent built-in diff tool).