OAuth 2.0 Authorization Code Grant Type
Authorization code grant type overview
The OAuth 2.0 Authorization Code grant type is something you've probably used before. Any time you've clicked "Log in with Google" or "Connect my Outlook Calendar", the application asking for your Google account information or for access to your Outlook calendar uses the authorization code flow to fetch an API key that they can use to interact with Google or Microsoft on your behalf.
Additional resources: https://oauth.net/2/grant-types/authorization-code/
How does the authorization code grant type work?
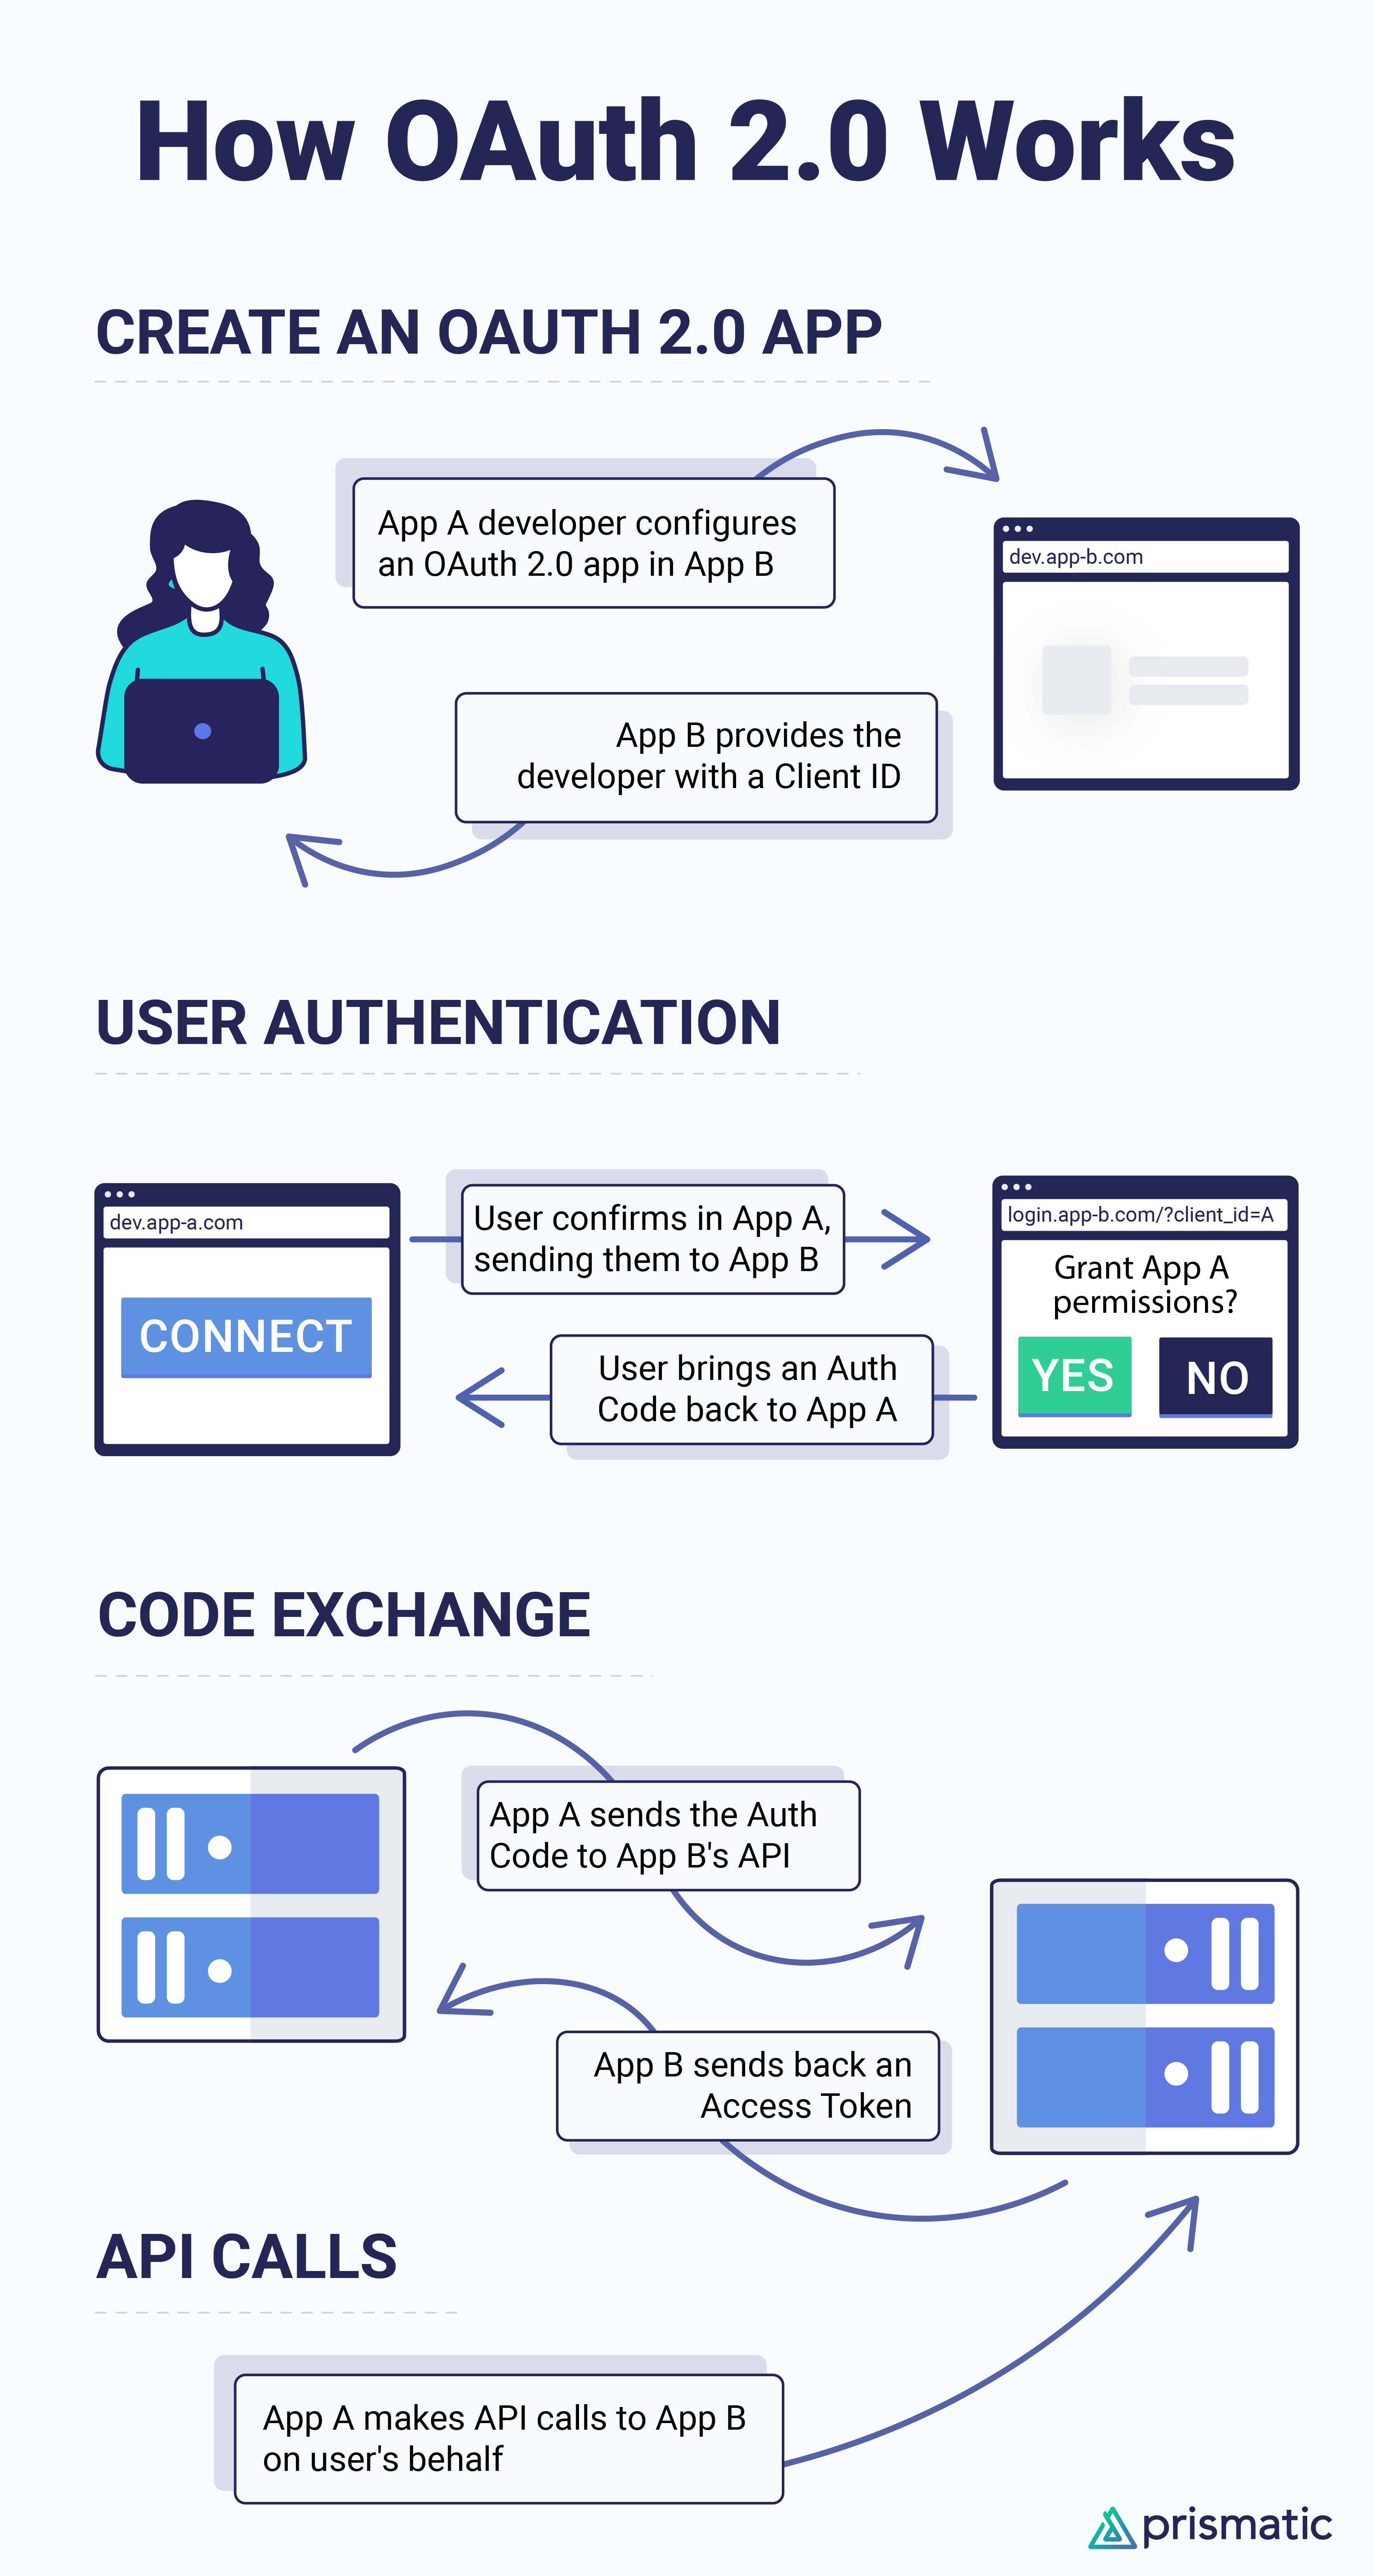
At a high level, the OAuth 2.0 authorization code flow works like this:
- You as a software vendor register with the third-party application. You tell them your application's name, a description, and a callback URL. They give you a client ID and client secret that are unique to you.
- You send customers to the third-party application's OAuth 2.0 authorize endpoint.
You include your client ID, a redirect URL, and an optional list of scopes (permissions) that you want to request from your user as a set of search parameters.
For example, you might ask for
files.content.readfrom Dropbox, so you can read your customer's Dropbox files. - The customer authenticates with the third-party application and then interacts with a consent screen.
This is the page you've likely seen before that says something like Acme corp would like to read files in your Dropbox folder. Are you okay with that?
Once they consent, the user is directed back to your application with a unique authentication
code. - Your application exchanges the
codeusing the third-party application's token endpoint, along with your client ID and client secret. The third-party application verifies that the code is valid, and if so, responds with an access token and an optional refresh token. - You periodically exchange the refresh token for a new access token and use the access token to make API calls on behalf of the customer.
Creating an OAuth 2.0 "app" in a third-party service
To use the authorization code grant type in your integration, you will need to work with the third-party service to create an "OAuth 2.0 Application". Most common SaaS platforms have documentation on how to create an OAuth application, and we link to that documentation on our component documentation pages. It's usually found in an "API Access" section of a settings page or on a page similarly named.
Most third-party services allow you to create an unverified OAuth application for testing purposes but require you to go through a verification process before you can use the application in production. The verification process can take days or weeks, so it's best to start the process early. The third-party may require you to provide a privacy policy, terms of service, and other information about your use case and may require a partnership agreement.
Authorization code callback URL
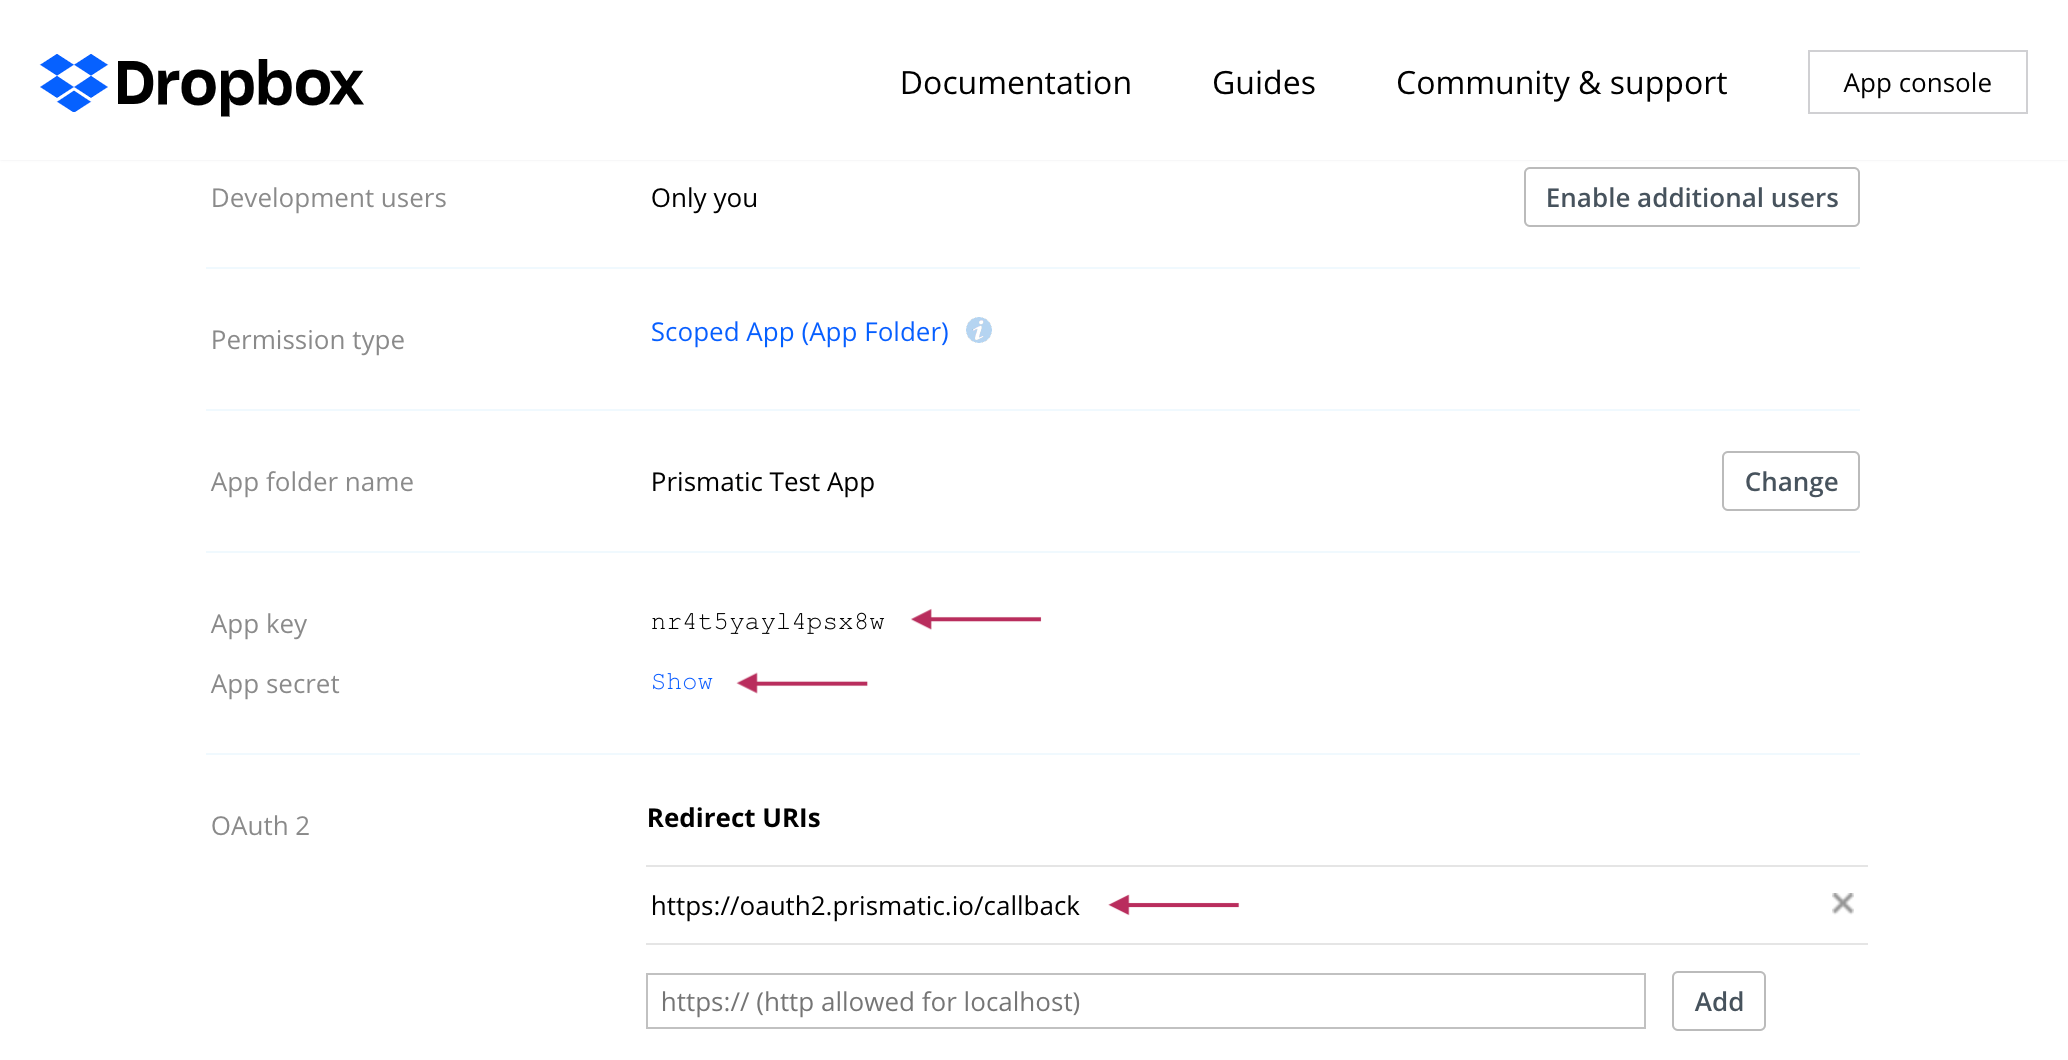
When you configure your OAuth application, you'll likely need to set up an authorized callback URL.
That's the URL to which users return with a special code after granting you permission to their account.
Your callback URL depends on the region where your tenant resides and whether or not you use a custom domain:
| Region | Callback URL |
|---|---|
| US Commercial (default) | https://oauth2.prismatic.io/callback |
| US GovCloud | https://oauth2.us-gov-west-1.prismatic.io/callback |
| Europe (Ireland) | https://oauth2.eu-west-1.prismatic.io/callback |
| Europe (London) | https://oauth2.eu-west-2.prismatic.io/callback |
| Canada (Central) | https://oauth2.ca-central-1.prismatic.io/callback |
| Australia (Sydney) | https://oauth2.ap-southeast-2.prismatic.io/callback |
| Africa (Cape Town) | https://oauth2.af-south-1.prismatic.io/callback |
| Custom Domain | https://oauth2.<your-custom-domain>/callback |
Authorization code client ID and secret
The third-party application will supply you with a client ID and client secret. These are sometimes called "App ID", "App Key", or something similar. Take note of these - you'll use them to configure your Prismatic integration's connection.
Configuring an authorization code consent screen
Depending on what application you're integrating with, they likely let you specify your application's name, your company's icon, a link to a privacy policy, and more. Be sure to enter your application's name - not "Prismatic".
This is the page that users will see after clicking the "connect" button in your integration's config wizard. The page will say something like
Acme corp would like access to view and create leads in your Salesforce account. Are you okay with that?
Authorization code grant type scopes
A scope is a specific permission that you would like to request from your customer.
For example, you might request file.contents.write permission for your customer's Dropbox account, so you can write files to their Dropbox, or you might request the channels:read permission from your customer's Slack account so you can get a list of public channels they have access to.
Some applications, like Dropbox and Salesforce, have you identify which permissions you need when you create your application. Others have you specify scopes as a URL search parameter when you send your customers to their authorization URL.
The offline_access scope
Many applications offer a scope called offline_access.
Granting this permission signifies that you want long-term access and will need a refresh token so you can continually refresh the access token you have.
Adding an OAuth 2.0 authorization code connection to an integration
Once you have an OAuth 2.0 Application configured in a third-party service, add a new connection in your Prismatic integration for the third-party you're integrating with. You can do that by either adding a step for the third-party (add a Salesforce step to automatically create a Salesforce connection, etc.) or opening the Configuration Wizard Designer and creating a new Connection.
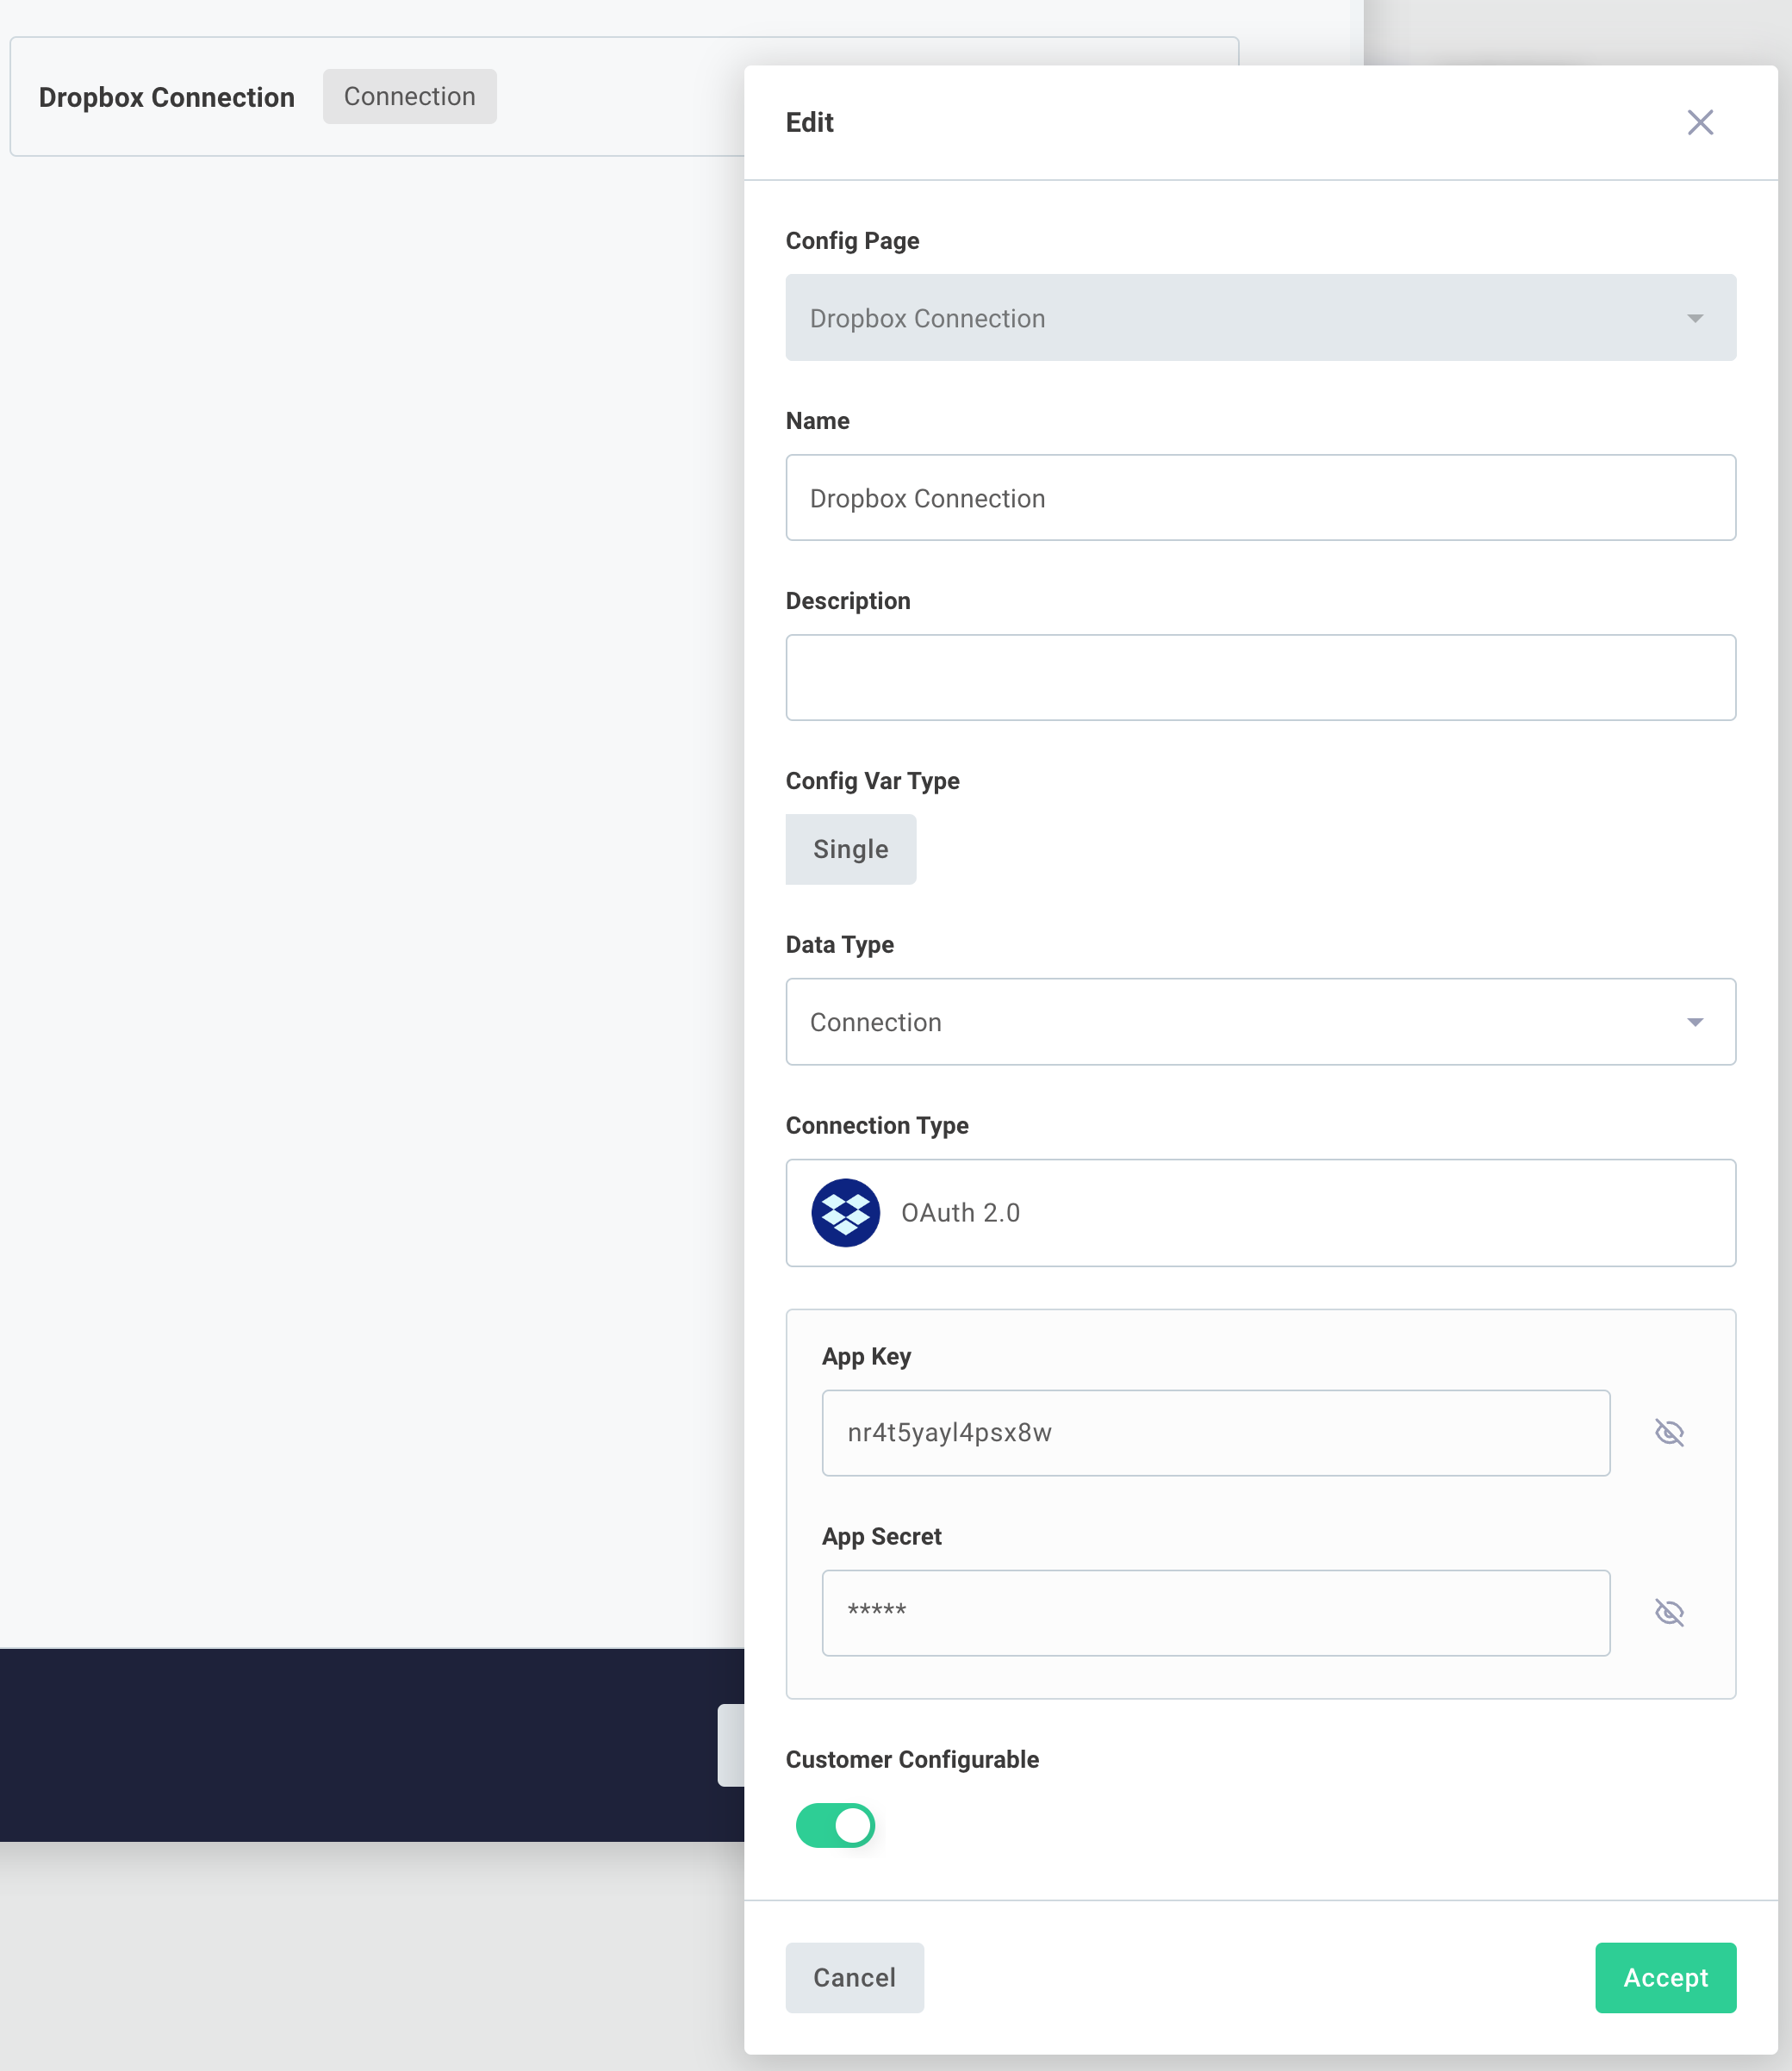
Enter the client ID and client secret that you noted in the previous step.
You may need to enter an Auth URL or Token URL if those are different for different tenants.
You can find those in the third-party applications' documentation, and they often look like https://example.com/authorize and https://example.com/oauth/token respectively.
There's a good chance the URLs are the same for everyone, so they are hidden in the Prismatic UI. Mark fields that you don't want your customers to see "hidden" by clicking the icon. Your client ID and client secret are hidden by default.
If the application you're connecting with allows you to request scopes on a per-connection basis, you'll be prompted for scopes here as well.
Configuring an authorization code connection
If you've created an integration with an OAuth 2.0 connection, customers will see a Connect button when they enable the integration. When they click the Connect button, they will be brought to the third-party application's OAuth service and will be prompted to verify that they want to grant permissions to your integration. Once they are done, they'll see an "Authorization completed successfully" page, which they can close to return to the instance configuration screen.
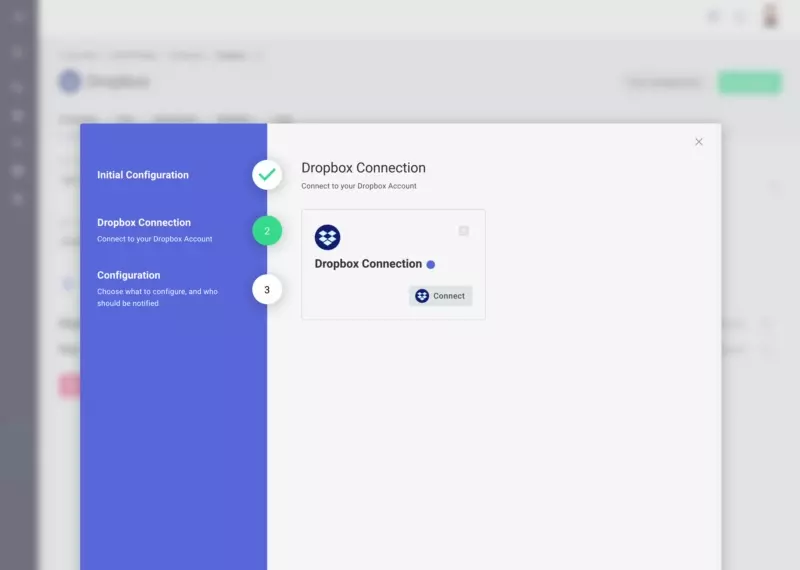
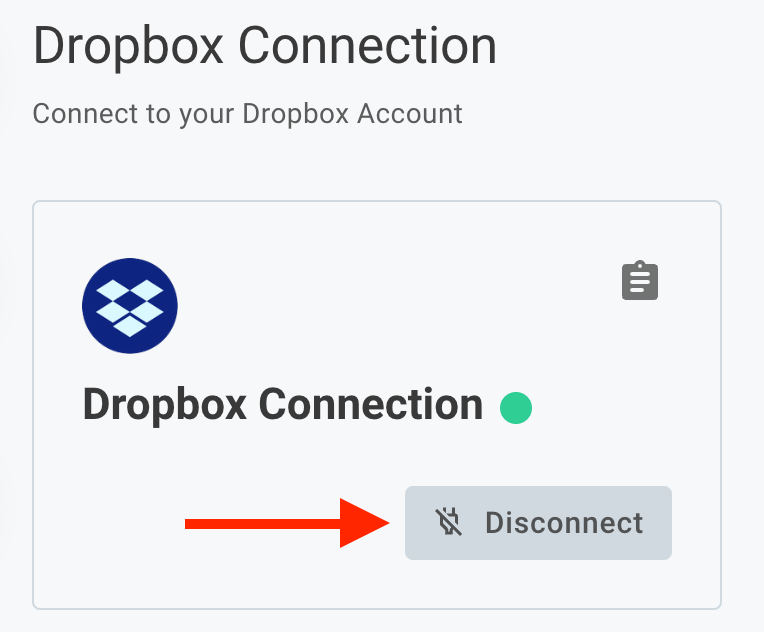
To change an OAuth connection (for example, if you logged in as the incorrect person when you clicked Connect), you can click Disconnect and then Connect again to reauthenticate against the OAuth provider.
If any problems occur during the OAuth flow (incorrect Auth or Token URL, incorrect scopes, etc.), you can view related connection logs by clicking the button to the right of the connection config variable. The connection will be marked with a green if the connection has been used successfully in an execution of the instance, yellow if it has been configured (but not used), and red if the component using the connection threw a connection-related error.
Disconnecting an authorization code connection
When you disconnect an OAuth 2.0 connection, two things (and one optional thing) happen:
- Prismatic stops periodically refreshing the access token
- Prismatic deletes the access and refresh tokens from its database, so steps can't reference it
- [Optional] Some OAuth 2.0 providers allow you to revoke a token. Quickbooks is a prominent example of an API that supports revocation. If a revocation endpoint is present in a component's connection, Prismatic reaches out to that endpoint to revoke the token with the third-party's API.
To disconnect an active OAuth 2.0 connection, click the Disconnect button under the config variable name:
Authorization code connections in custom components
If you would like to build a custom component that implements an OAuth 2.0 auth code connection, see the example code on the custom connectors connections article.