Config Pages
Config pages overview
Customers enable and configure an instance of an integration through a Configuration Wizard. They work through Configuration Pages, authenticating with third-party apps and setting config variables.
Configuration pages can contain config variables of various types and helper text and images to guide the user on where to look. If your integration requires manual configuration of webhooks, the config wizard can also display the instance's webhook endpoints and API keys (see Endpoint API keys in the config wizard).
- Low-Code
- Code-Native
If you're building your integration with low-code, you can use the Config Wizard Designer within the integration designer to create your customers' configuration experience.

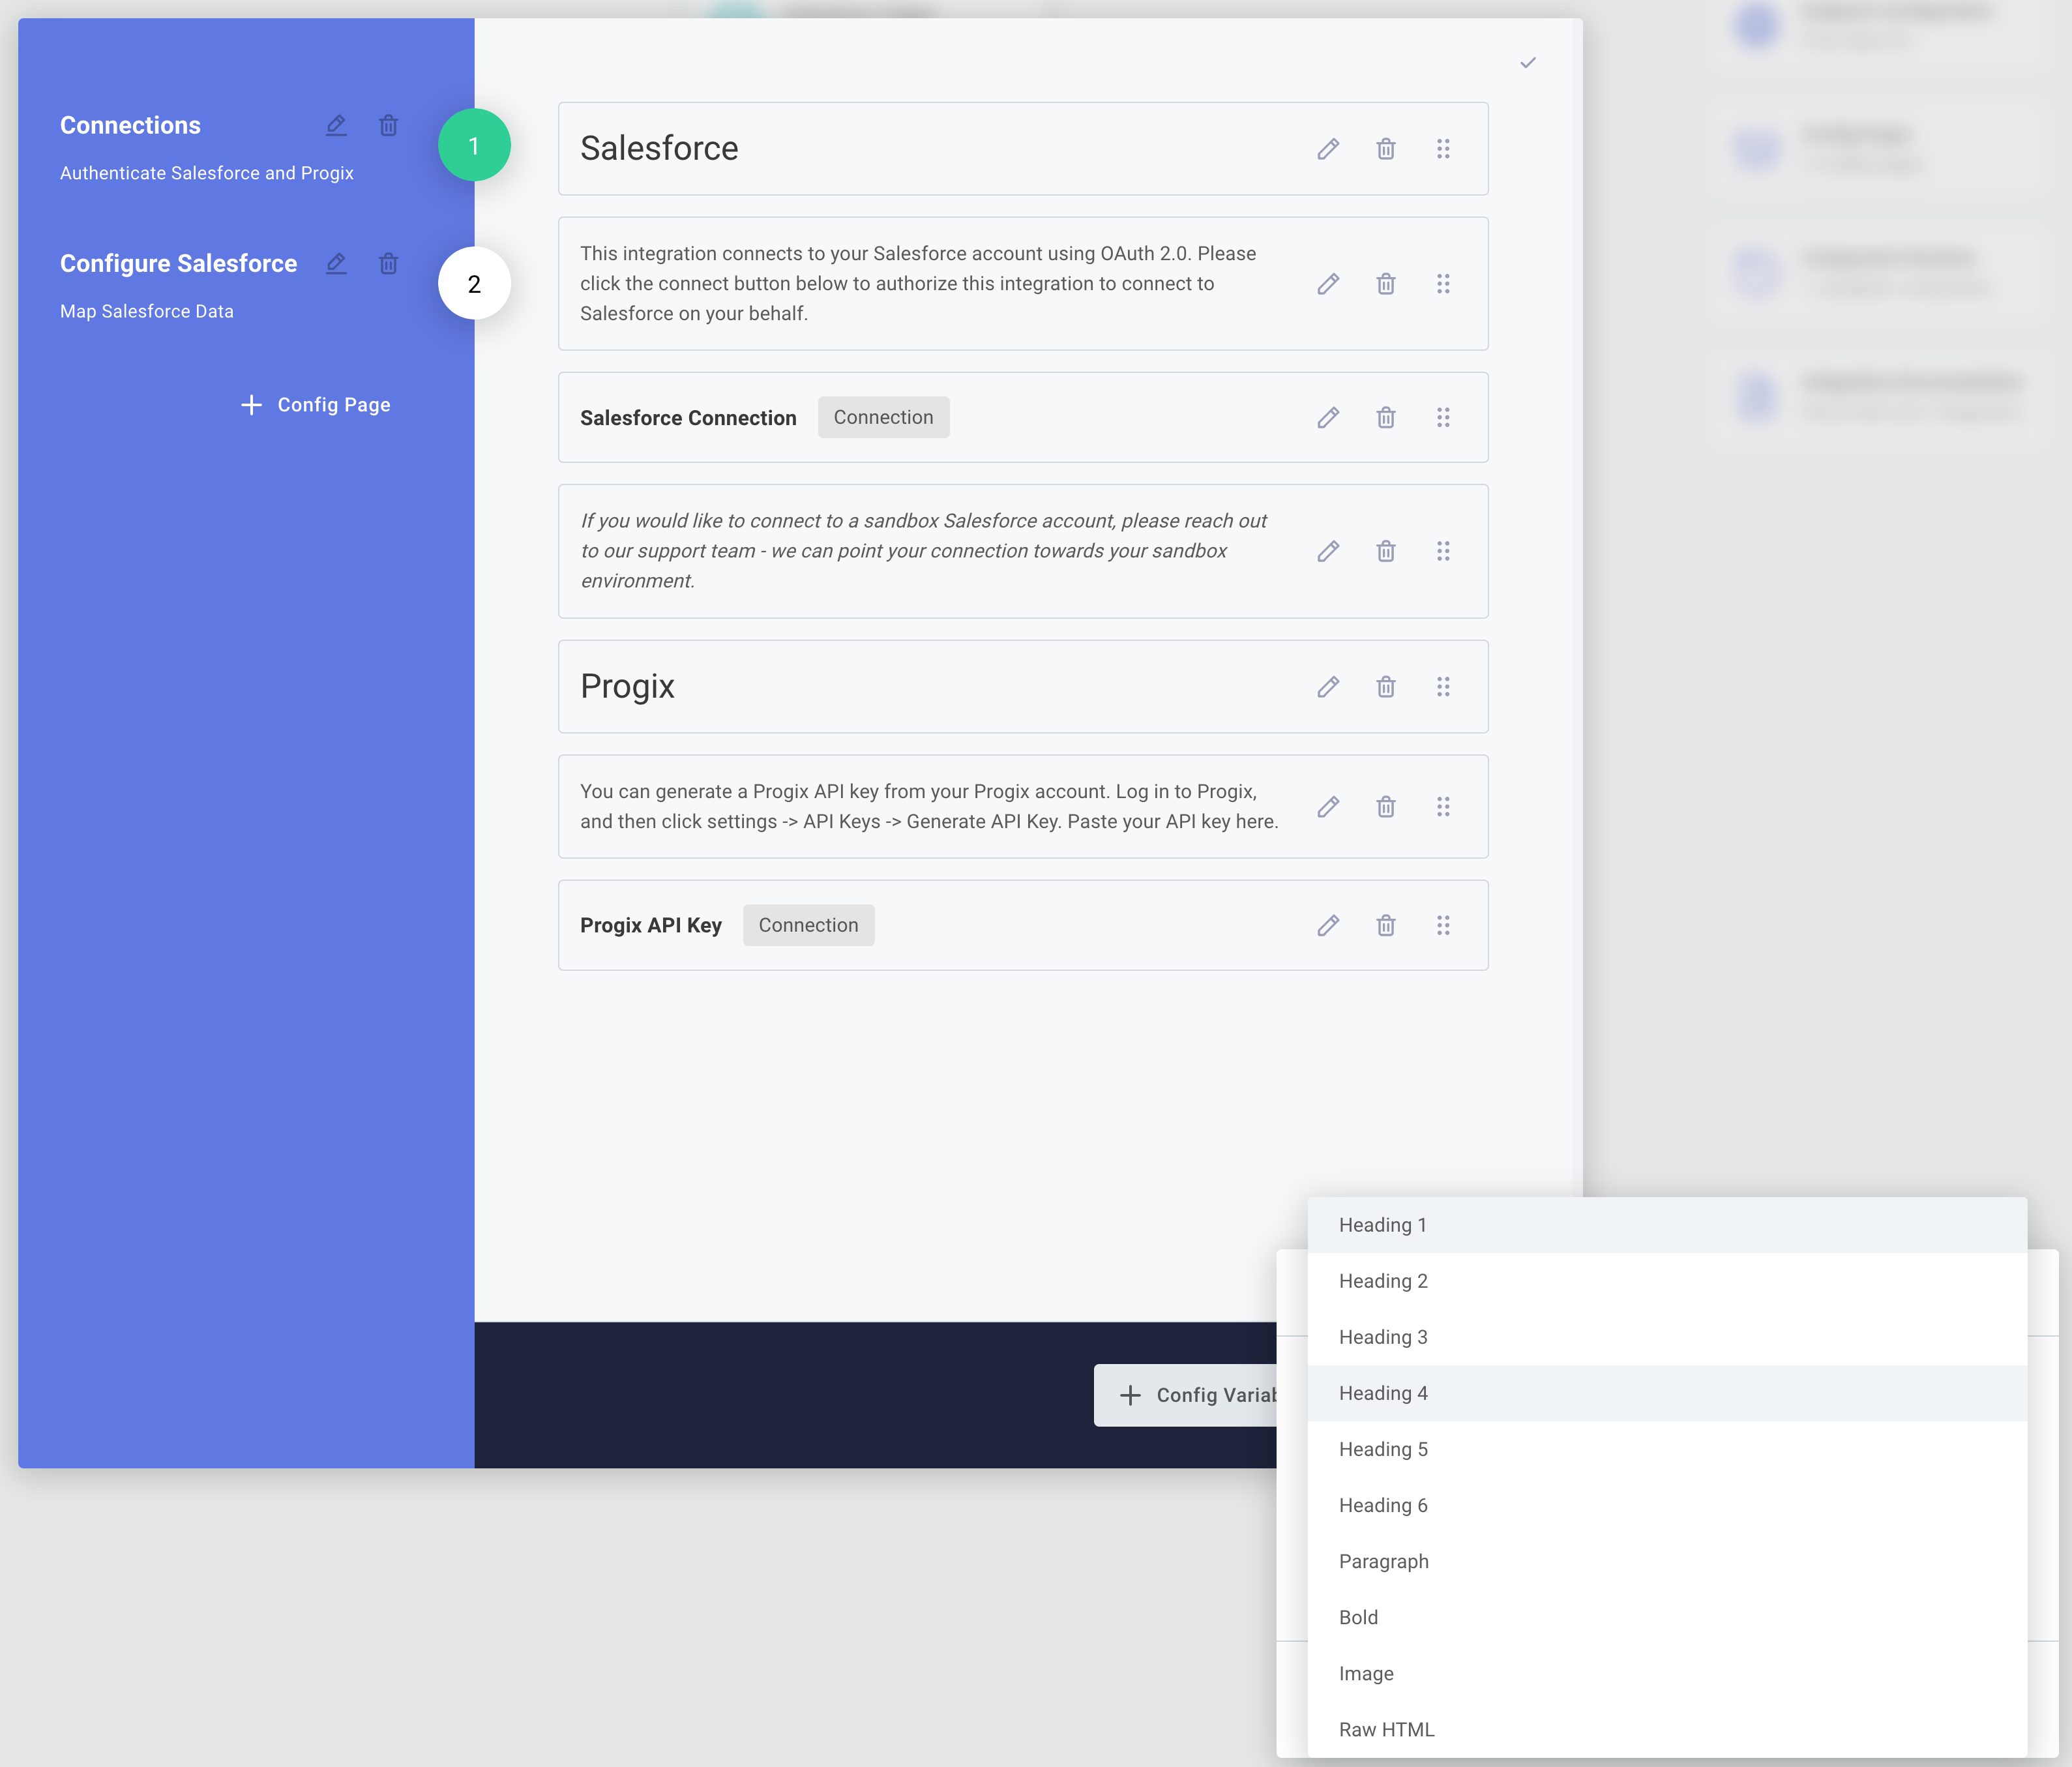
You can add a configuration page by clicking + Config Page, and you can rename a config page or add a short description to the page by clicking the pencil icon beside the page.
Like low-code integrations, code-native integrations include a config wizard. The config wizard can include things like OAuth 2.0 connections, API key connections, dynamically-sourced UI elements (data sources), and other advanced configuration wizard steps.
A config wizard consists of multiple pages.
Each page has a title, which is derived from the key of the configPage object, and a tagline as well as a set of elements (individual config variables).
For example, a config wizard might contain a page for a Slack OAuth 2.0 connection, a page where the user selects a channel from a dynamically-populated dropdown menu, and a page where a user enters two static string inputs:
import { configPage, configVar } from "@prismatic-io/spectral";
import { slackConnectionConfigVar } from "./connections";
import { slackSelectChannelDataSource } from "./dataSources";

export const configPages = {
  Connections: configPage({
    tagline: "Authenticate with Slack",
    elements: {
      "Slack OAuth Connection": slackConnectionConfigVar,
    },
  }),
  "Slack Config": configPage({
    tagline: "Select a Slack channel from a dropdown menu",
    elements: {
      "Select Slack Channel": slackSelectChannelDataSource,
    },
  }),
  "Other Config": configPage({
    elements: {
      "Acme API Endpoint": configVar({
        stableKey: "acme-api-endpoint",
        dataType: "string",
        description: "The endpoint to fetch TODO items from Acme",
        defaultValue:
          "https://my-json-server.typicode.com/prismatic-io/placeholder-data/todo",
      }),
      "Webhook Config Endpoint": configVar({
        stableKey: "webhook-config-endpoint",
        dataType: "string",
        description:
          "The endpoint to call when deploying or deleting an instance",
      }),
    },
  }),
};
For full documentation, see the Build Code-Native article.
Displaying additional helper text in the configuration wizard
- Low-Code
- Code-Native
To add helper text, including headings (H1 - H6) or paragraphs, click the + Text/Image button and select the type of text you'd like to add.
To add an image, your image will need to be publicly accessible online. Enter the public URL of the image you'd like shown on your config page.
For further customization, you can choose to add Raw HTML to your config page.
In addition to config variables, you can add helpful text and images to guide your customers as they work through your config wizard.
To add HTML to the config wizard (which can include links, images, etc), include a string element to a configPage definition:
export const configPages = {
  Connections: configPage({
    elements: {
      helpertext1: "<h2>Asana Instructions</h2>",
      helpertext2:
        "To generate an Asana API Key, visit the " +
        '<a href="https://app.asana.com/0/my-apps" target="_blank">developer portal</a> ' +
        'and select "Create new token".',
      "Asana API Key": connectionConfigVar({
        stableKey: "f0eab60f-545b-4b46-bebf-04d3aca6b63c",
        dataType: "connection",
        inputs: {
          // ...
        },
      }),
    },
  }),
};

Displaying webhook information in the configuration wizard
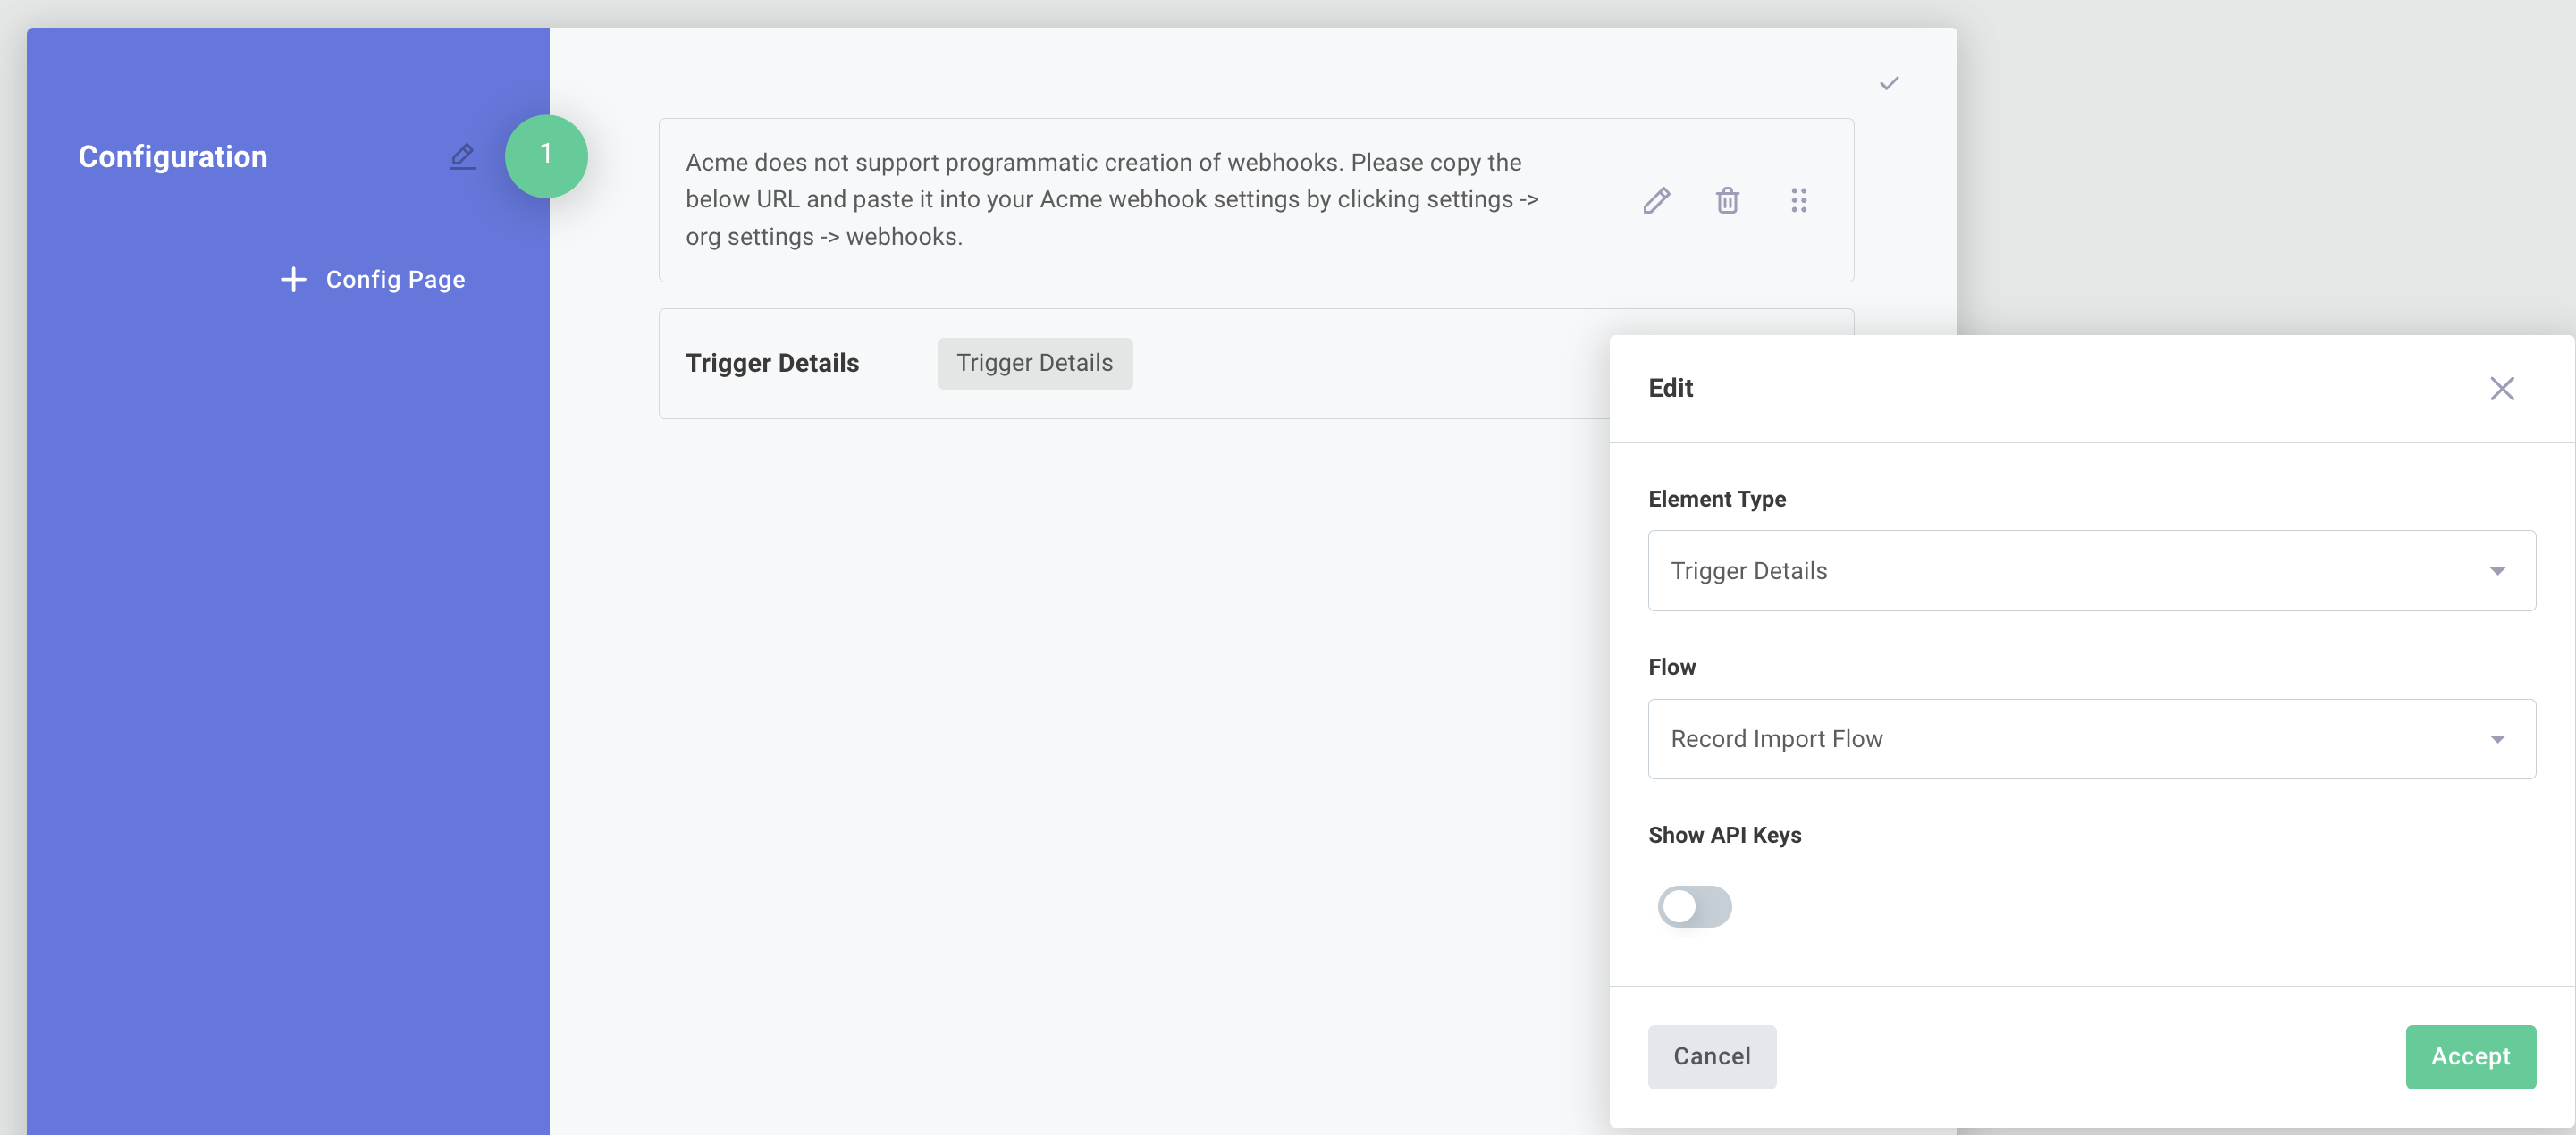
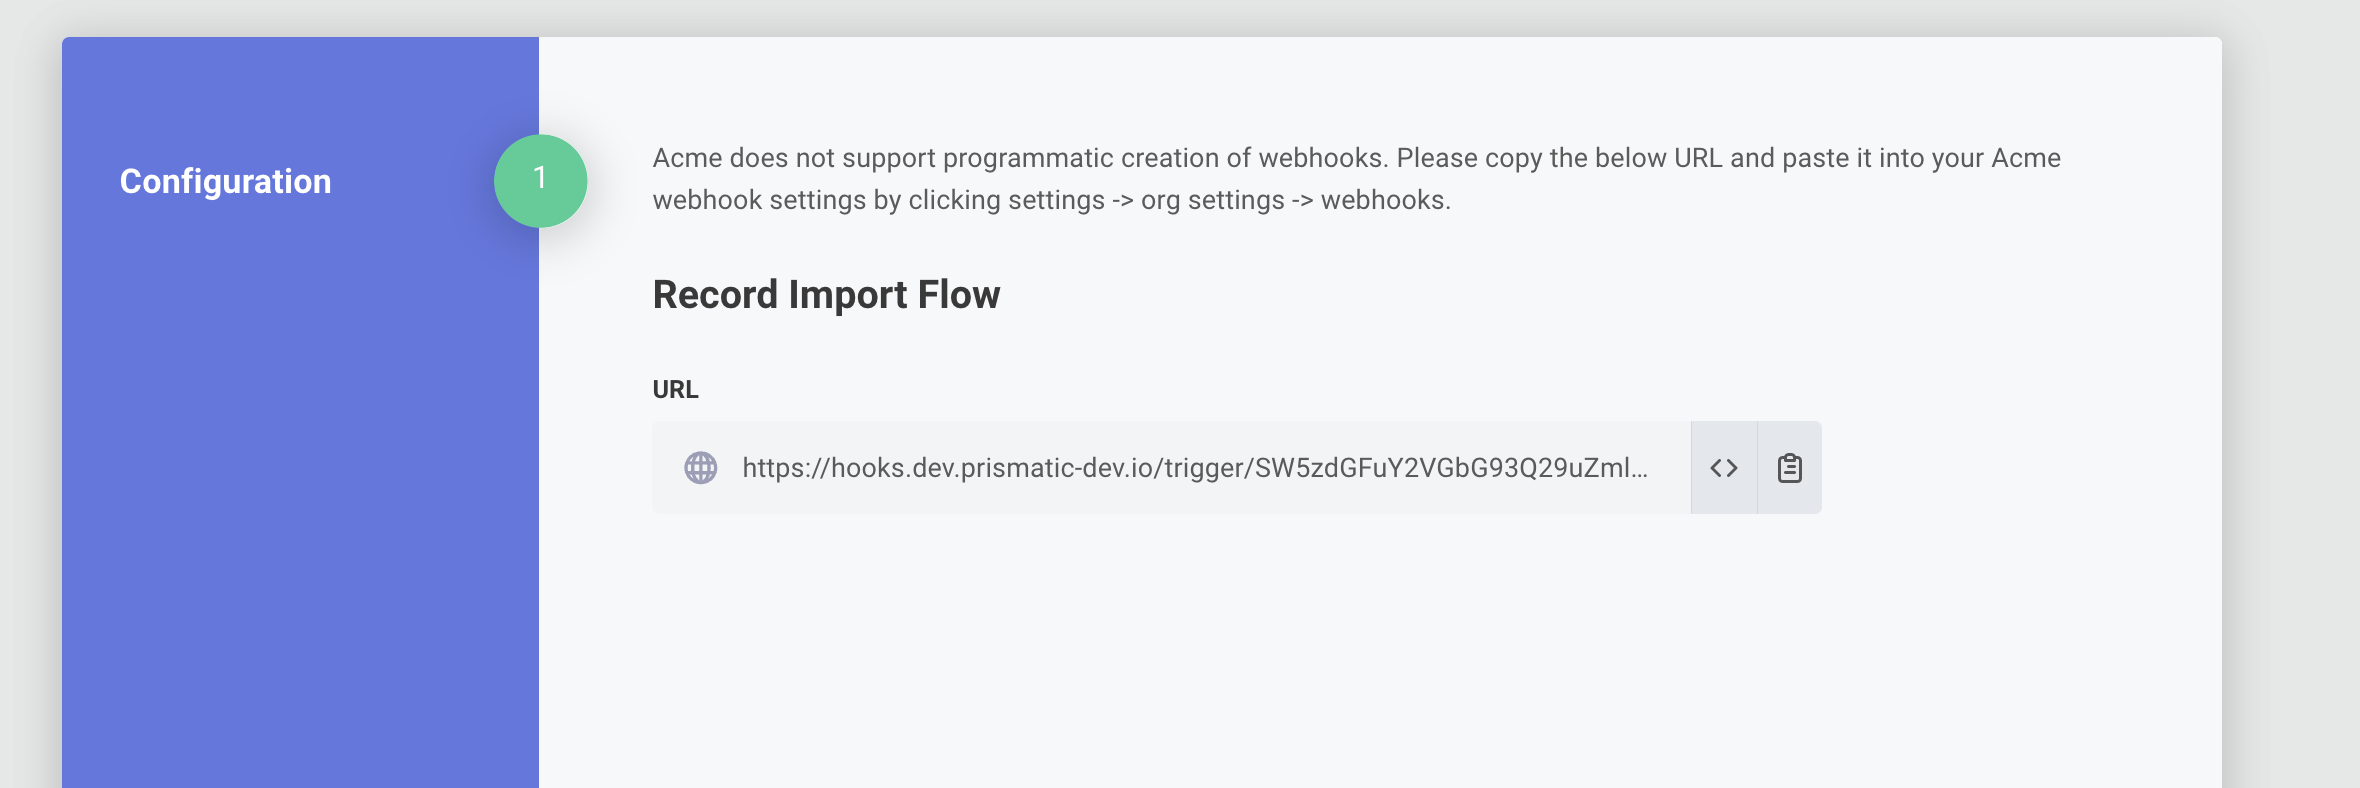
Your instance's webhook endpoints and API keys can be displayed in the configuration wizard. Click + Text/Image and then select Trigger Details as the Element Type. You can opt to show all flows' URLs, or the URL for a specific flow.

When your customers deploy an instance of your integration, they'll see the webhook information on the configuration page. This is helpful if they need to manually configure webhooks in a third-party app.
