Testing Code-Native Integrations
Testing a code-native integration
There are two types of testing that you can do with a code-native integration: you can run unit tests of your code locally in your IDE, and you can import the integration and test it in the Prismatic runner.
- Unit tests in your IDE are great for testing the logic of your integration and testing modular portions of your code
- Testing in the Prismatic runner is great for trying out the configuration wizard experience you've built and testing the integration's behavior in a real-world environment.
You will probably want to incorporate both types of testing into your development process.
Testing a code-native integration in Prismatic
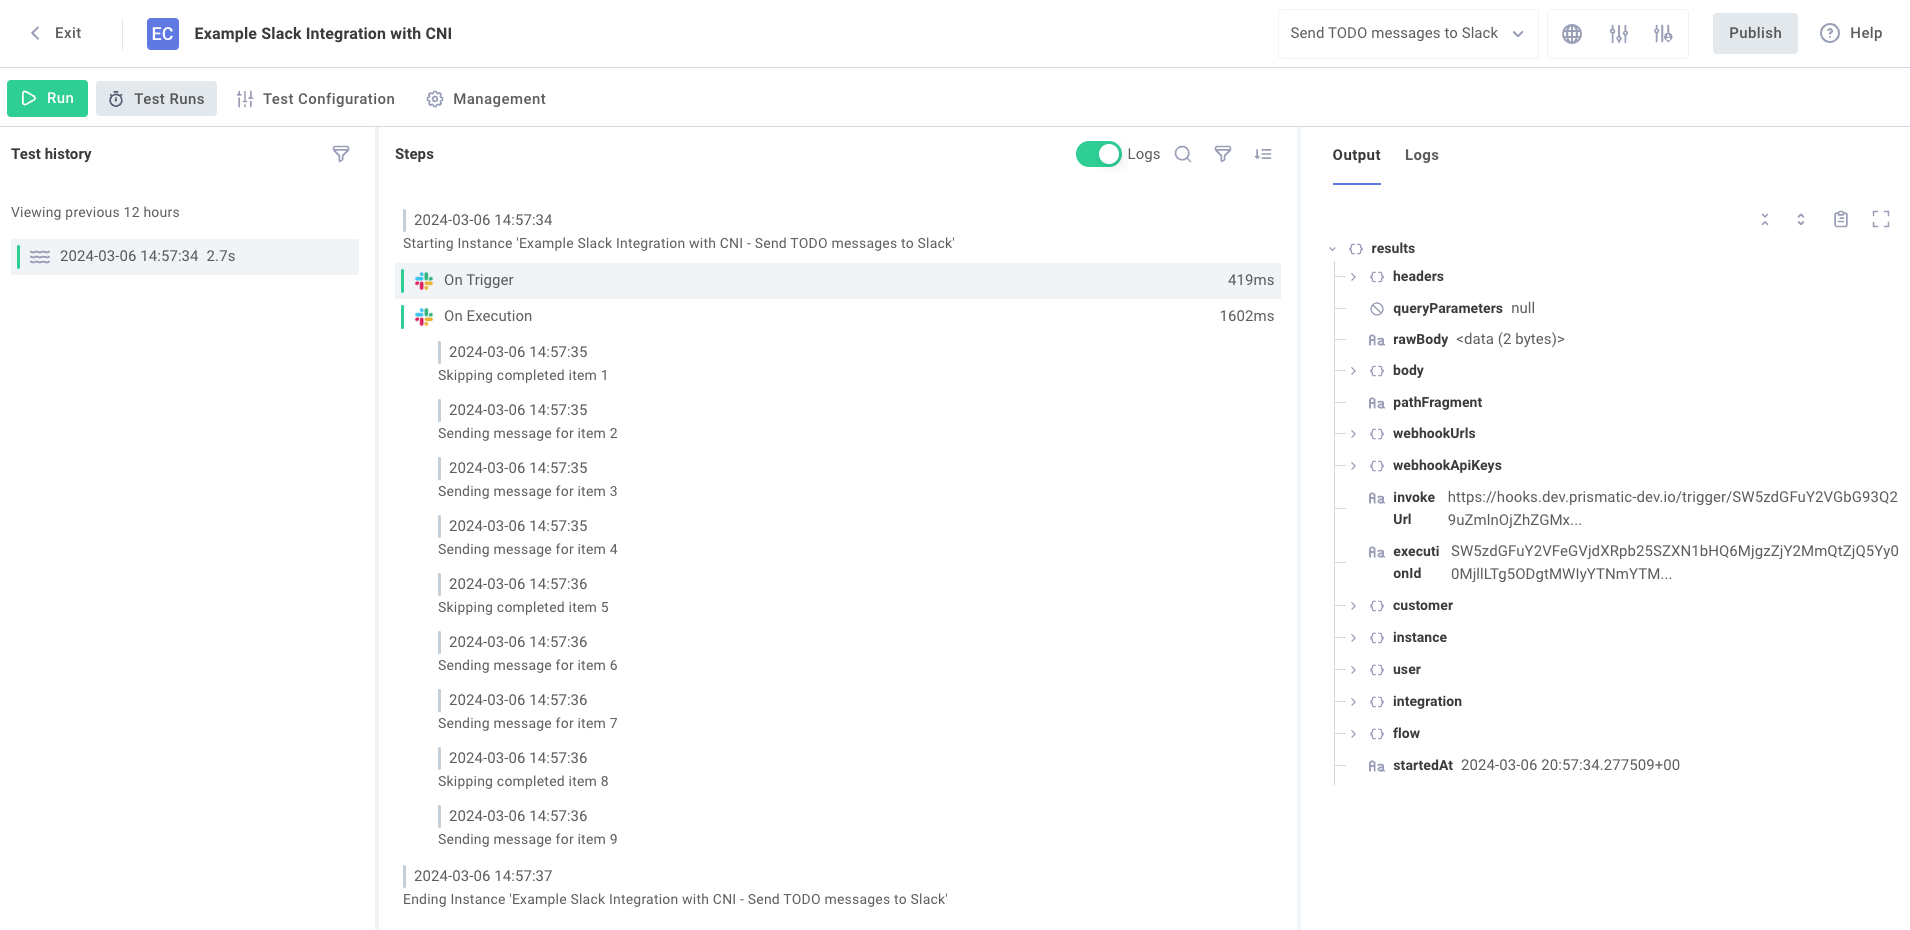
After building with npm run build and importing your code-native integration with prism integrations:import --open, you can test your integration in the Prismatic runner similar to how you test a low-code integration.

To test your config wizard experience, click the Test Configuration button. To run a test of a flow, select the flow from the dropdown menu on the top right of the page and then click the green Run button. When you're satisfied with your integration, you can click Publish to publish a new version of your integration and manage instances of your integration from the Management tab.
A code-native integration has no steps - just a trigger and onExecution function, so there are no step results to inspect.
To debug your integration, use the context.logger object in your onExecution.
You can even conditionally log lines based on whether or not your test instance has debug mode enabled.
Testing a code-native integration from the CLI
If you would like to test your flow from within your IDE, use the prism integrations:flows:test command.
After importing your code-native integration with prism integrations:import, a test instance of your integration is deployed and can be invoked from the Prismatic UI.
The same testing you can do in the UI can be done from the command line.
We recommend using the --tail-logs flag to watch for logs from your invocation.
If you would like to send a custom payload to your flow's trigger, use the --payload flag to send a local file as an HTTP body to your flow's webhook URL.
> prism integrations:flows:test --tail-logs --payload ./my-payload.json
? Select the flow to test: Flow 1 (flow-1)
Starting execution...... done

To re-run this flow directly:
prism integrations:flows:test -u=https://hooks.prismatic.io/trigger/SW5zdGFuY2VGbG93Q29uZmlnOjhjYTZiZGU2LWM1MTktNGI5Ni1iYzVjLTc5NWJiZDMxMTcyNw== -p=./my-payload.json --tail-logs

{"executionId":"SW5zdGFuY2VFeGVjdXRpb25SZXN1bHQ6ZGVkOGE0YWEtMTYzZC00OTMwLWE0NTMtOTNlNGVmODlkYWQw"}

 ›   Warning: While the timestamps are accurate, logs & step results may not arrive in chronological order.

Press CMD+C/CTRL+C to stop polling. This process will timeout after 20 minutes.

 2025-05-12T17:05:01.197000+00:00 LOG_INFO       Starting Instance 'My First Integration'. Total Concurrent Executions: 1
 2025-05-12T17:05:05.115000+00:00 LOG_INFO       "Select a database" is already marked complete.
 2025-05-12T17:05:05.687000+00:00 LOG_INFO       "Fix CORS configuration on API gateway" is already marked complete.
 2025-05-12T17:05:06.013000+00:00 LOG_INFO       "Document API authentication" is already marked complete.
 2025-05-12T17:05:08.237000+00:00 LOG_INFO       Ending Instance 'My First Integration'
Listening for webhook invocations from the CLI
If your code-native integration includes a webhook trigger, you can use the integrations:flows:listen command to listen for incoming webhook invocations.
prism integrations:flows:listen --integration-id SW50ZWdEXAMPLE
When you run this command and select one of your integration's flows, your test instance will enter listening mode and wait for incoming webhook invocations.
When a webhook invocation is received, the payload will be saved to a local file.
By default, the file will be saved as ./payloads/payload-<executionid>-<timestamp>.json, but you can specify a different output directory with the --output flag.
Once you have a saved payload file, you can use the --payload flag with the integrations:flows:test command described aboveto re-send the payload to your flow for testing.
Measuring performance of a code-native integration
When in debug mode, you can leverage functions of context.debug to measure how long specific portions of your flows take to run and how much memory they consume (see links for examples).
Unit tests for code-native integrations
You can also write unit tests for your code-native integration, similar to unit tests for custom components.
The invokeFlow function from the custom component SDK is used to invoke a test of a flow in a code-native integration.
You can specify a sample payload to "send" to your flow's onTrigger function, and the invokeFlow function will run both onTrigger and onExecution and return the result of the flow's onExecution function.
If you use existing components within your flows, you will not be able to build unit tests for your flows, since your local dev environment does not have access to the existing components.
Please consider testing your flow from the CLI instead.
Below is a simple flow that takes a payload and sends the payload to an API, returning the results of the API call. The corresponding unit test code invokes the flow, "sending" a sample payload and verifying that the results received are as expected.
- CNI Code
- Unit test code
import {
  configPage,
  configVar,
  flow,
  integration,
} from "@prismatic-io/spectral";
import axios from "axios";
import { componentRegistry } from "./componentRegistry";

const configPages = {
  "Acme Config": configPage({
    elements: {
      "Acme API Endpoint": configVar({
        stableKey: "1F886045-27E7-452B-9B44-776863F6A862",
        dataType: "string",
        description: "The endpoint to fetch TODO items from Acme",
        defaultValue:
          "https://my-json-server.typicode.com/prismatic-io/placeholder-data/todo",
      }),
      "Acme API Key": configVar({
        stableKey: "webhook-config-endpoint",
        dataType: "string",
        description:
          "The endpoint to call when deploying or deleting an instance",
      }),
    },
  }),
};

export const myFlow = flow({
  name: "Create Acme Opportunity",
  stableKey: "create-acme-opportunity",
  description: "Create an opportunity in Acme",
  onExecution: async (context, params) => {
    const { id, name, value } = params.onTrigger.results.body.data as {
      id: string;
      name: string;
      value: number;
    };

    if (value < 0) {
      throw new Error("Invalid value - values cannot be negative");
    }

    const acmeEndpoint = context.configVars["Acme API Endpoint"];

    const response = await axios.post(
      `${acmeEndpoint}/opportunity`,
      { id, name, value },
      {
        headers: {
          Authorization: `Bearer ${context.configVars["Acme API Key"]}`,
        },
      },
    );

    return { data: response.data };
  },
});

export default integration({
  name: "acme-cni",
  description: "Acme CNI",
  iconPath: "icon.png",
  flows: [myFlow],
  configPages,
  componentRegistry,
});
import { myFlow } from ".";
import {
  invokeFlow,
  defaultTriggerPayload,
} from "@prismatic-io/spectral/dist/testing";

interface MyFlowResponse {
  externalId: string;
  id: string;
  name: string;
  value: number;
}

describe("test myFlow", () => {
  test("Verify that the API returns an external ID that matches the specified ID", async () => {
    const { result } = await invokeFlow(
      myFlow,
      {
        "Acme API Endpoint": "https://staging.api.example.com",
        "Acme API Key": "my-api-key",
      },
      {},
      {
        ...defaultTriggerPayload(),
        body: {
          data: { id: "123", name: "my-opportunity", value: 1000 },
          contentType: "application/json",
        },
      },
    );
    expect((result?.data as MyFlowResponse).externalId).toBe("123");
  });

  test("Verify that errors are thrown when provided negative values", async () => {
    await expect(
      invokeFlow(
        myFlow,
        {
          "Acme API Endpoint": "https://staging.api.example.com",
          "Acme API Key": "my-api-key",
        },
        {},
        {
          ...defaultTriggerPayload(),
          body: {
            data: { id: "123", name: "my-opportunity", value: -1000 },
            contentType: "application/json",
          },
        },
      ),
    ).rejects.toThrow("Invalid value - values cannot be negative");
  });
});
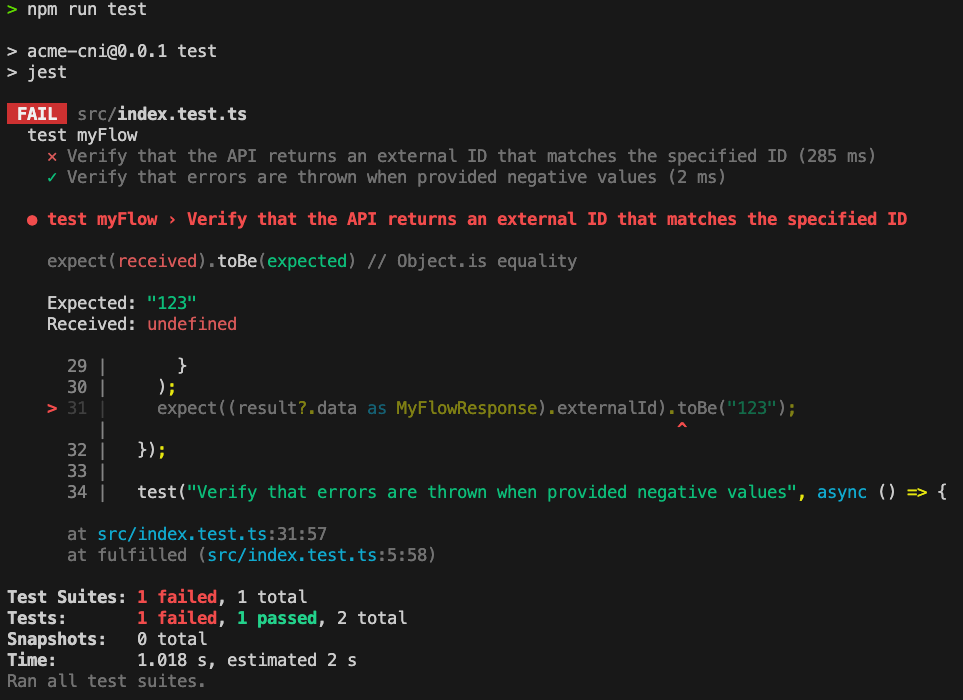
You can run a unit test with
npm run test

Note that if your code-native integration depends on existing components' actions, your local environment does not have the necessary component code and you must test your integration within Prismatic.
Unit testing a code-native integration with an OAuth 2.0 connection
If your integration includes an OAuth 2.0 connection, you can use the same strategy outlined in the Unit Testing Custom Components guide.
Both custom components and code-native integrations can take advantage of the prism components:dev:run command to fetch an established connection from an existing test instance.