Create a New Code-Native Integration
This guide walks you through the setup process and creates your integration's initial project structure.
Initializing a new code-native integration
To initialize a new code-native integration, you can use the Prismatic CLI. Run the following command to create a new code-native integration:
prism integrations:init my-new-integration
You will be prompted to give your integration a description and select a type of connection (OAuth 2.0 or basic auth).
Then, a boilerplate TypeScript project will be created in the my-new-integration directory.
Your project's directory will look like this:
├── .npmrc                   # Instructs NPM to look for component manifests in Prismatic's NPM repository
├── .spectral
│   └── index.ts             # A helper file that will enable type hinting for component references
│   └── prism.json           # A metadata file that tracks this code-native integration's integration ID
├── assets
│   └── icon.png             # The icon for your integration
├── jest.config.js           # Configuration for the Jest unit testing suite
├── package.json             # Includes a dependency on @prismatic-io/spectral
├── src
│   ├── client.ts            # Code for connecting to a third-party API
│   ├── componentRegistry.ts # Where you list components that you reference
│   ├── configPages.ts       # The config wizard experience
│   ├── flows.ts             # Your integration's flows
│   ├── index.test.ts        # Unit testing code
│   └── index.ts             # Metadata about the integration
├── tsconfig.json
└── webpack.config.js
Configuring code-native integration metadata
Your integration's name, description, and other metadata are defined in the src/index.ts file.
The name, description, and category properties are customer-facing and will be visible when customers deploy your integration from the embedded marketplace.
export default integration({
  name: "Example Slack Integration with CNI",
  description: "My code-native Slack integration!",
  category: "Communication",
  labels: ["chat", "beta", "paid"],
  iconPath: "icon.png",
  flows,
  configPages,
  componentRegistry,
});

Semantic versioning in code-native integrations
Each time you publish your integration, the version number will be incremented. Versions are not synced between stacks. That means that if you've published your Salesforce integration ten times in the US stack and twice on the EU stack, instances on v10 in the US stack will be running the same code as instances on v2 in the EU stack.
You can specify your own semantic versioning in the integration() definition in src/index.ts:
export default integration({
  // ...
  version: "1.2.3",
});
This version is accessible in the Prismatic API as the integration's externalVersion property.
For example, this query will return these results:
query getIntegrationExternalVersions ($myIntegrationId: ID!) {
    integration(
      id: $myIntegrationId
    ) {
      versionSequence {
        nodes {
          versionNumber
          externalVersion
        }
      }
    }
  }
{
  "myIntegrationId": "SW50ZWdyYXRpb246ZDRjZjlmMWYtYWI5Mi00OTJiLWI1YzAtNThjNDkwOTUzM2Mw"
}
{
  "data": {
    "integration": {
      "versionSequence": {
        "nodes": [
          {
            "versionNumber": 2,
            "externalVersion": "1.2.3"
          },
          {
            "versionNumber": 1,
            "externalVersion": "1.2.1"
          }
        ]
      }
    }
  }
}
Supplying an external version in this way is optional but a great way to determine which version of your integration is running in a given stack.
Building and importing your code-native integration
To build your project, run:
npm run build
Webpack will compile your TypeScript code into a single JavaScript file, and the dist directory will be created.
Once your integration is built, you can import your code-native integration using the prism CLI tool:
prism integrations:import --open
The --open flag is optional and will open the integration in the Prismatic designer, where you can configure a test instance and test data sources and flows.
By default, the integrations:import command will use the name of the integration defined in code to determine which existing integration to replace (or, if no integration with that name exists, it will create a new integration).
If you update your integration's name in code, you will need to use an --integrationId flag to specify the ID of the integration you want to update.
Publishing code-native integrations in a CI/CD pipeline
If you have multiple tenants, or if you want to automate the publishing of your code-native integrations, you can incorporate integration publishing into your CI/CD pipeline.
At a high level, the steps to publish a code-native integration in a CI/CD pipeline are:
- Install the
prismCLI tool - Authenticate the
prismCLI tool with your Prismatic tenant - Build your code-native integration
- Use the
prism integrations:importcommand to publish your integration
If you use GitHub, you can use Prismatic's GitHub Actions to publish your code-native integration as part of your GitHub Actions workflow.
The integration-publisher GitHub Action supports both YAML-defined integrations and code-native integrations.
Including git commit information
When publishing code-native integrations in a CI/CD pipeline, you may want to include git commit information with your integration publish. This information can help you track which version of your integration code is associated with each published integration version.
In this example, first import our code-native integration.
Then, we run integrations:import and derive the commit hash, commit URL, and repository URL from the git repository and include that information when publishing the integration:
export INTEGRATION_ID=$(prism integrations:import)

prism integrations:publish ${INTEGRATION_ID} \
  --comment "Refactored config wizard"\
  --commitHash $(git rev-parse HEAD) \
  --commitUrl $(git config --get remote.origin.url)/commit/$(git rev-parse HEAD) \
  --repoUrl $(git config --get remote.origin.url)
This information is available in the web app when viewing the integration's version history.
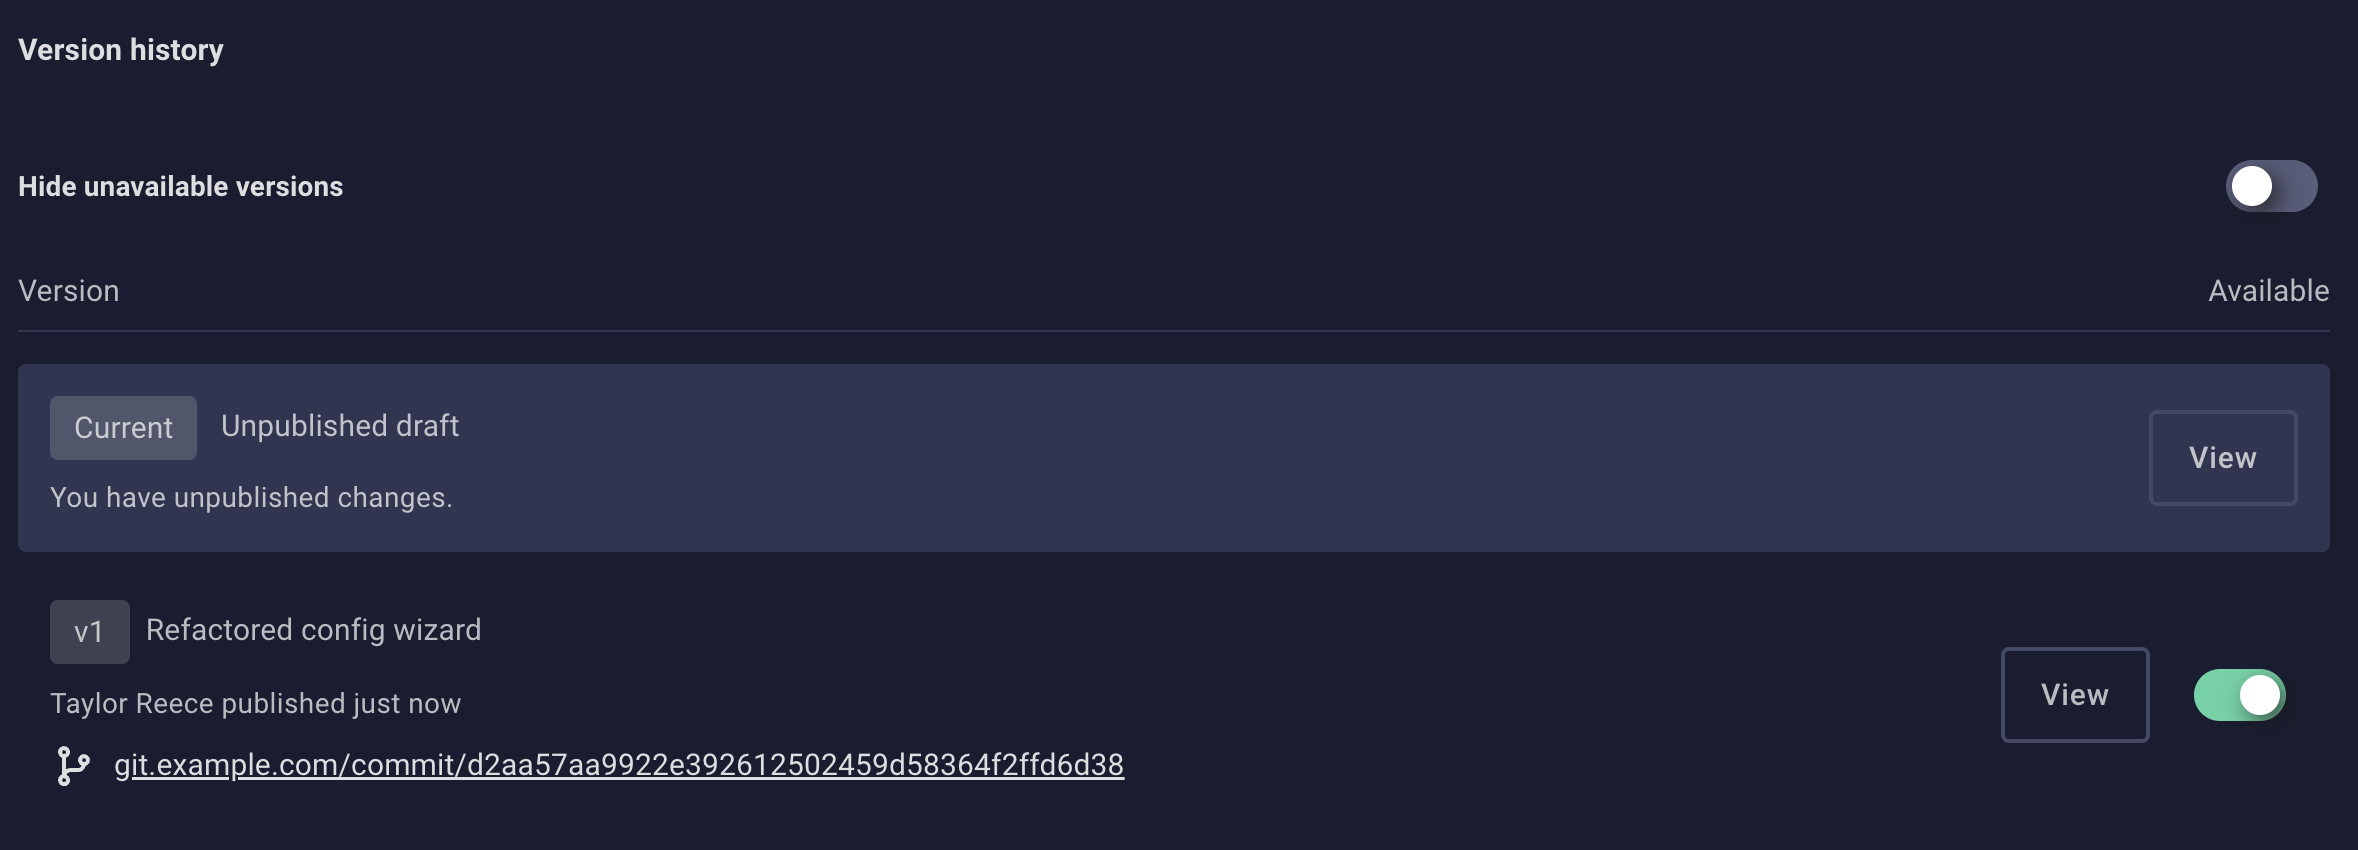
Note: If you use Prismatic's GitHub Actions, the action automatically includes git commit information when publishing your integration.