Get Started with Code-Native
This tutorial will guide you through fundamental code-native development concepts. You will:
- Create a new code-native integration project
- Build a simple integration that retrieves JSON data from a REST API and sends messages to Slack
- Create a configuration wizard for your integration
- Add a second flow that handles incoming webhook requests
- Build, import and test your integration in Prismatic
Please follow along with the videos and code snippets below.
Integration overview
The integration you'll build will retrieve data (a list of todo tasks) from an API, loop over the list, identify tasks marked "incomplete", and notify you via Slack of any incomplete tasks.
We'll use a placeholder API for the todo list data - https://my-json-server.typicode.com/prismatic-io/placeholder-data/todo.
You'll design this integration to be configurable, meaning the same integration can be deployed to multiple customers with different API endpoints, Slack credentials, and Slack channel names.
Start coding
Code-native prerequisites
- Install a recent version of Node.js
- Install Prismatic's CLI tool
- (Optional) install the Prism MCP server to enable AI coding assistant support
- (Optional) install the Prismatic VS Code extension to enable IDE integration for code-native development
Initialize a new code-native project
To create a new code-native integration project, run the following command in your terminal:
prism integrations:init todo-slack-integration
You will be prompted to give your integration a description and select a connection type (OAuth 2.0 or basic auth).
Then, a boilerplate TypeScript project will be created in the todo-slack-integration directory.
After creating the project, navigate to the new directory and install dependencies:
cd todo-slack-integration
npm install
Build and publish the integration
The boilerplate project includes a sample integration that you can build and deploy immediately.
To build the integration, run:
npm run build
This will create a production build of your integration in the dist directory.
Next, publish the integration to your Prismatic account:
prism integrations:import --open
Take a moment to explore the code in the src directory to understand how the sample integration is structured.
Key files to review:
src/index.ts: Defines the integration's metadata and references its flows and configuration pages.src/flows.ts: Contains the integration's flows, including a sample flow that retrieves data from a placeholder API.src/configPages.ts: Defines configuration pages that end users will interact with when deploying the integration. Notice how the configuration variables in the code correspond to the fields you'll see in the Prismatic UI when configuring a test integration.
Note: The boilerplate code uses a mock API endpoint. When you test the integration, you can enter any value for the "API Key" connection config variable input.
Clean up the boilerplate code
To focus on the core concepts, we'll start fresh by replacing the boilerplate code with our own implementation.
- Delete
src/client.tsandsrc/flows.test.ts - Replace the contents of
src/configPages.tsandsrc/flows.tswith the following:
- flows.ts
- configPages.ts
import { flow } from "@prismatic-io/spectral";

export const processTodoItems = flow({
  name: "Process Todo Items",
  stableKey: "process-todo-items",
  description: "Fetch items from an API and post incomplete items to Slack",
  onExecution: async (context) => {
    return Promise.resolve({ data: null });
  },
});

export default [processTodoItems];
import { configPage } from "@prismatic-io/spectral";

export const configPages = {
  Connections: configPage({
    elements: {},
  }),
};
We now have a project with a blank config wizard and a single flow that does nothing.
Fetch data from a REST API
Now that we have a blank slate, let's start building our integration by fetching data from a REST API.
We'll use axios to fetch a list of todo items from an API endpoint specified by the user (though you can use another HTTP client of your choice). For each item, we log whether the task is completed or pending.
Our configuration page now includes a configuration variable for the user to specify the API endpoint. This allows customers to use different API endpoints when they deploy our integration.
- flows.ts
- configPages.ts
import axios from "axios";
import { flow } from "@prismatic-io/spectral";

interface TodoItem {
  id: number;
  completed: boolean;
  task: string;
}

export const processTodoItems = flow({
  name: "Process Todo Items",
  stableKey: "process-todo-items",
  description: "Fetch items from an API and post incomplete items to Slack",
  onExecution: async (context, params) => {
    const response = await axios.get<TodoItem[]>(
      context.configVars["Todo API Endpoint"],
    );
    for (const item of response.data) {
      if (item.completed) {
        context.logger.info(`Completed: ${item.task}`);
      } else {
        context.logger.warn(`Pending: ${item.task}`);
      }
    }
    return { data: null };
  },
});

export default [processTodoItems];
import { configPage, configVar } from "@prismatic-io/spectral";

export const configPages = {
  Connections: configPage({
    elements: {
      "Todo API Endpoint": configVar({
        stableKey: "todo-api-endpoint",
        dataType: "string",
        description: "The endpoint for the Todo API",
      }),
    },
  }),
};
Add Slack to our project
Now that we're successfully retrieving data from the API, the next step is to send that data to Slack. We'll do that by first creating a Slack connection, then adding the Slack SDK to our project, and finally posting messages to Slack.
Create Slack connection
Slack uses OAuth 2.0 (authorization code flow) for authentication, so we'll create an OAuth 2.0 connectionConfigVar that has oauth2Type: OAuth2Type.AuthorizationCode.
We can reference Slack's documentation for the authorization and token URLs, as well as the required scopes for posting messages to Slack and listing Slack channels.
We'll hardcode the authorization URL, token URL, and scopes in our config page, since they're well-known and all customers will use the same values. However, we'll use environment variables for the client ID and client secret (which are sensitive).
You can reference environment variables in your code-native project using process.env.VARIABLE_NAME, and save them to a .env file in the root of your project.
- configPages.ts
- .env
import {
  configPage,
  configVar,
  connectionConfigVar,
  OAuth2Type,
} from "@prismatic-io/spectral";

export const configPages = {
  Connections: configPage({
    elements: {
      "Slack Connection": connectionConfigVar({
        stableKey: "slack-connection",
        dataType: "connection",
        oauth2Type: OAuth2Type.AuthorizationCode,
        inputs: {
          authorizeUrl: {
            label: "Authorize URL",
            default: "https://slack.com/oauth/v2/authorize",
            type: "string",
            shown: false,
          },
          tokenUrl: {
            label: "Token URL",
            default: "https://slack.com/api/oauth.v2.access",
            type: "string",
            shown: false,
          },
          clientId: {
            label: "Client ID",
            type: "string",
            shown: false,
            default: process.env.SLACK_CLIENT_ID,
          },
          clientSecret: {
            label: "Client Secret",
            type: "string",
            shown: false,
            default: process.env.SLACK_CLIENT_SECRET,
          },
          scopes: {
            label: "Scopes",
            type: "string",
            shown: false,
            default: "chat:write chat:write.public channels:read",
          },
        },
      }),
      "Todo API Endpoint": configVar({
        stableKey: "todo-api-endpoint",
        dataType: "string",
        description: "The endpoint for the Todo API",
      }),
    },
  }),
};
SLACK_CLIENT_ID=your-client-id
SLACK_CLIENT_SECRET=your-client-secret
After building and publishing your integration, you'll see a new Slack connection option in the Prismatic UI when configuring a test integration.
Add the Slack SDK to our project
Next, we'll add the Slack SDK to our project so we can post messages to Slack. For this tutorial, we'll use @slack/web-api. You could also use another Slack SDK or call the Slack REST API directly with your preferred Node.js HTTP client.
npm install @slack/web-api
Post messages to Slack
Now that we have a Slack connection and the Slack SDK installed, we can post messages to Slack. We'll update our flow to post a message to a Slack channel for each incomplete task we find.
We can initialize the Slack client using the OAuth 2.0 access token from our Slack connection, which we can access via context.configVars["Slack Connection"].token?.access_token.
For simplicity, we'll hardcode the Slack channel name in our code, but we'll make that configurable in the next step.
import axios from "axios";
import { WebClient } from "@slack/web-api";
import { flow, util } from "@prismatic-io/spectral";
interface TodoItem {
id: number;
completed: boolean;
task: string;
}
export const processTodoItems = flow({
name: "Process Todo Items",
stableKey: "process-todo-items",
description: "Fetch todo items from an API and send to Slack",
onExecution: async (context, params) => {
const slackClient = new WebClient(
util.types.toString(
context.configVars["Slack Connection"].token?.access_token,
),
);
const response = await axios.get<TodoItem[]>(
context.configVars["Todo API Endpoint"],
);
for (const item of response.data) {
if (item.completed) {
context.logger.info(`Completed: ${item.task}`);
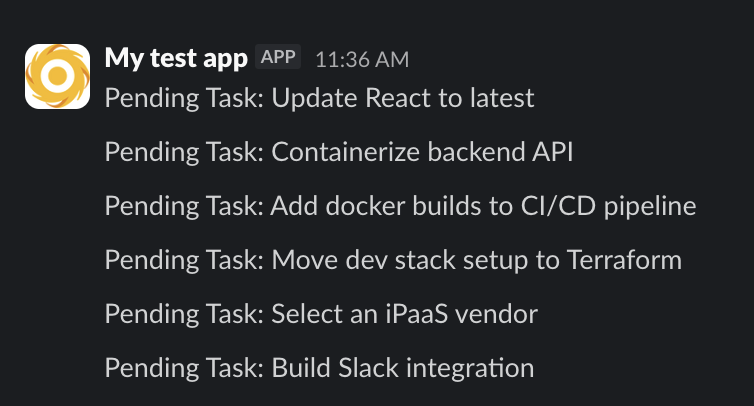
} else {
await slackClient.chat.postMessage({
text: `Pending Task: ${item.task}`,
channel: "#cni-todo-demo", // replace with your channel name
});
}
}
return { data: context.configVars };
},
});
export default [processTodoItems];
After building and testing your integration, you should see messages in your specified Slack channel for any incomplete tasks retrieved from the API.
Create Slack channel picker data source
In the previous step we hardcoded the Slack channel name in our code.
Let's make that configurable by adding a dataSourceConfigVar to our config page that retrieves a list of Slack channels using the Slack SDK.
Since our connection is on the first configPage and our data source requires the connection, we'll add a second configPage that contains the data source config variable.
We'll also extract the Slack client creation logic into a separate slackClient.ts file for better code organization, and update our flow to use the new Slack client function and config variable.
- configPages.ts
- flows.ts
- slackClient.ts
import {
  configPage,
  configVar,
  Connection,
  connectionConfigVar,
  dataSourceConfigVar,
  Element,
  OAuth2Type,
} from "@prismatic-io/spectral";
import { createSlackClient } from "./slackClient";

export const configPages = {
  Connections: configPage({
    elements: {
      // same as before
    },
  }),
  "Configure Slack": configPage({
    tagline: "Select Slack Channel",
    elements: {
      "Select Slack Channel": dataSourceConfigVar({
        stableKey: "my-select-slack-channel",
        dataSourceType: "picklist",
        perform: async (context) => {
          const slackClient = createSlackClient(
            context.configVars["Slack Connection"] as Connection,
          );
          const response = await slackClient.conversations.list({
            types: "public_channel",
          });
          const result: Element[] = (response.channels ?? [])
            .map((channel) => ({
              label: channel.name || "",
              key: channel.id || "",
            }))
            .sort((a, b) => (a.label < b.label ? -1 : 1));
          return { result };
        },
      }),
    },
  }),
};
+import { flow } from "@prismatic-io/spectral";
 import axios from "axios";
-import { WebClient } from "@slack/web-api";
-import { flow, util } from "@prismatic-io/spectral";
+import { createSlackClient } from "./slackClient";


@@ -13,10 +13,8 @@ export const processTodoItems = flow({
   stableKey: "process-todo-items",
   description: "Fetch todo items from an API and send to Slack",
   onExecution: async (context, params) => {
-    const slackClient = new WebClient(
-      util.types.toString(
-        context.configVars["Slack Connection"].token?.access_token
-      )
+    const slackClient = createSlackClient(
+      context.configVars["Slack Connection"]
     );
     const response = await axios.get<TodoItem[]>(
       context.configVars["Todo API Endpoint"]
@@ -27,7 +25,7 @@ export const processTodoItems = flow({
       } else {
         await slackClient.chat.postMessage({
           text: `Pending Task: ${item.task}`,
-          channel: "#cni-todo-demo",
+          channel: context.configVars["Select Slack Channel"],
         });
       }
     }
import { Connection, util } from "@prismatic-io/spectral";
import { WebClient } from "@slack/web-api";

export function createSlackClient(connection: Connection) {
  return new WebClient(util.types.toString(connection.token?.access_token));
}
With the new config page and data source in place, your users be able to select a Slack channel when configuring your integration.

Add a second flow that handles webhook requests
Integrations can have multiple flows, each handling different types of events or data processing. Let's add a second flow that handles incoming webhook requests.
This flow will be triggered when a new account is created in a CRM system. The CRM system sends an XML payload to our integration's webhook URL, like this:
<notification>
    <type>new_account</type>
    <account>
        <first>Nelson</first>
        <last>Bighetti</last>
        <company>
            <name>Hooli</name>
            <city>Palo Alto</city>
            <state>CA</state>
        </company>
    </account>
</notification>
We'll install an XML parser using npm install fast-xml-parser and then update our flows.ts file to add a new flow that:
- Parses the incoming XML payload in the trigger
- Passes the parsed payload to the execution step via the trigger's
body.datafield - Sends a message to Slack with details from the new account
import { flow, util } from "@prismatic-io/spectral";
import axios from "axios";
import { XMLParser } from "fast-xml-parser";
import { createSlackClient } from "./slackClient";

export const processTodoItems = flow({
  /* as before */
});

interface AccountNotificationPayload {
  notification: Notification;
}

interface Notification {
  type: string;
  account: Account;
}

interface Account {
  first: string;
  last: string;
  company: Company;
}

interface Company {
  name: string;
  city: string;
  state: string;
}

export const newAccountFlow = flow({
  name: "New Account Flow",
  stableKey: "new-account-flow",
  description: "Flow to run when a new account is created",
  onTrigger: async (context, payload) => {
    const parser = new XMLParser();
    const xmlData = parser.parse(util.types.toString(payload.rawBody.data));
    return Promise.resolve({
      payload: { ...payload, body: { data: xmlData } },
      response: { statusCode: 200, contentType: "text/plain", body: "OK" },
    });
  },
  onExecution: async (context, params) => {
    const data = params.onTrigger.results.body
      .data as AccountNotificationPayload; // Parsed XML data
    const slackClient = createSlackClient(
      context.configVars["Slack Connection"],
    );

    const message =
      `New Account Created:\n` +
      `Name: ${data.notification.account.first} ${data.notification.account.last}\n` +
      `Company: ${data.notification.account.company.name}\n` +
      `Location: ${data.notification.account.company.city} ${data.notification.account.company.state}`;

    await slackClient.chat.postMessage({
      text: message,
      channel: context.configVars["Select Slack Channel"],
    });

    return { data: null };
  },
});

export default [processTodoItems, newAccountFlow];
You can simulate the request from the CRM by taking note of your flow's webhook URL and running the following curl command:
curl -X POST "https://hooks.prismatic.io/trigger/SW5example==" \
  -H "Content-Type: application/xml" \
  -d '
<notification>
  <type>new_account</type>
  <account>
    <first>Nelson</first>
    <last>Bighetti</last>
    <company>
      <name>Hooli</name>
      <city>Palo Alto</city>
      <state>CA</state>
    </company>
  </account>
</notification>
'
Prepare for marketplace
Now that our integration is complete, we can prepare it for production use in our integration marketplace. We'll perform a few final cleanup tasks:
-
We'll add instructional text to our config pages to guide users through the configuration process. You can add any HTML you like here, including links and images.
Add helper text to config pagesexport const configPages = {Connections: configPage({elements: {Instructions:"<h2>Slack Connection</h2><p>Click the button below to authorize Acme to use your Slack account.</p>","Slack Connection": connectionConfigVar({/* Same as before */}),"Todo Instructions":"<h2>Acme Todo API</h2><p>Enter the endpoint for the Acme Todo API.</p>","Todo API Endpoint": configVar({/* Same as before */}),},}),"Configure Slack": configPage({tagline: "Select Slack Channel",elements: {"Channel Instructions":"<h2>Slack Channel</h2><p>Select the Slack channel to post todo items to.</p>","Select Slack Channel": dataSourceConfigVar({/* Same as before */}),},}),}; -
Generally, you'll want to name your integration after the app you're integrating with. Since customers will know they're configuring a Slack integration, it makes sense to rename your integration in
index.tstoname: "Slack". You should also give your integration a better description, such asdescription: "Send notifications to Slack". -
Finally, you can update the icon representing your integration. Replace
assets/icon.pngwith the below Slack logo.
Additionally, you can update the Slack connection to have a "Sign in with Slack" button by adding this to your
connectionConfigVar()after saving the below icon file to yourassetsdirectory:icons: {oauth2ConnectionIconPath: "sign_in_with_slack.png",},
With the icons in place, your users will see a more polished experience when configuring your integration.
![]()