Convert Low-Code Integrations to Code-Native
You might build a proof-of-concept integration in the low-code builder but later want to switch to code-native. You can convert your low-code integration to a code-native project two ways:
- Using the in-app Convert to Code feature
- Using the
prism integrations:convertcommand
All concepts (running steps, branching, looping, etc) in low-code have a code-native equivalent.
A "repeat for each" loop step will become a for ... of loop in code-native, for example.
The same is not true in reverse: some code-native concepts (like using Promise.all to run steps in parallel) do not have a low-code equivalent.
Converting a low-code integration to code-native is a one-way operation. You cannot convert a code-native integration back to low-code.
Option 1: Convert an integration in-app
Within the low-code builder, click the Convert to Code button in the top-right corner of the builder. This will trigger the conversion process.
From the modal that appears, you can preview the generated code-native code for your integration, its flows and configuration wizard.
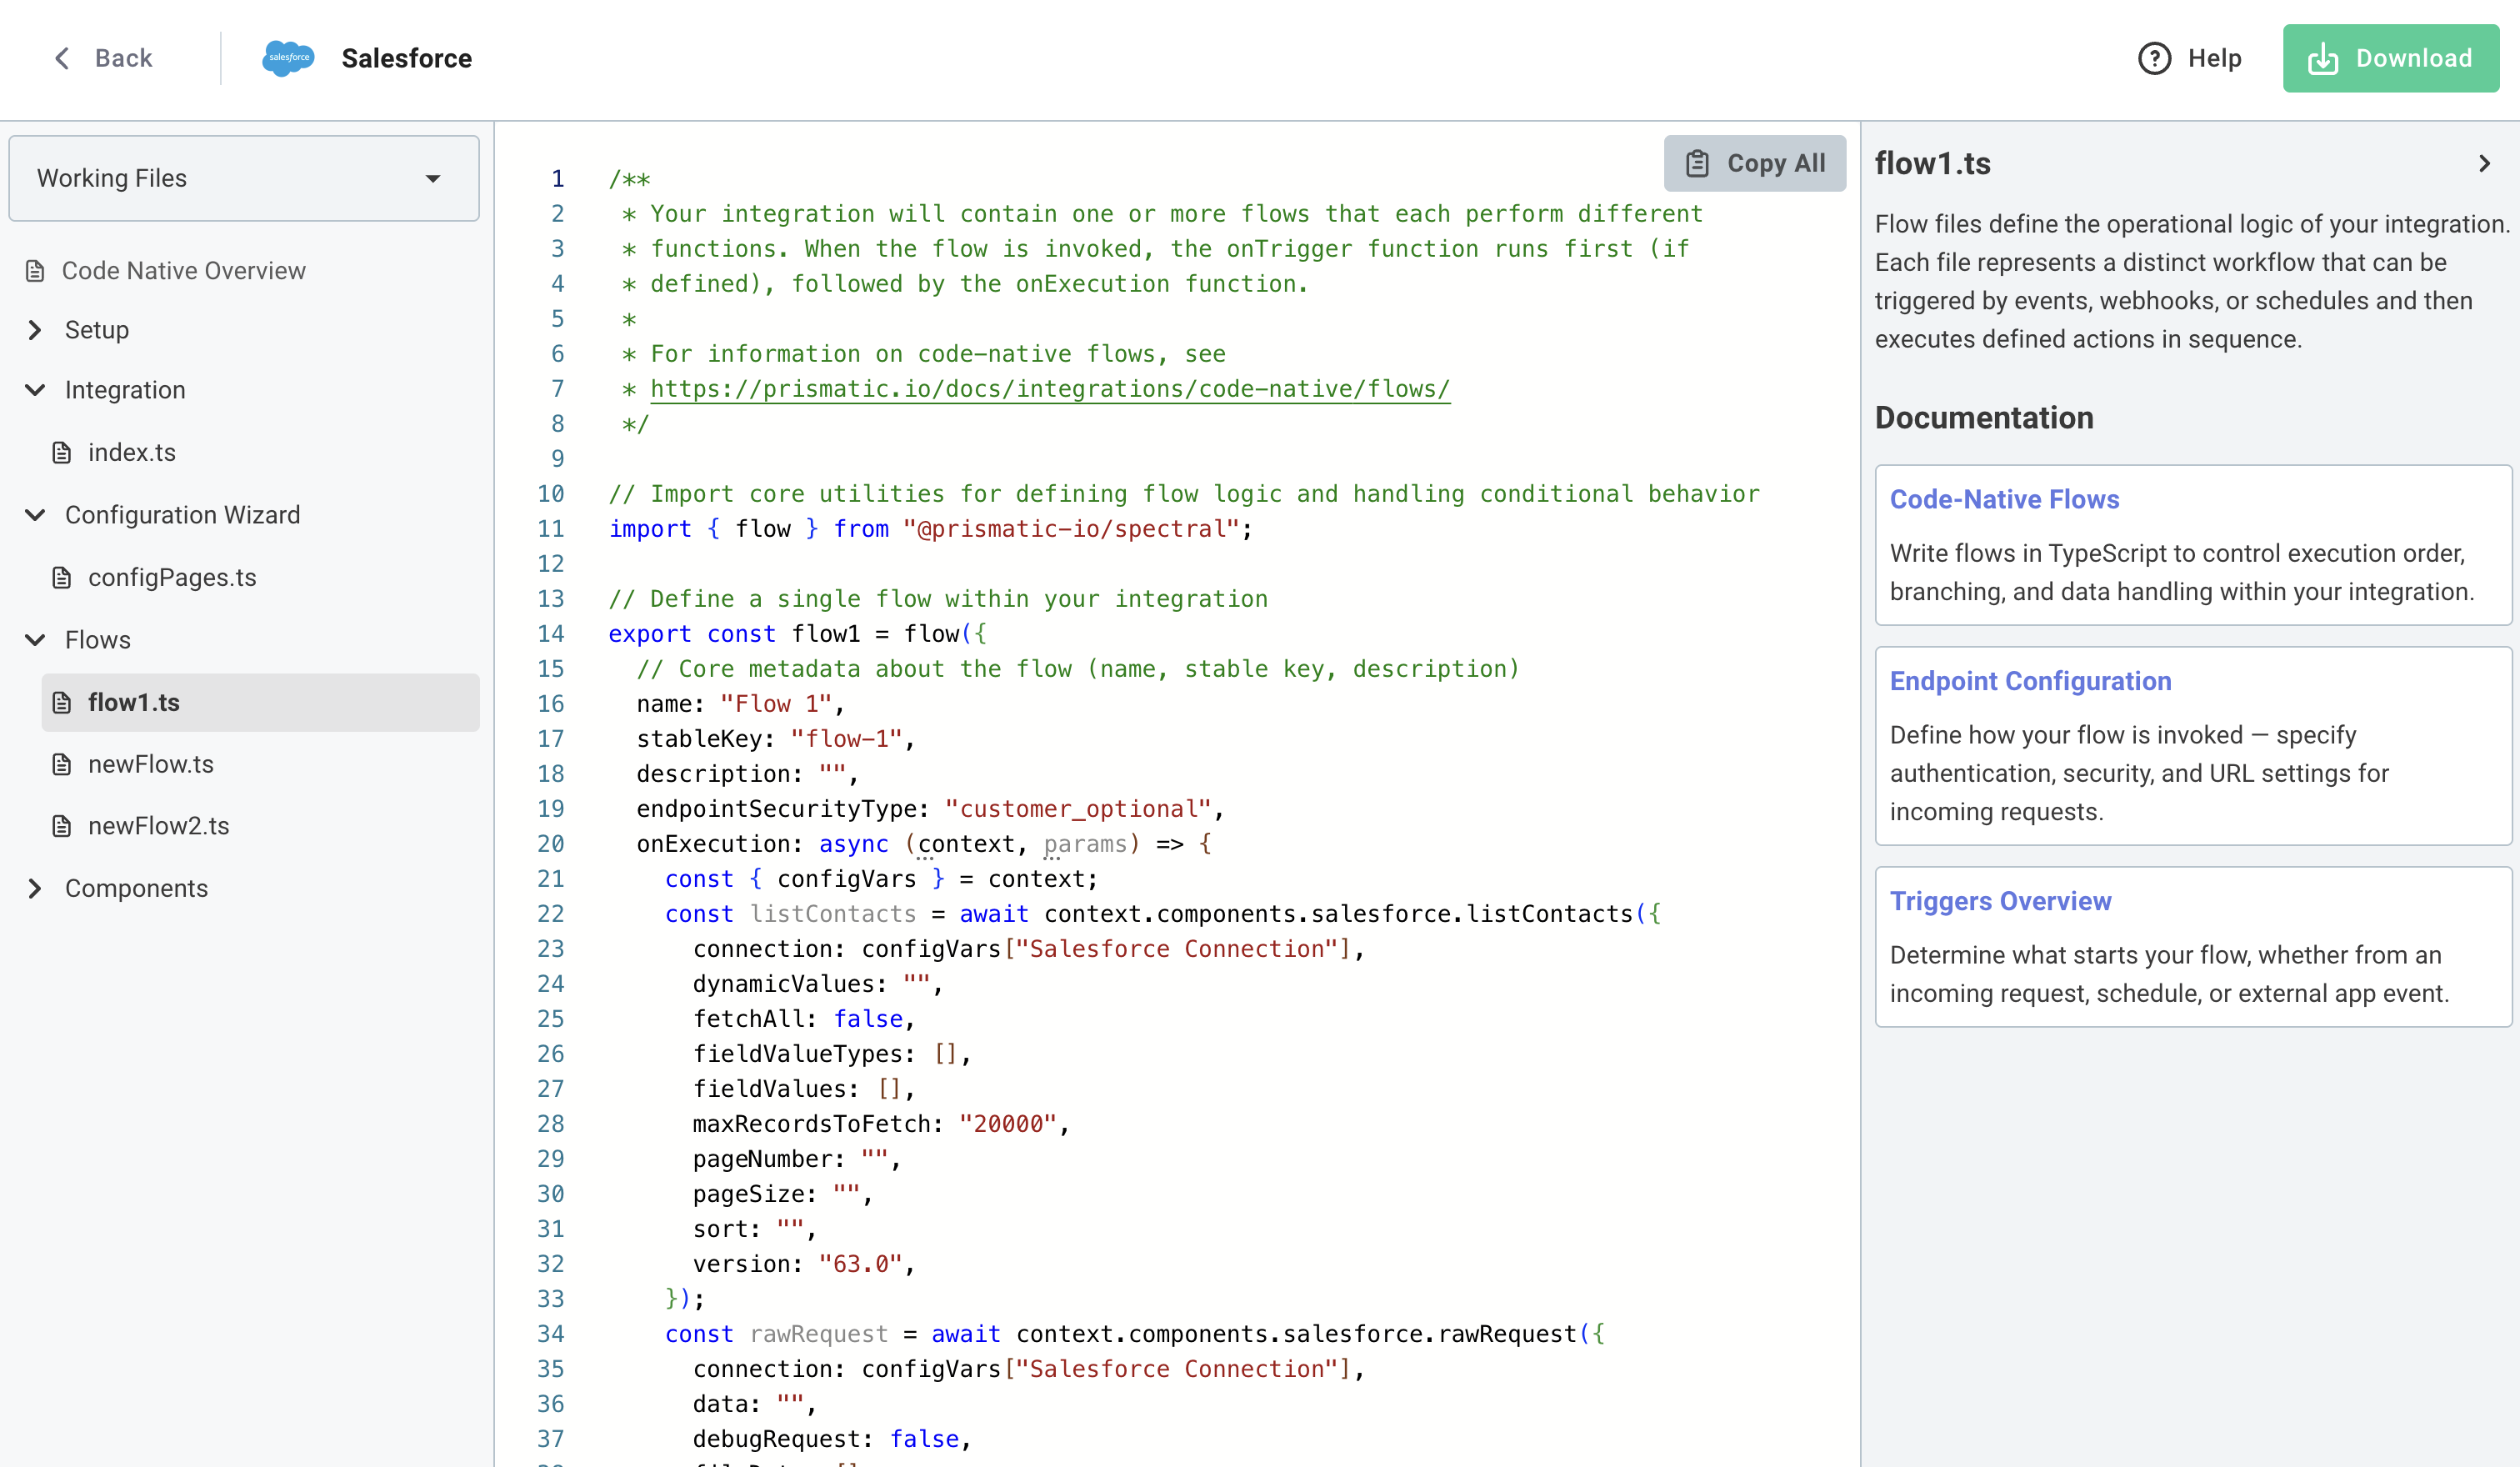
After reviewing the generated code, click Download to download a zip file of your code-native integration project.
Option 2: Convert an integration using the CLI
If you would like to use the CLI tool to convert your low-code integration to code-native, take note of the integration's ID (it's the SW5... portion of the URL when you view your integration).
Next, ensure that you have the latest version of the prism CLI tool installed. Then run the converter command:
$ prism integrations:convert SW50ExampleExampleExample

Converting low-code integration to code-native integration... done

Conversion completed successfully!

Download URL: <SOME URL>

Next steps:
  1. Download the zip file from the URL above
  2. Extract it to your desired location
  3. Run: npm install && npm update --save && npm run format

For documentation on code-native integrations, visit https://prismatic.io/docs/integrations/code-native/
The command above will yield a link to a zip file containing your generated code-native integration.
Installing dependencies
Regardless of how you obtained your generated code-native integration (in-app or CLI), navigate to the extracted project directory and install dependencies and automatically format your code:
cd path-to-unzipped-integration
npm install
npm update --save
npm run format
Handling custom components
If your low-code integration uses custom components, you can either:
- Abstract the logic in the custom component into a package that both your custom component and code-native integration use
- Invoke the custom component actions, connections, triggers, and data sources from your code-native integration
For components published to npm, install their packages and use their exported actions, connections, triggers, and data sources in the converted project. For projects that still use the converter's generated references, follow the compatibility and migration instructions.
Post-generation instructions
Depending on your integration, a few manual steps may be required to get your integration to compile and run properly.
Remove unused step result assignments
If you had a low-code step that is not referenced by a subsequent step, you may see myStep is declared but its value is never read.
When you replace a generated step with an npm component action, omit the variable assignment if nothing uses its result. In this fragment, myComponent is the package's default import:
// go from:
const myAction = await myComponent.actions.myAction({});

// to:
await myComponent.actions.myAction({});
Type API responses
Component packages include types for their action results. When you call an API directly, describe the response with a TypeScript interface so your flow can work with its fields. This example uses Axios to fetch an array of todo items:
import { flow } from "@prismatic-io/spectral";
import axios from "axios";

interface TodoItem {
  id: number;
  completed: boolean;
  title: string;
}

export const getTodoItems = flow({
  name: "Get Todo Items",
  stableKey: "get-todo-items",
  onExecution: async () => {
    const result = await axios.get<TodoItem[]>(
      "https://jsonplaceholder.typicode.com/todos",
    );
    return { data: result.data };
  },
});
Simplify conditionals in branches
To ensure that generated code-native code behaves identically to low-code branching conditionals, we import isEqual and other functions from Spectral.
These can generally be safely converted to JavaScript equivalents.
// Generated code
import { isEqual } from "@prismatic-io/spectral/dist/conditionalLogic";
if (isEqual(val1, val2)) {
  doSomething();
}

// Likely equivalent code with no import
if (val1 === val2) {
  doSomething();
}
Code component usage
If your low-code integration used code steps, invoking a code step in code-native is redundant. You can refactor your code so that you do not invoke the code step and instead run the code within your flow's code. This may require updating subsequent steps' references to your code step.
Conditional branch names
The branch component's result is the name of the branch that was traversed. Some low-code integrations use that value to determine what to do once the branch has completed.
The code-native equivalent looks like this:
let myBranchStep = "Else";
if (something()) {
  doSomethingElse();
  myBranchStep = "Unexpected Error";
} else {
  doYetAnotherThing();
  myBranchStep = "Else";
}
You can remove myBranchName if your low-code integration did not make use of the branch step's result.
Importing your converted code-native integration
You can import your converted code-native integration the same way you would import any code-native integration (with prism integrations:import).
Note: by default, a safeguard exists to prevent accidentally overwriting a low-code integration with a code-native integration.
When importing your integration, by default, a new integration will be created.
If you would like to overwrite your existing low-code integration with your new code-native one, run the import with a --replace flag:
prism integrations:import --integrationId SW5example --replace
We strongly recommend that you make a backup of your low-code integration's YAML file prior to replacing it with a code-native integration.
If you'd like to revert a code-native integration back to low code, you can issue a similar prism command using your low-code integration's definition file:
prism integrations:import --integrationId SW5example --replace --path /path/to/low-code/file.yaml
If you don't have your integration's YAML definition, you can view the YAML definition of a previously published version of your integration from the Management > Version history drawer.