Managing Customers
Creating new customers
- Web App
- CLI
- API
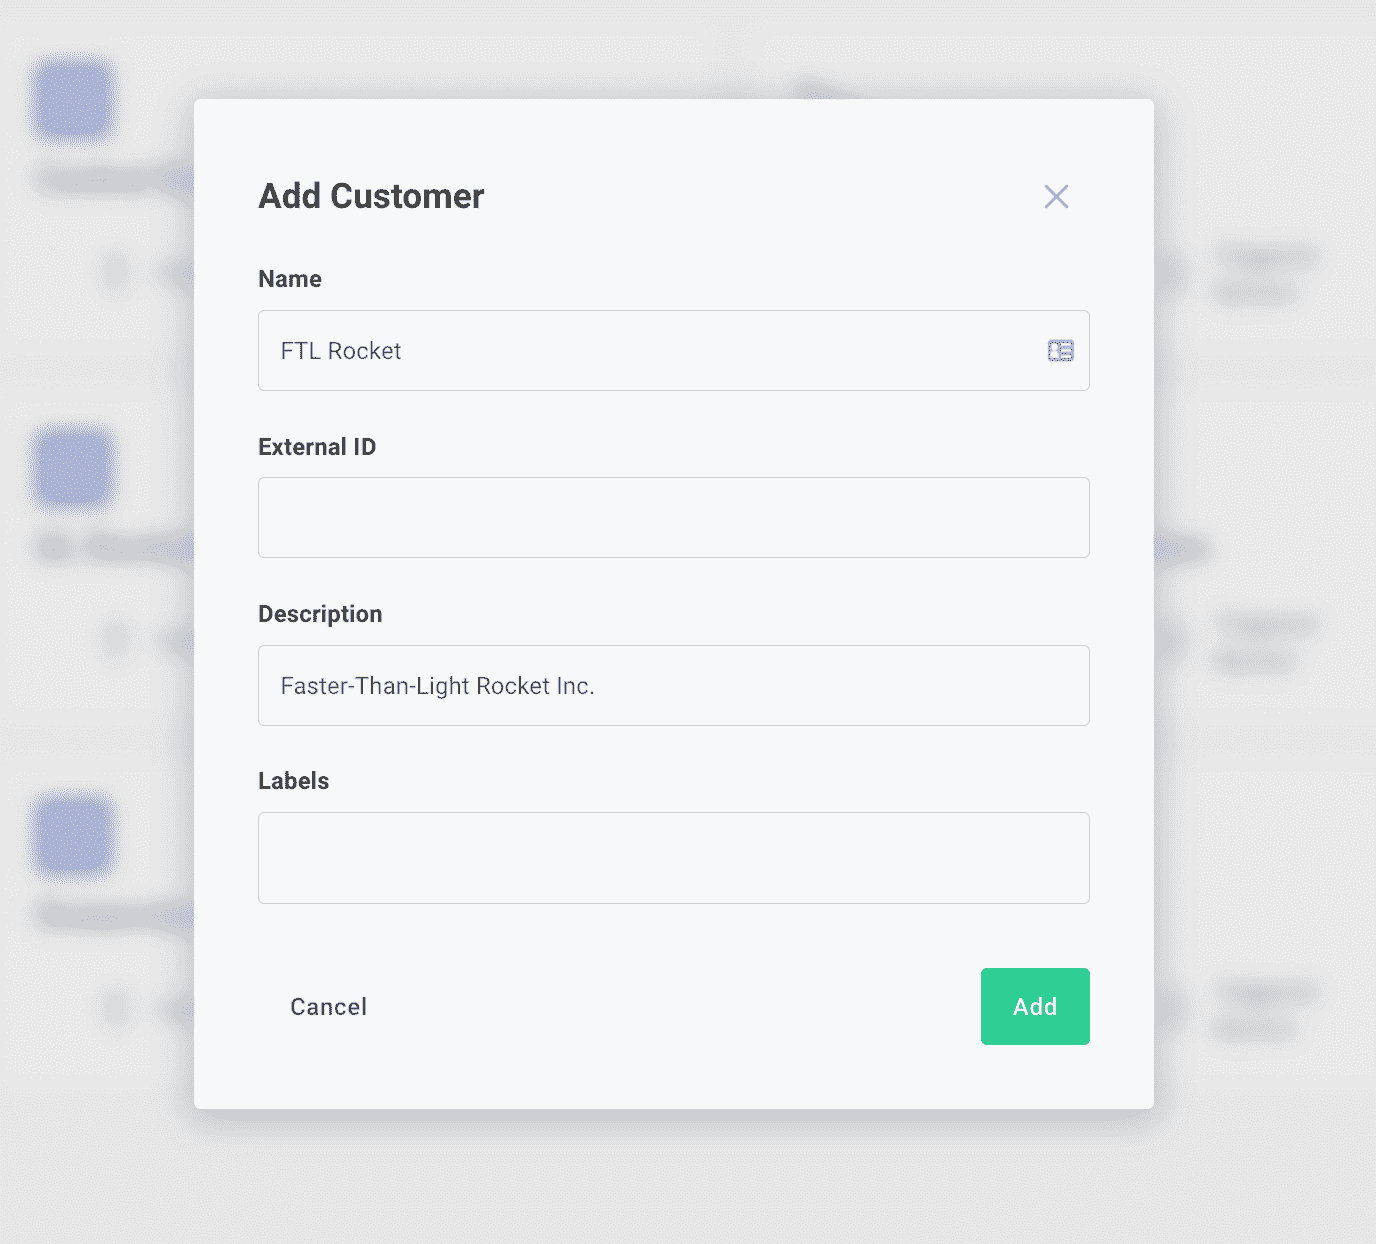
After you click the Customers link on the left-hand sidebar, click the + Add Customer button on the upper-right. Enter an appropriate name and description for your customer.
To create new customers, use the prism customers:create subcommand.
prism customers:create \
    --name 'FTL Rockets' \
    --description 'Faster-Than-Light Rocket Inc'
Create a new customer using the createCustomer) mutation:
mutation {
  createCustomer(
    input: { name: "FTL Rockets", description: "Faster-Than-Light Rocket Inc" }
  ) {
    customer {
      id
    }
  }
}
If you are using embedded to present an integration marketplace or workflow builder in your app, you do not have to create customers or customer users manually.
Customers and customer user records are automatically created for you when you sign a JWT for authentication. Embedded customer users are different from standard customer users - standard customer users require a valid email address and receive Prismatic-branded confirmation emails. Embedded customer users can have any value (like a UUID) for their unique identifier and do not receive transactional emails.
Searching customers
- Web App
- CLI
- API
After clicking the Customers link on the left-hand sidebar, you can enter a portion of a customer's name into the search bar to filter customers by name. To filter customers by description, external ID, or label instead, click the Filter button to the right of the search bar.
You can list customers using prism customers:list, and you can --filter or --sort the results:
prism customers:list --filter "Name=Smith Rocket Company"
Query customers) for a list of customers:
query {
  customers {
    nodes {
      id
      name
      description
    }
  }
}
Modifying customers
After you click the Customers link on the left-hand sidebar, you'll see a list of your customers.
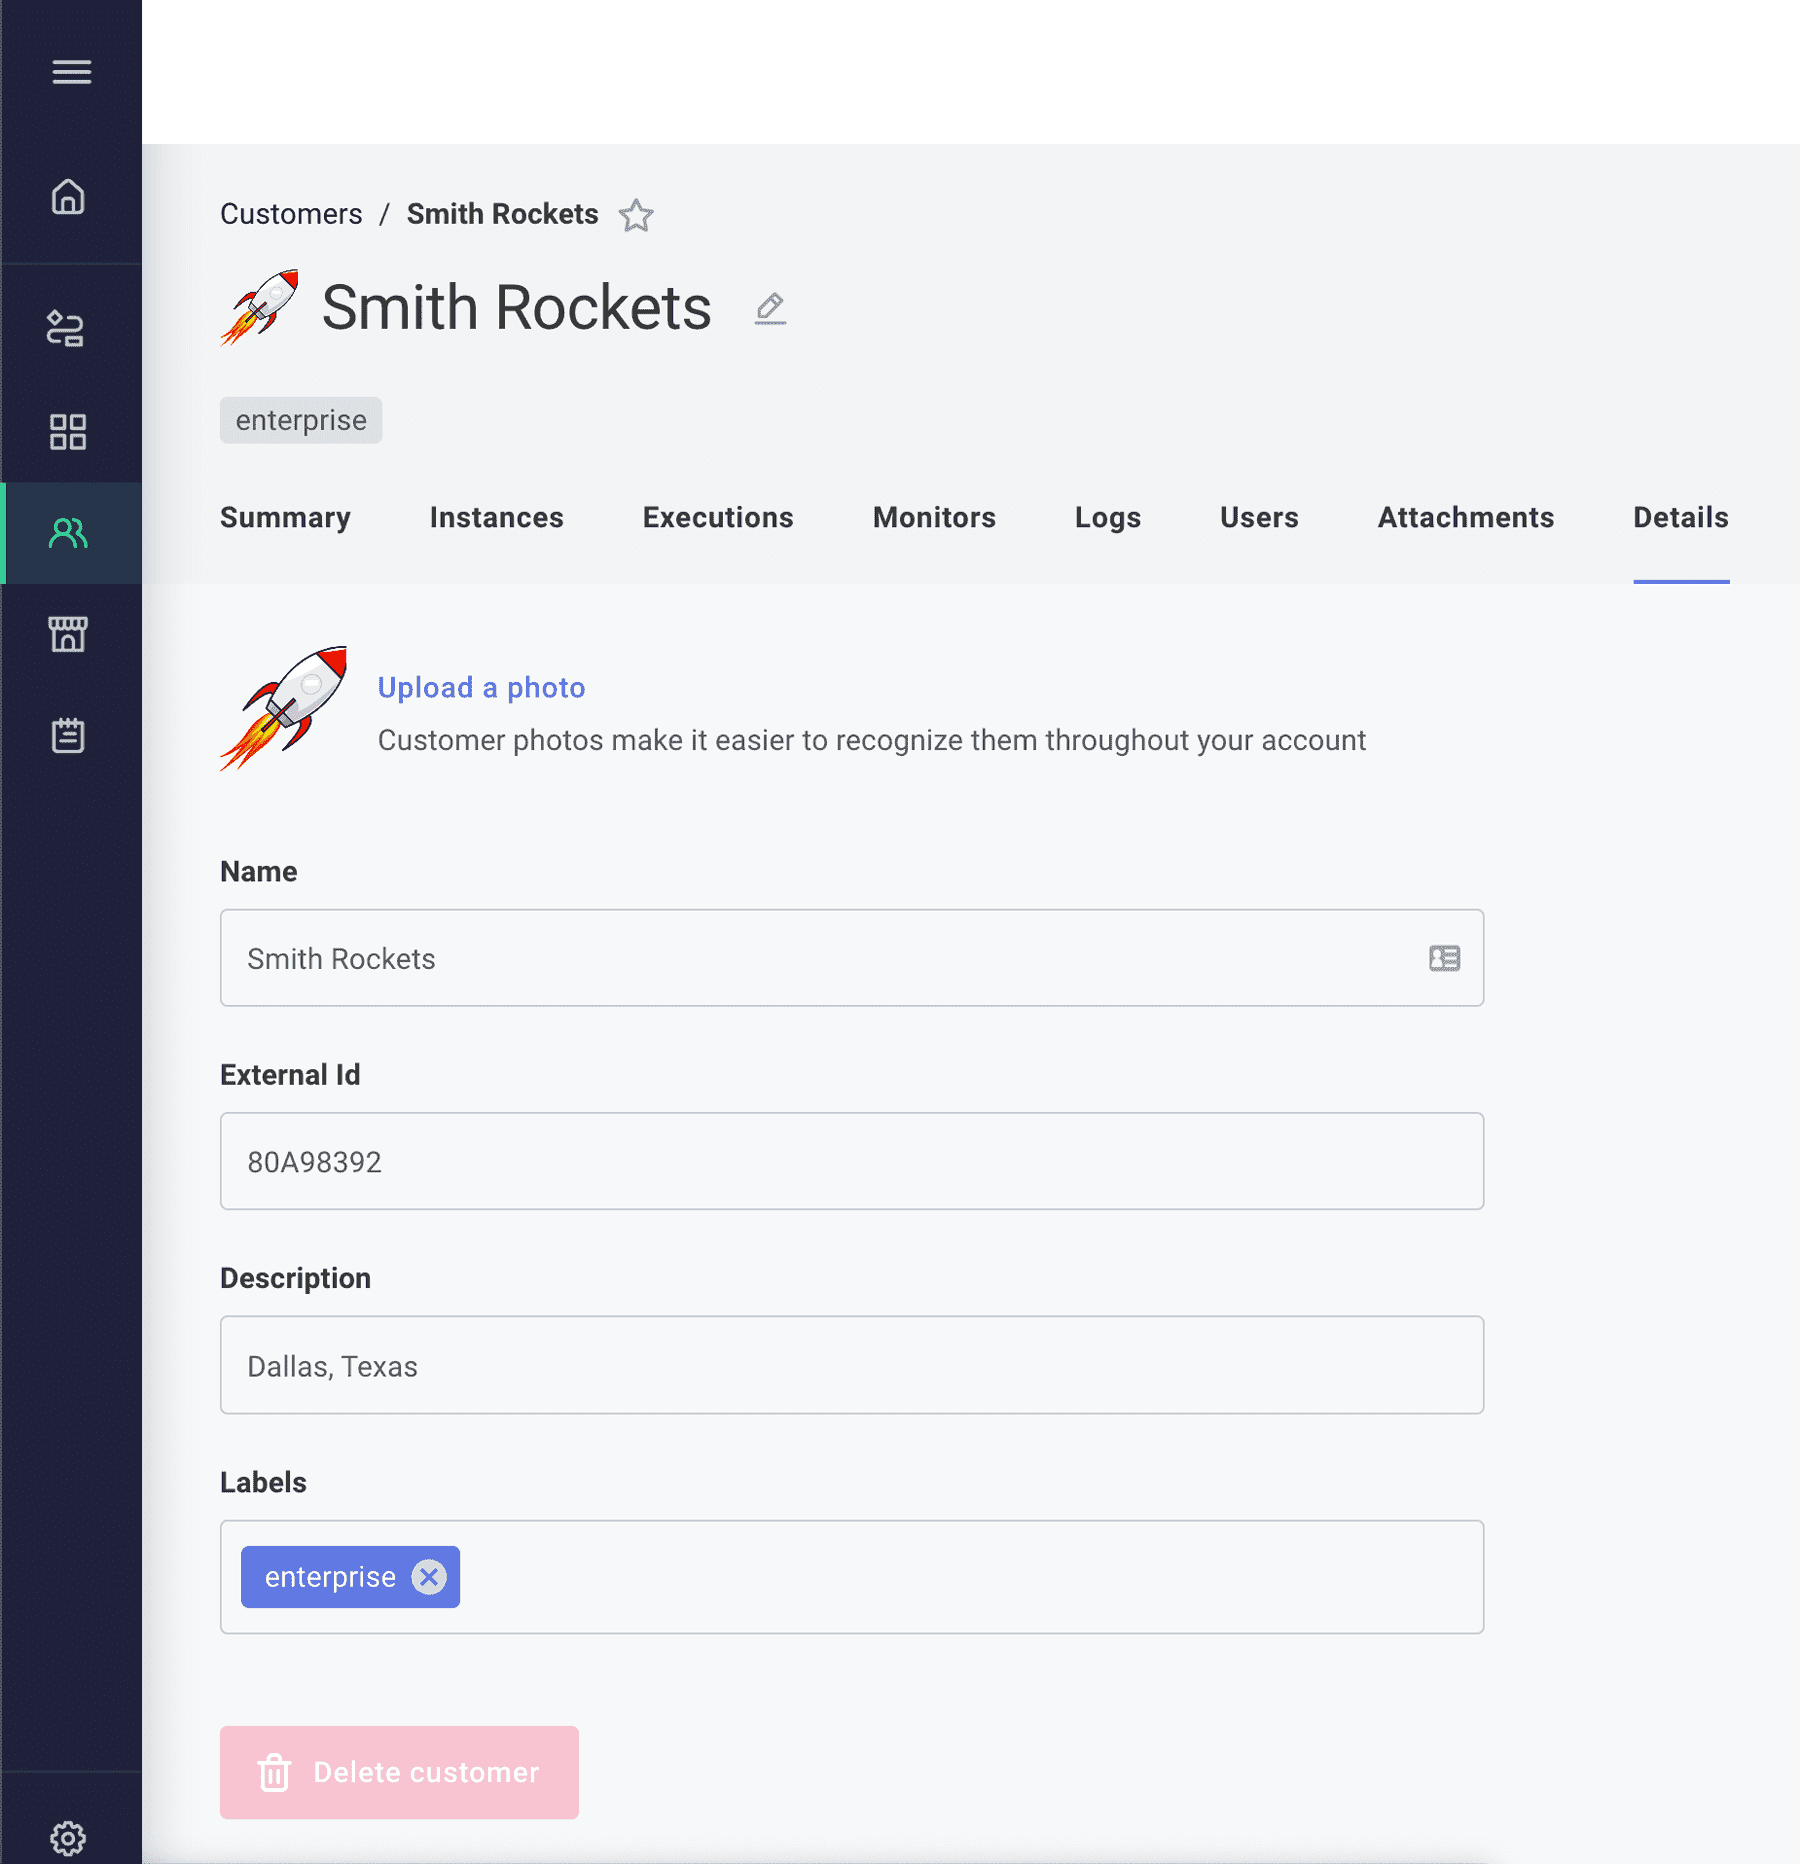
When you click a customer's name, you'll see the customer's page. This page contains a menu with options to manage instances assigned to the customer, alert monitors, logs, customer users, and file attachments.
Editing customer name, description and logo
- Web App
- CLI
- API
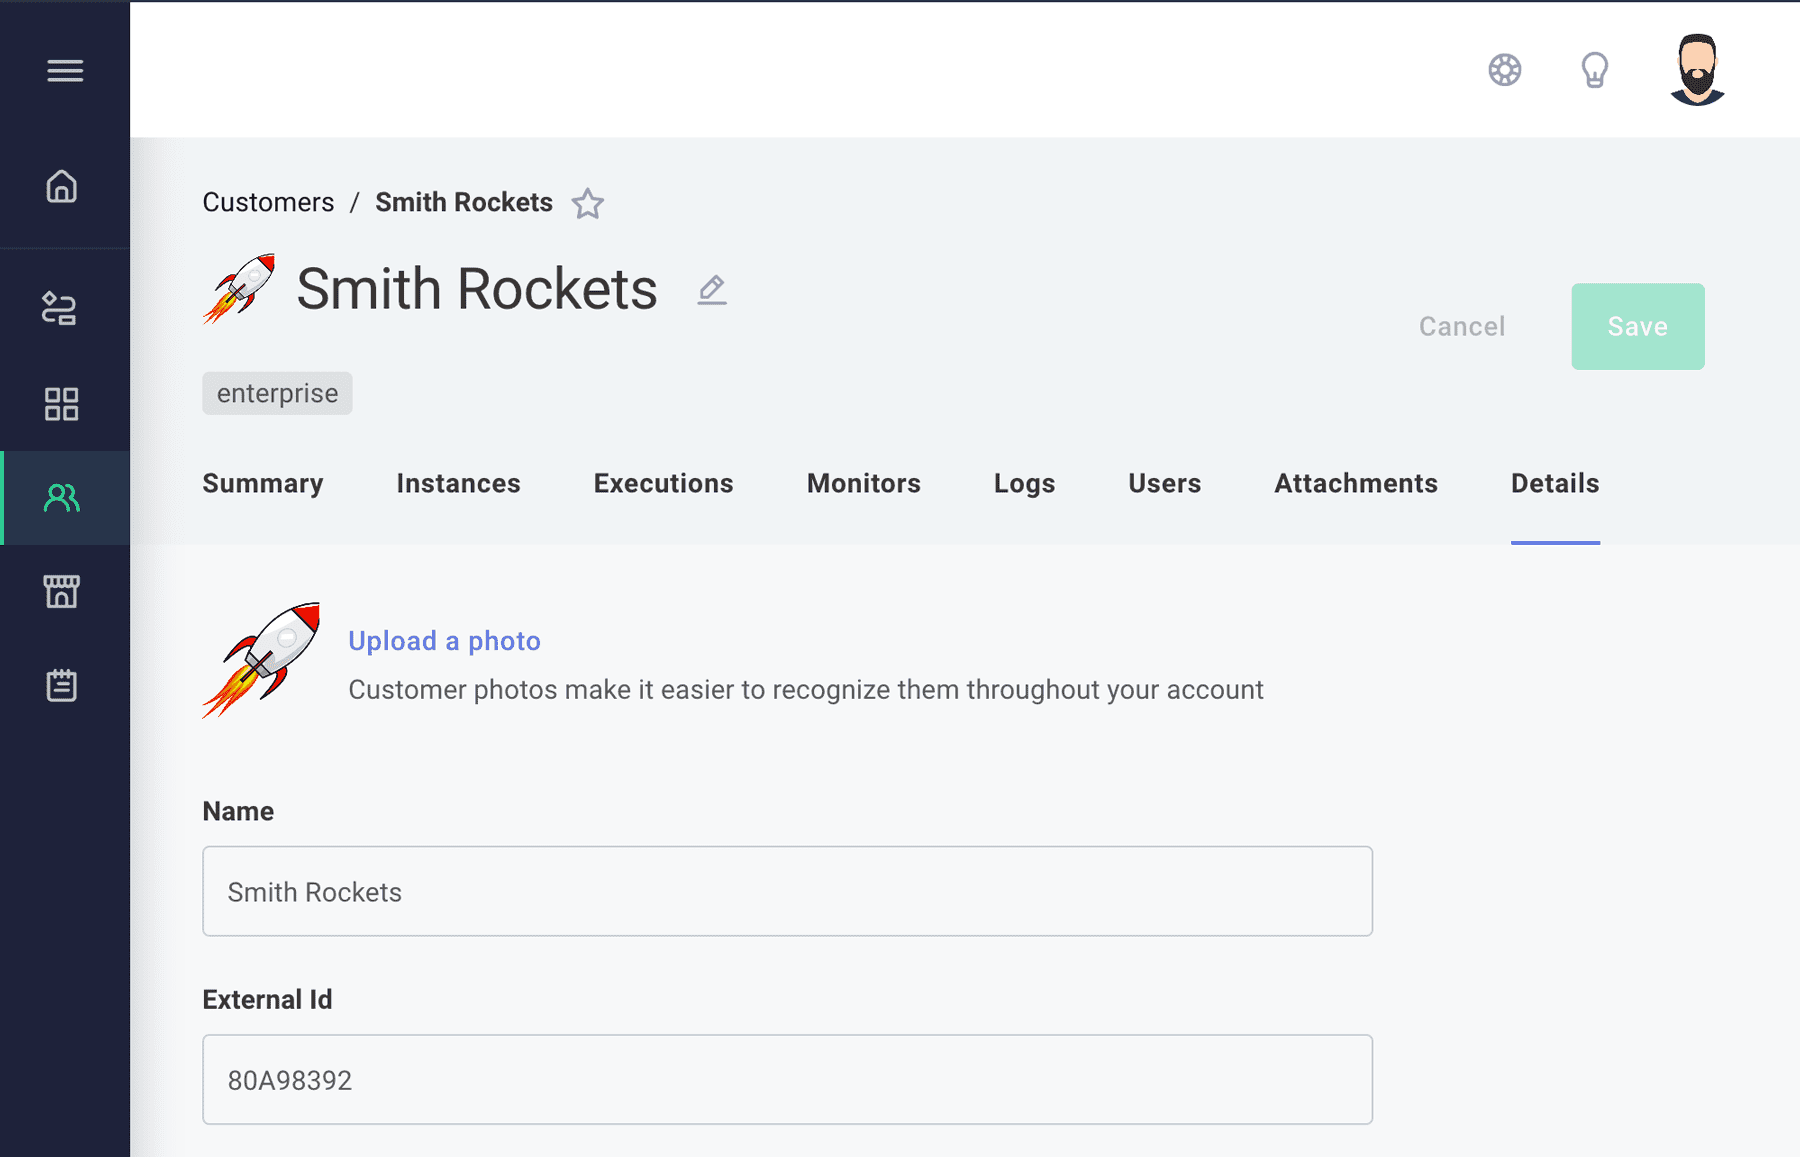
From the customer's page, you can click the Details tab at the top of the page to change the customer's name or modify the longer customer description. To modify the customer's avatar icon, click the Upload a photo link on the Details tab. The avatar icon you upload will be resized and cropped to 500 x 500 pixels. Transparent PNG images tend to look the best.
Update the customer name or description from the command line using the prism customers:update subcommand with the customer's ID:
prism customers:update \
    EXAMPLEtZXI6M2JkYzcwNTAtZTU2ZS00ZGJkLThmMzQtNWI0MDdhOTEXAMPLE \
    --name "New Customer Name" \
    --description "New Customer Description"
Use the updateCustomer) mutation to update a customer:
mutation {
  updateCustomer(
    input: {
      id: "Q3VzdG9tZXI6ZDIyOGUwNjItYzc0NC00NDFkLWE0MDMtNjQ1NTU4MDQ1OTZk"
      name: "New Customer Name"
      description: "New customer description"
    }
  ) {
    customer {
      id
    }
  }
}
Customer labels
Labels help you keep your customers organized. You can assign any number of labels to a customer from the customer's Details tab, and you can then search for customers by label. Note: Prismatic automatically converts labels to lowercase for consistency.
Deleting customers
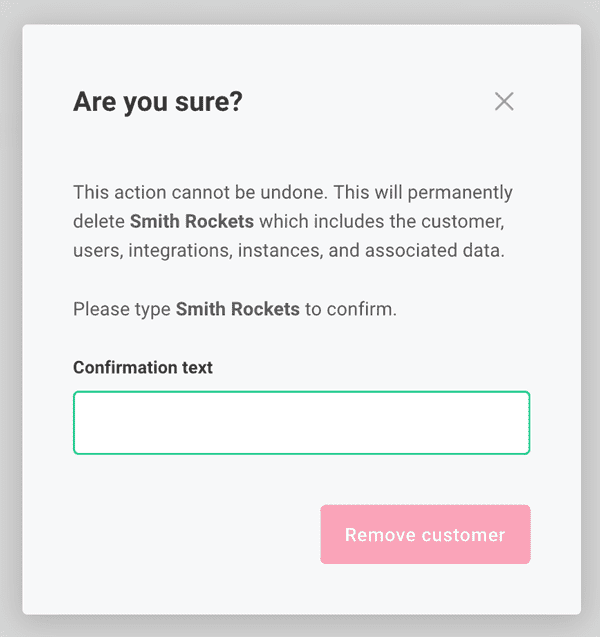
When you delete a customer, Prismatic also deletes all associated users and instances. Use caution when deleting customers.
- Web App
- CLI
- API
After you click the Customers link on the left-hand sidebar, click the name of the customer you'd like to delete, and then select the Details tab.
Verify that the name shown matches the customer you wish to delete, and click the Delete customer button. Confirm your choice by typing the customer name exactly, and then you can click Remove customer.
To delete a customer, use the prism customers:delete subcommand.
# Get the customer's ID
CUSTOMER_ID=$(prism customers:list \
                --columns id \
                --filter 'Name=^FTL Rockets$' \
                --no-header)

prism customers:delete ${CUSTOMER_ID}
Delete a customer using the deleteCustomer) mutation:
mutation {
  deleteCustomer(
    input: {
      id: "Q3VzdG9tZXI6ZDIyOGUwNjItYzc0NC00NDFkLWE0MDMtNjQ1NTU4MDQ1OTZk"
    }
  ) {
    customer {
      id
    }
  }
}
Customer external IDs
You can assign a customer an External ID - a unique identifier from an external system.
So, if you know "Smith Rocket Company" as a customer with an ID of abc-123 in another system you use, you can assign "Smith Rocket Company" in Prismatic the externalId of abc-123.
This is helpful if you need to quickly look up or associate customers in Prismatic with customers in your external system.
You can set external IDs programmatically (see the next section), or edit them within the Prismatic web app by clicking the Customers link on the left-hand sidebar, selecting a customer, and then clicking on the Details tab.
External IDs are required if you want to route webhook requests to instances deployed to specific customers using shared webhook triggers.
Per-customer execution concurrency
Per-customer execution concurrency limits are available on Enterprise plans.
You can limit the number of simultaneous executions allowed for a specific customer. This prevents a single customer's high-volume integrations from consuming a disproportionate share of your organization's total execution capacity.
When a customer reaches their limit, additional execution attempts return a 429 "too many requests" response. The number of executions rejected in the last 24 hours is visible from your organization's Settings > Execution Limits.
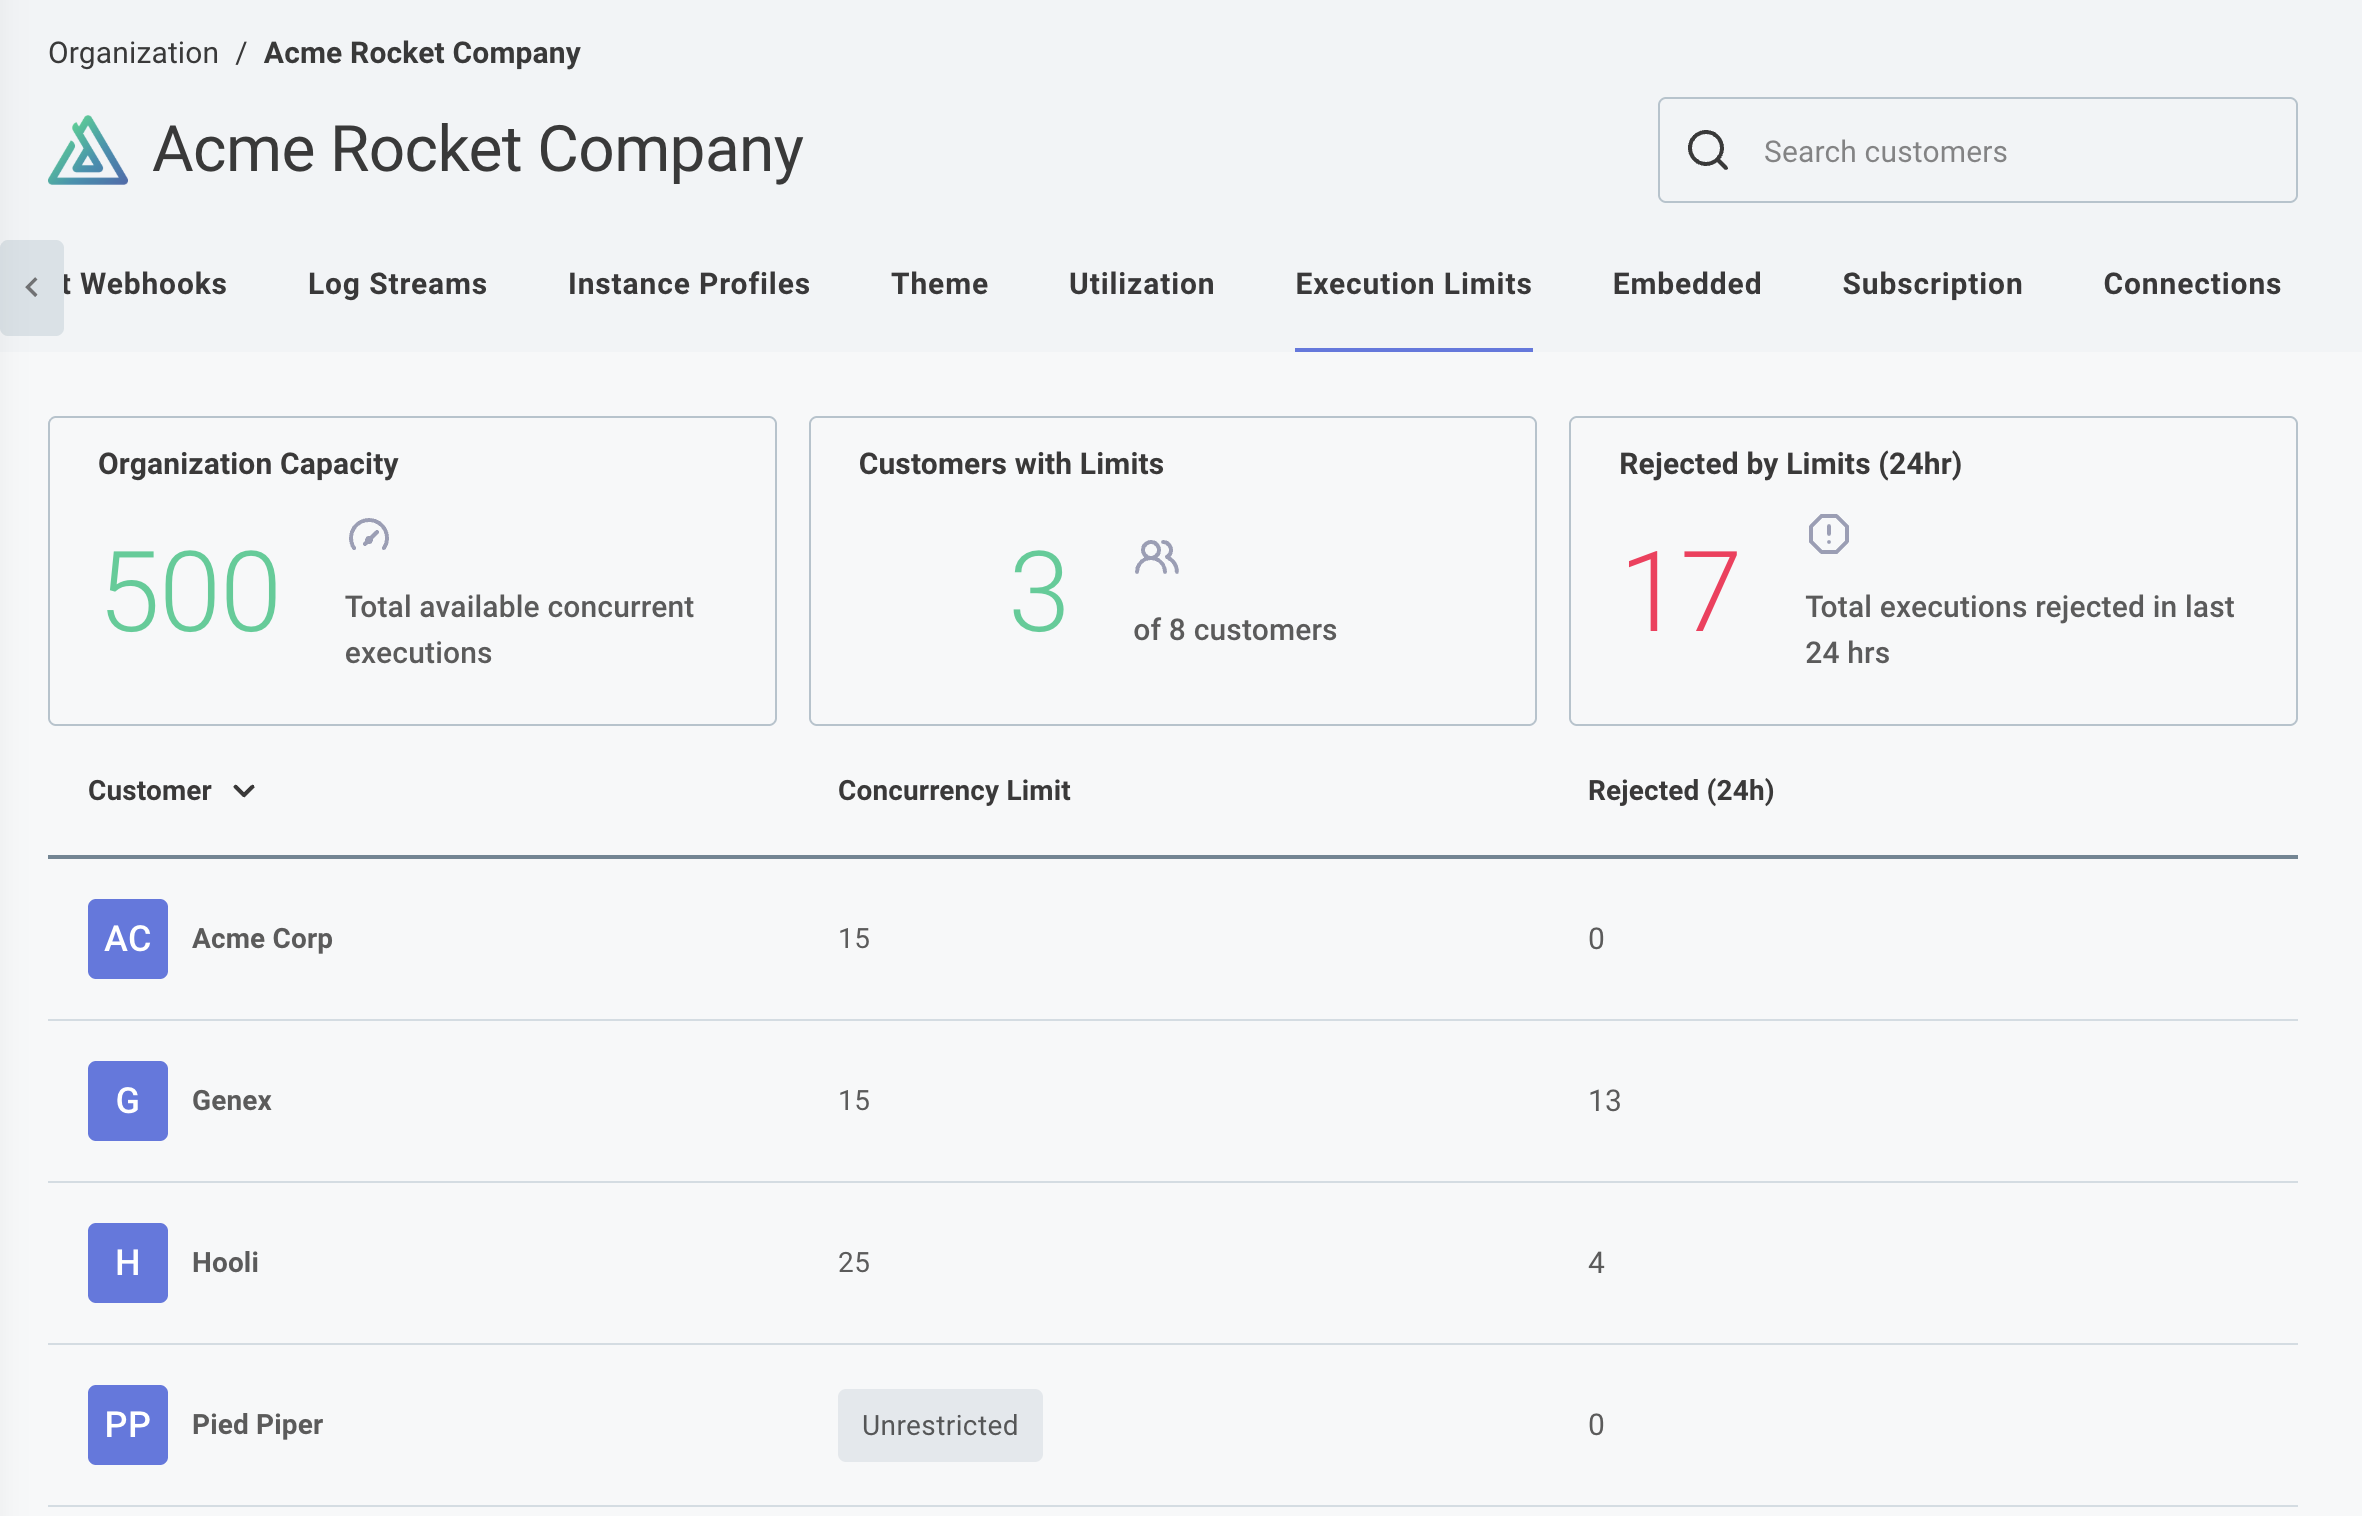
Existing customers default to Unrestricted - they are limited only by your organization's overall concurrency cap.
You can allocate more total concurrency across customers than your organization's maximum. It's unlikely all customers would hit their limits simultaneously, but if they do, the organization's overall concurrency cap still applies.
Setting a concurrency limit
- Web App
- API
You can set concurrency limits for customers two places:
- From a customer's Utilization tab you can manage that customer's concurrency limit directly.
- From your organization's Settings > Execution Limits page, you can manage all customers' limits.
When editing a customer's concurrency limit, you can choose between two options:
- Unrestricted - The customer shares your organization's overall concurrency pool with no individual cap.
- Set Limit - Enter a maximum number of concurrent executions for this customer.
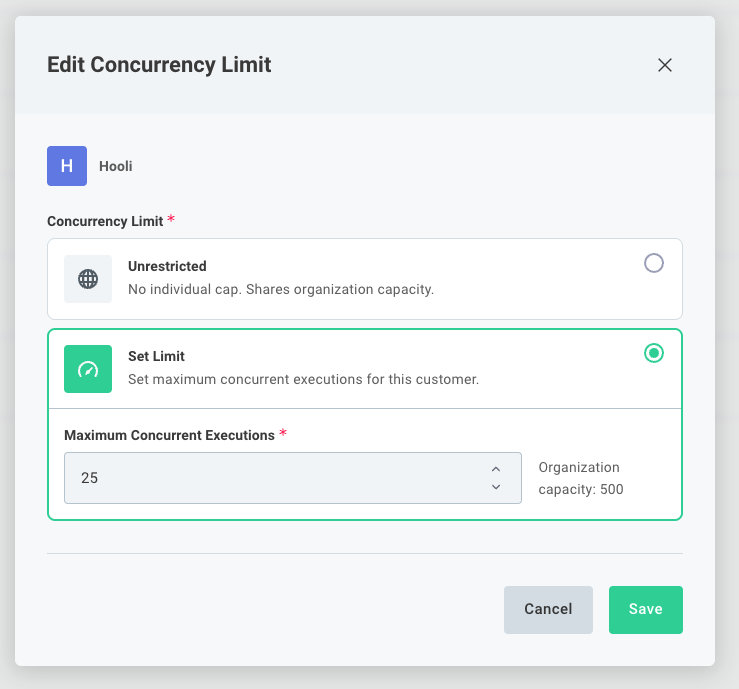
Use the updateCustomer mutation and set concurrentExecutionLimit to the desired maximum number of concurrent executions.
To remove a limit, set concurrentExecutionLimit to null.
mutation {
  updateCustomer(
    input: {
      id: "Q3VzdG9tZXI6ZDIyOGUwNjItYzc0NC00NDFkLWE0MDMtNjQ1NTU4MDQ1OTZk"
      concurrentExecutionLimit: 25
    }
  ) {
    customer {
      id
      concurrentExecutionLimit
    }
  }
}
You can also specify a concurrency limit when creating customers automatically via the concurrent_execution_limit embedded JWT claim.