Step Inputs
Actions, Triggers and Data Sources are configured via inputs.
Each input is comprised of a required label and type, and optional placeholder, default, comments, required and model.
Consider this example input:
const middleName = input({
  label: "Middle Name",
  placeholder: "Middle name of a person",
  type: "string",
  required: false,
  default: "",
  comments: "Leave blank if the user has no middle name",
  clean: (value) => util.types.toString(value),
});
This contributes to an input prompt that looks like this:

Note where the label and placeholder text appeared in the web application, and note that First Name and Last Name are required - indicated with a *, but Middle Name is not.
Input types
An input can take a number of types, which affects how the input renders in the Prismatic web application:
- string will allow users to input or reference a string of characters.

- text renders a textarea, for values that can run to more than one line. Reach for it when a value can reasonably be long, such as a message body or a description, rather than adding line breaks to a string.
- password will allow users to input or reference a string of characters, and the string will be obfuscated in the UI.

- boolean allows users to enter one of two values: true or false.

- code opens a code editor so users can enter XML, HTML, JSON, etc.
Syntax highlighting can be added to a code input's definition and can reference any language supported by PrismJS.
(e.g.
input({ label: "My Code", type: "code", language: "json" })) Two languages,htmlandmarkdown, get a rich text editor instead of the code editor.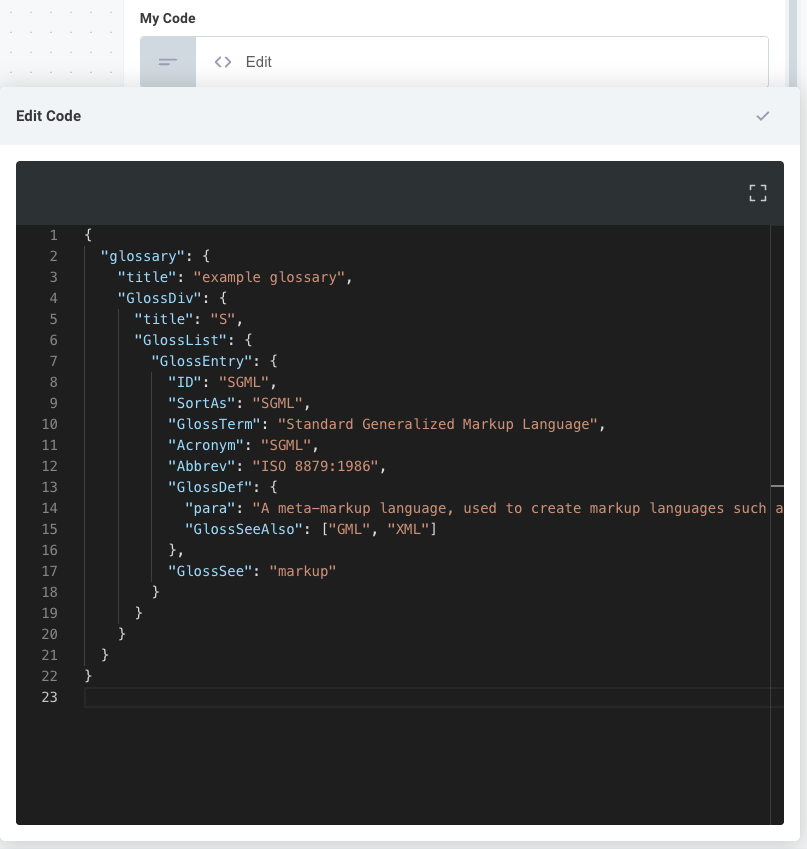
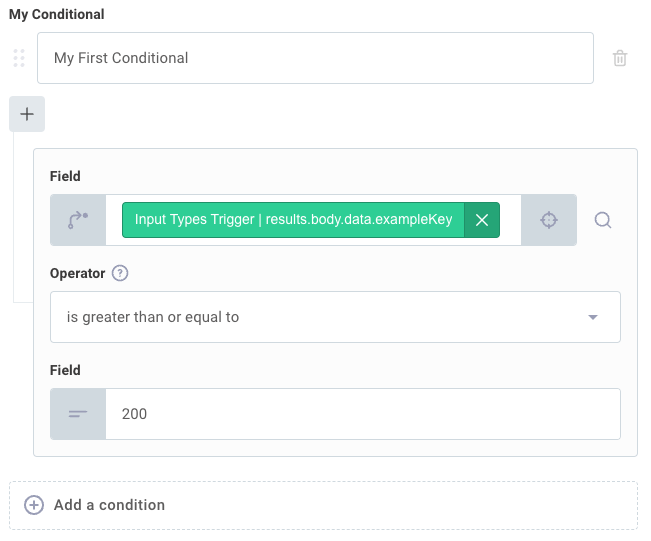
- conditional allows users to enter a series of logical conditionals.
This is most notably used in the branch component.
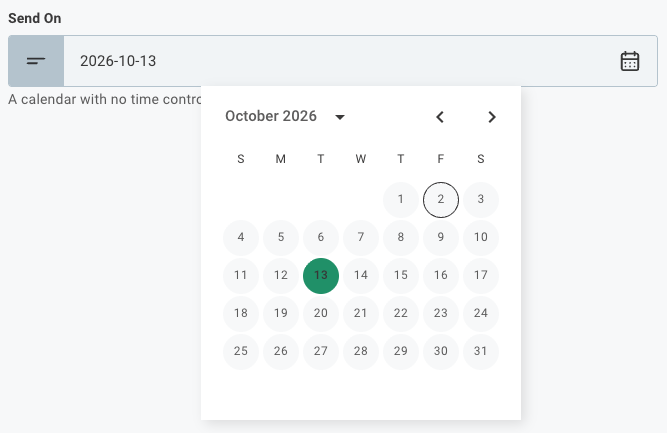
- date opens a calendar so users can select a day, with no time.
See date and timestamp inputs.
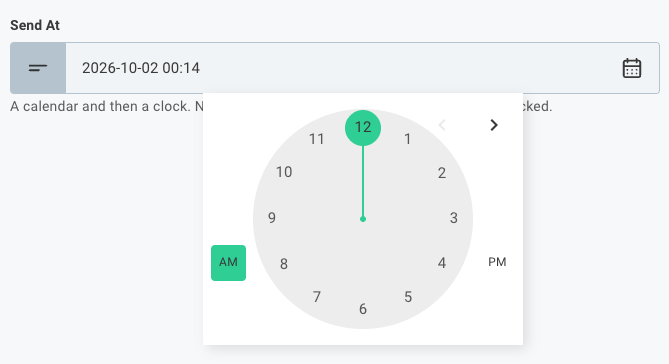
- timestamp opens a calendar and a clock so users can select a day and a time.
See date and timestamp inputs.
- number allows users to enter a whole number.
See numeric inputs.

- float allows users to enter a number with a decimal component.
See numeric inputs.

You can also create connection inputs for actions. Read more about connections.
Dropdown menu inputs
Rather than allowing integration builders to enter values for an input, you might want to have users choose a value from a list of possible values. You can do that by making your input into a dropdown menu.
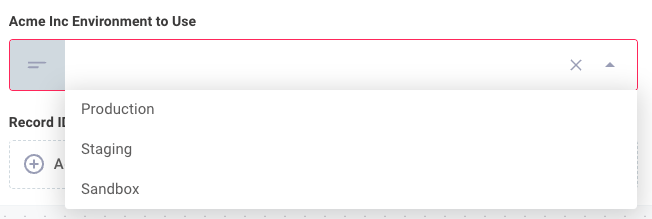
To create an input with a dropdown menu, add a model property to your input:
export const acmeEnvironment = input({
  label: "Acme Inc Environment to Use",
  placeholder: "ACME Environment",
  type: "string",
  required: true,
  model: [
    {
      label: "Production",
      value: "https://api.acme.com/",
    },
    {
      label: "Staging",
      value: "https://staging.acme.com/api",
    },
    {
      label: "Sandbox",
      value: "https://sandbox.acme.com/api",
    },
  ],
});
The model property should be an array of objects, with each object containing a label and a value.
The label is shown in the dropdown menu.
The value is passed in as the input's value to the custom component.
Collection inputs
Most inputs represent single strings. A collection input, on the other hand, represents an array of values or key-value pairs. Collections are handy when you don't know how many items a component user might need.
Value list collection
For example, your component might require an array of record to query, but you might not know how many record IDs a component user will enter.
You can create a valuelist collection in code like this:
const assetIdsInputField = input({
  label: "Asset ID(s)",
  type: "string",
  collection: "valuelist",
  required: true,
});
The corresponding UI in the integration designer would then prompt a user for any number of record IDs that they would like to enter:
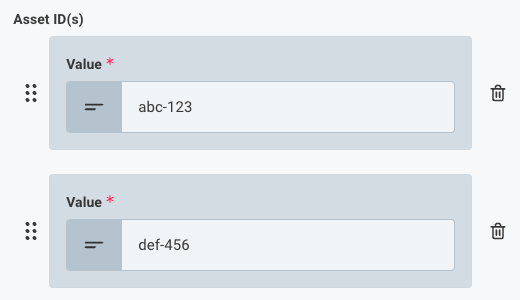
When the input is received by an action's perform function, the input is a string[].
Key value list collection
If you would like users to enter a number of key-value pairs as an input, you can use a keyvaluelist collection.
The Header input on the HTTP component actions is an example of a keyvaluelist collection, and is defined in code like this:
export const headersInputField = input({
  label: "Header",
  type: "string",
  collection: "keyvaluelist",
  required: false,
  comments: "A list of headers to send with the request.",
  example: "User-Agent: curl/7.64.1",
});
The "Header" input, then, appears like this in the integration designer:
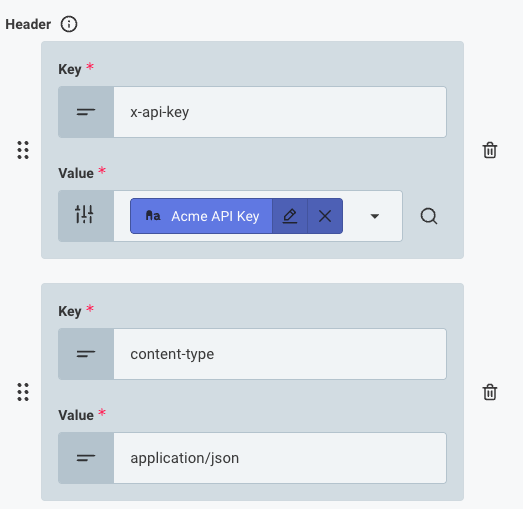
When the input is received by an action's perform function, the input is an array of objects of the form:
[
  {
    key: "foo",
    value: "bar",
  },
  {
    key: "baz",
    value: 5,
  },
];
If you would like to convert the input to a key-value pair object, you can use the built-in Spectral function, keyValPairListToObject:
import { util } from "@prismatic-io/spectral";
const myObject = util.types.keyValPairListToObject(myInput);
// { foo: "bar", baz: 5 }
Structured object inputs
A structured object input groups related sub-inputs into a single named object.
Use structuredObjectInput when an action needs to accept a complex type with named fields - such as a mailing address, a person's name, or any nested record.
The integration designer presents each sub-field as its own input row under a collapsible group.
Import structuredObjectInput from @prismatic-io/spectral and pass it a map of inputs:
import { action, input, structuredObjectInput } from "@prismatic-io/spectral";

const createContactAction = action({
  display: {
    label: "Create Contact",
    description: "Create a new CRM contact",
  },
  inputs: {
    connection: connectionInput,
    name: structuredObjectInput({
      label: "Name",
      inputs: {
        prefix: input({ label: "Prefix", type: "string" }),
        firstName: input({
          label: "First Name",
          type: "string",
          required: true,
        }),
        lastName: input({ label: "Last Name", type: "string", required: true }),
      },
    }),
    address: structuredObjectInput({
      label: "Mailing Address",
      inputs: {
        street: input({ label: "Street", type: "string" }),
        city: input({ label: "City", type: "string" }),
        state: input({ label: "State", type: "string" }),
        zip: input({ label: "Zip Code", type: "string" }),
      },
    }),
  },
  perform: async (context, inputs) => {
    // Structured inputs are plain objects - access sub-fields with dot notation
    const fullName =
      `${inputs.name.prefix ?? ""} ${inputs.name.firstName} ${inputs.name.lastName}`.trim();
    const { street, city, state, zip } = inputs.address;

    const client = createCrmClient(inputs.connection);
    return {
      data: await client.contacts.create({
        name: fullName,
        street,
        city,
        state,
        zip,
      }),
    };
  },
});
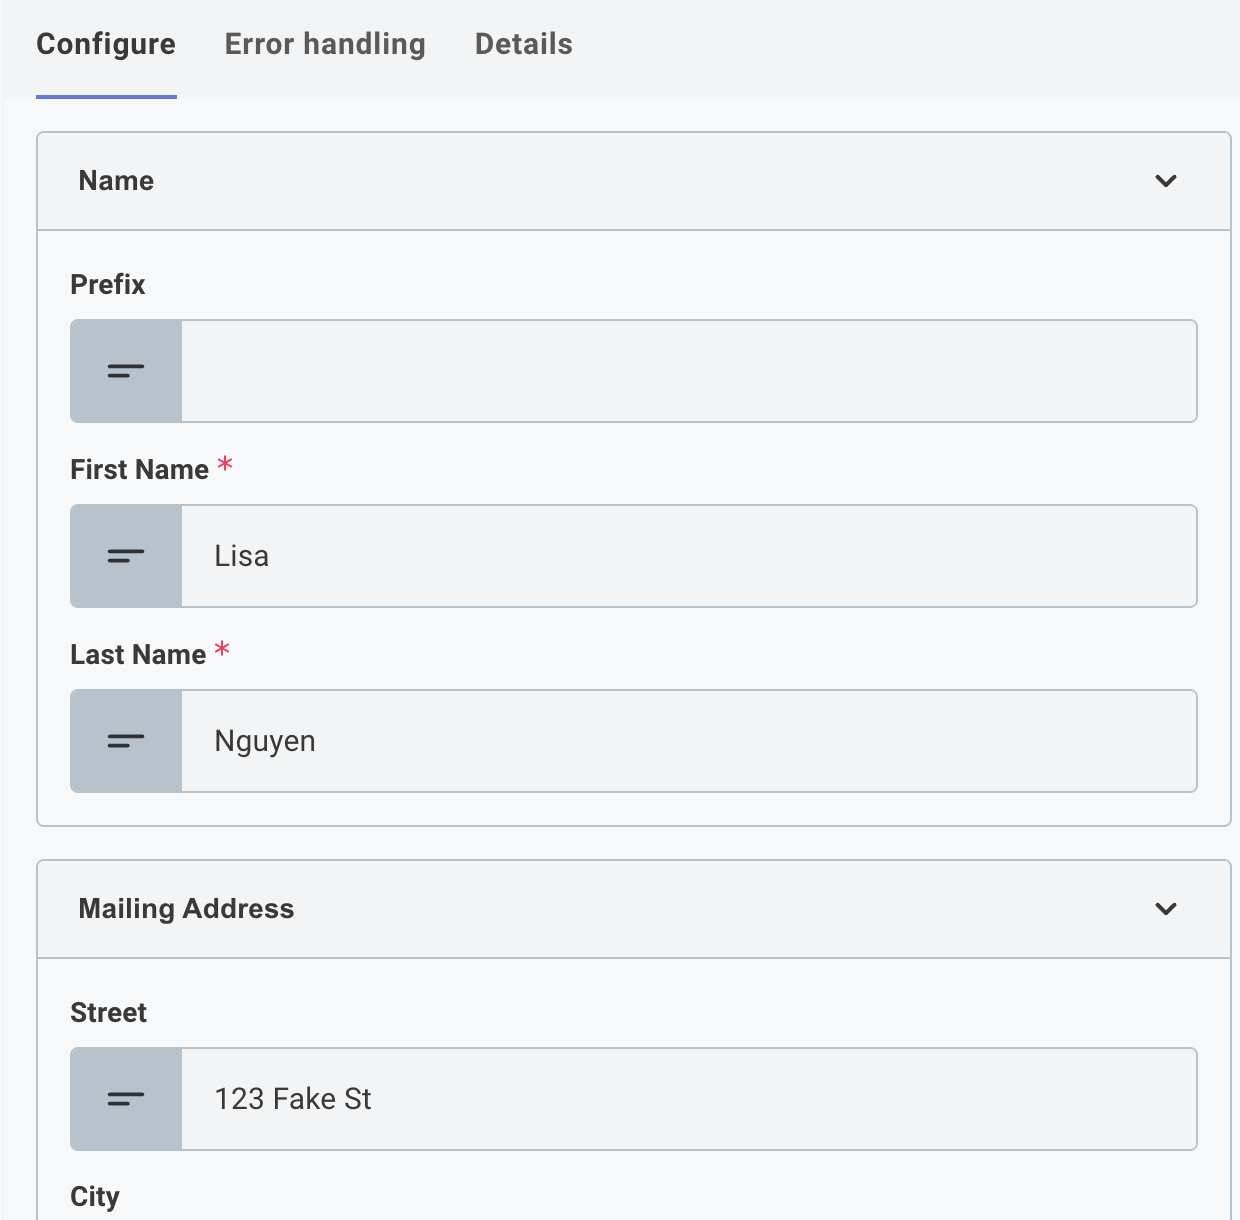
Dynamic object inputs
A dynamic object input shows a different set of sub-inputs depending on which configuration the integration builder selects. This is useful when a single action must handle multiple distinct record types - for example, creating an Account, a Lead, or a Contact in a CRM - where each type has its own fields.
Import dynamicObjectInput from @prismatic-io/spectral and define a configurations map where each key names a configuration:
import { action, input, dynamicObjectInput } from "@prismatic-io/spectral";

const createRecordAction = action({
  display: {
    label: "Create Record",
    description: "Create an Account, Lead, or Contact in your CRM",
  },
  inputs: {
    connection: connectionInput,
    record: dynamicObjectInput({
      label: "Record",
      configurations: {
        account: {
          label: "Account",
          inputs: {
            companyName: input({
              label: "Company Name",
              type: "string",
              required: true,
            }),
            industry: input({
              label: "Industry",
              type: "string",
              model: [
                { label: "Technology", value: "tech" },
                { label: "Finance", value: "finance" },
                { label: "Healthcare", value: "healthcare" },
              ],
            }),
            annualRevenue: input({ label: "Annual Revenue", type: "string" }),
          },
        },
        lead: {
          label: "Lead",
          inputs: {
            firstName: input({
              label: "First Name",
              type: "string",
              required: true,
            }),
            lastName: input({
              label: "Last Name",
              type: "string",
              required: true,
            }),
            company: input({ label: "Company", type: "string" }),
            leadSource: input({
              label: "Lead Source",
              type: "string",
              model: [
                { label: "Web", value: "web" },
                { label: "Referral", value: "referral" },
                { label: "Event", value: "event" },
              ],
            }),
          },
        },
        contact: {
          label: "Contact",
          inputs: {
            firstName: input({
              label: "First Name",
              type: "string",
              required: true,
            }),
            lastName: input({
              label: "Last Name",
              type: "string",
              required: true,
            }),
            email: input({ label: "Email", type: "string", required: true }),
            phone: input({ label: "Phone", type: "string" }),
          },
        },
      },
    }),
  },
  perform: async (context, inputs) => {
    const client = createCrmClient(inputs.connection);

    // inputs.record.configuration holds the key the builder selected.
    // inputs.record.values holds the input values for that configuration.
    if (inputs.record.configuration === "account") {
      return {
        data: await client.accounts.create({
          companyName: inputs.record.values.companyName,
          industry: inputs.record.values.industry,
          annualRevenue: inputs.record.values.annualRevenue,
        }),
      };
    }

    if (inputs.record.configuration === "lead") {
      return {
        data: await client.leads.create({
          firstName: inputs.record.values.firstName,
          lastName: inputs.record.values.lastName,
          company: inputs.record.values.company,
          leadSource: inputs.record.values.leadSource,
        }),
      };
    }

    if (inputs.record.configuration === "contact") {
      return {
        data: await client.contacts.create({
          firstName: inputs.record.values.firstName,
          lastName: inputs.record.values.lastName,
          email: inputs.record.values.email,
          phone: inputs.record.values.phone,
        }),
      };
    }
  },
});
Note that discriminated unions help in identifying the shape of inputs.record.values based on the value of inputs.record.configuration.
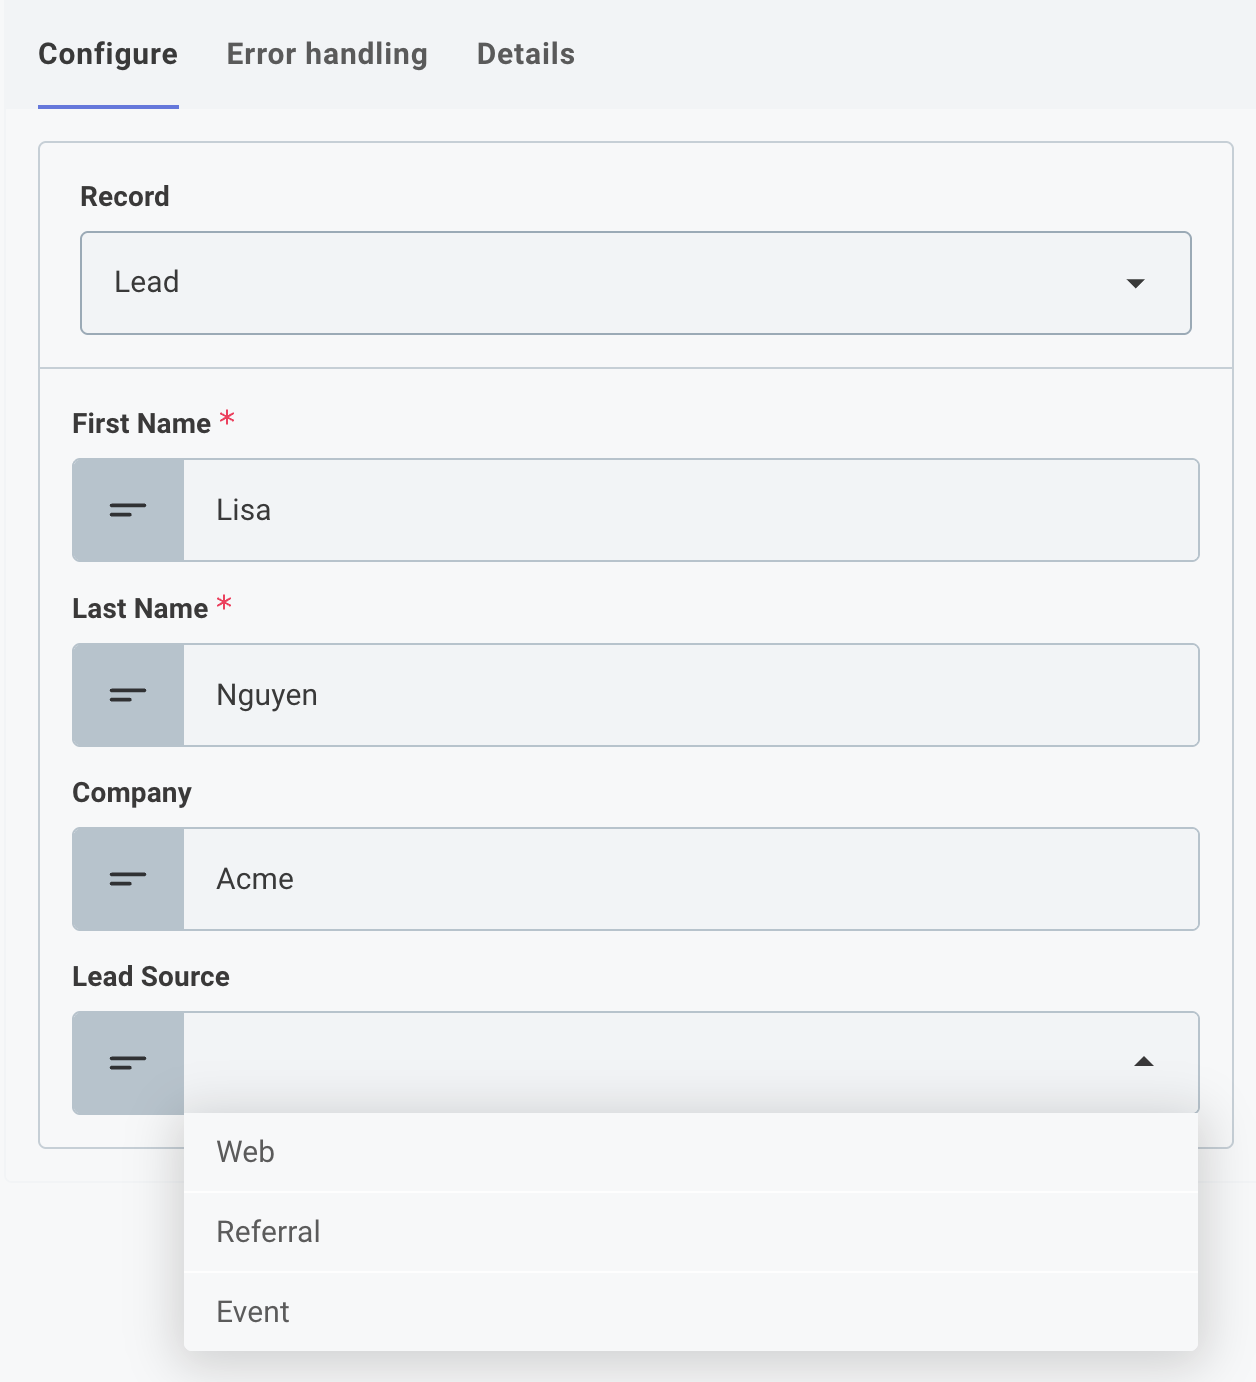
The integration designer shows a dropdown of configuration labels - Account, Lead, or Contact - and displays only the sub-inputs for the selected type.
In the perform function, inputs.record.configuration holds the selected configuration key, and inputs.record.values holds the input values the builder filled in for that configuration.
Rich text for HTML and Markdown
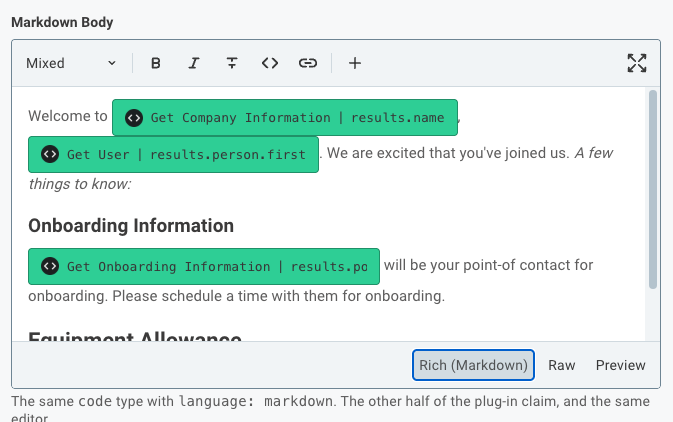
A code input whose language is html or markdown opens a rich text editor rather than the plain code editor, so your users can apply bold, italics, headings, lists and links from a toolbar instead of writing the markup by hand.
const emailBody = input({
  label: "Email Body",
  type: "code",
  language: "html",
  required: true,
  comments: "The body of the email, with formatting",
});
Nothing changes for your connector.
The value is still the HTML or Markdown source, and your perform function receives the same string it would have received from the code editor.
Two conditions have to hold for the rich text editor to appear:
- The language is exactly
htmlormarkdown. Every other language, includingjsonandjavascript, keeps the code editor. - The input is not a collection. A
valuelistorkeyvaluelistof code inputs keeps the code editor, because the rich text editor mounts on a single value.
Date and timestamp inputs
Use date when you need a calendar day, and timestamp when you also need a time on that day. The two render different pickers, and they store different strings:
| Type | What the user selects | What is stored |
|---|---|---|
| date | A day | 2026-09-30 |
| timestamp | A day and a time | 2026-09-30T14:30 |
Both arrive in your perform function as strings, not as Date objects.
If your API expects a Date, convert the value with a clean function:
const launchDay = input({
  label: "Launch Day",
  type: "date",
  required: true,
  comments: "The day the sync starts from",
  clean: (value) => util.types.toDate(value),
});
util.types.toDate throws on an empty valueAn optional date or timestamp input that the user leaves blank arrives as an empty string, and util.types.toDate("") raises Value '' cannot be coerced to date., which fails the step.
On an optional input, check for a value before converting it:
clean: (value) => (value ? util.types.toDate(value) : undefined),
A config variable of type date or timestamp stores the same strings, so an input can be filled either by hand or from a config variable and your perform function sees the same shape.
Numeric inputs
Use number for a whole number and float when a decimal component is meaningful. Both render a numeric field with stepper arrows.
Like every other input, they arrive in perform as strings.
Clean them with the coercion that matches the type, because util.types.toInt truncates a decimal that only appears at run time:
const retryCount = input({
  label: "Retry Count",
  type: "number",
  required: true,
  clean: (value) => util.types.toInt(value),
});

const matchThreshold = input({
  label: "Match Threshold",
  type: "float",
  required: true,
  clean: (value) => util.types.toNumber(value),
});
Cleaning inputs
An input can receive a string, number, boolean, buffer, or object, including values referenced from another step.
Use its clean function to convert incoming values to the type and format your action expects before perform runs.
Placeholders and help text explain what to enter; cleaning handles the value your action actually receives.
Validate requirements that type conversion alone doesn't enforce, such as an accepted date format or a number's allowed range. If a value isn't valid, throw an error that names the input and explains how to correct it. For optional inputs, decide how to handle an empty value before converting it.
When multiple actions use the same input, consider sharing the input definition to keep its help text, defaults, and cleaning consistent. When different inputs need the same conversion or validation, consider sharing that logic in a function.
For example, suppose you expect an input to be a number.
The supplied value might be a string such as "3000".
Use util.types.toNumber() in clean to pass a number to perform:
const serverPortInput = input({
  label: "Server Port",
  placeholder: "The port of the API server",
  comments: "Look for the number after the colon (my-server.com:3000)",
  type: "string",
  default: "3000",
  required: true,
  clean: (value) => util.types.toNumber(value),
});
You can also add validation to the input.
For example, if you want to validate that the input is an IPv4 IP address, you can build a more complex clean function:
const validateIpAddress = (value: unknown) => {
  const ipAddressRegex =
    /^(?:(?:2(?:[0-4][0-9]|5[0-5])|[0-1]?[0-9]?[0-9])\.){3}(?:(?:2([0-4][0-9]|5[0-5])|[0-1]?[0-9]?[0-9]))$/;
  const inputValue = util.types.toString(value);
  if (!ipAddressRegex.test(inputValue)) {
    throw new Error(`The value "${inputValue}" is not a valid IP address`);
  }
  return inputValue;
};

const ipAddressInput = input({
  label: "IP Address",
  placeholder: "Server IP Address",
  type: "string",
  default: "192.168.1.1",
  required: true,
  clean: validateIpAddress,
});
Handle complex inputs in a custom action
When an API endpoint that you're wrapping in a custom action expects a simple payload, like
POST /widgets

{
  "name": "string",
  "color": "string",
  "quantity": "number"
}
it's easy to map each value in the POST request to an input.
Here, we'd create a "name" input, a "color" input, and a "quantity" input.
Then, we'd apply a clean: util.types.toNumber clean function to the "quantity" input to ensure it is cast to a number.
But, some endpoints expect complex payloads that may contain arrays of objects with optional properties, etc.
POST /widgets
{
  "externalId": "abc-123",
  "variants": [
    {
      "name": "Variant 1",
      "color": "red",
      "price": {
        "usd": 5,
        "ca": 5.5
      }
    },
    {
      "name": "Variant 2",
      "color": "blue",
      "price": {
        "usd": 6
      }
    }
  ]
}
In this case, it's likely that an integration builder will want to construct a property like variants programmatically, and it's probably best to present two inputs, "External ID" which is type: "string" and "Variants" which is type: "code".
To accommodate both JSON and JavaScript object inputs, use the util.types.toObject function to ensure that what is entered becomes a JavaScript object.
For example,
const createWidgets = action({
  display: {
    label: "Create Widgets",
    description: "Create widgets and their variants",
  },
  inputs: {
    connection: connectionInput,
    externalId: input({
      label: "External ID",
      type: "string",
      comments: "The ID stored in Acme for this Widget type",
      clean: util.types.toString,
    }),
    variants: input({
      label: "Variants",
      comments:
        "Variant types of the widget. Ensure you provide an array of variant objects.",
      type: "code",
      language: "json",
      clean: util.types.toObject,
      example: JSON.stringify(
        [
          {
            name: "Variant 1",
            color: "red",
            price: {
              usd: 5,
              ca: 5.5,
            },
          },
          {
            name: "Variant 2",
            color: "blue",
            price: {
              usd: 6,
            },
          },
        ],
        null,
        2,
      ),
    }),
  },
  perform: async (context, inputs) => {
    const client = createAcmeClient(inputs.connection);
    const { data } = await client.post("/widgets", {
      externalId: inputs.externalId,
      variants: inputs.variants,
    });
    return { data };
  },
});