Custom Connections
Overview
A connection is a special type of input for an action that contains information about how to connect to an external application or service. A connection can contain one or more inputs representing API endpoints, keys, passwords, OAuth 2.0 fields, and other authentication details. The inputs within a connection use the same structure as other inputs, described here.
For example, suppose you're writing a component for an API that accepts either a username/password combination or an API key. You would create two connections - one for username/password authentication and one for API key authentication.
You also want to allow your customers to point to either a sandbox or production environment - each connection should include an input for the endpoint. Your connections might look like this:
import { connection } from "@prismatic-io/spectral";

// Define this once to avoid repetition in the two connections
const acmeEnvironment = input({
  label: "Acme Inc Environment to Use",
  placeholder: "ACME Environment",
  type: "string",
  required: true,
  model: [
    {
      label: "Production",
      value: "https://api.acme.com/",
    },
    {
      label: "Sandbox",
      value: "https://sandbox.acme.com/api",
    },
  ],
});

const basicAuth = connection({
  key: "basicAuth",
  display: {
    label: "Acme username and password",
    description: "Acme basic auth",
  },
  inputs: {
    username: {
      label: "Acme Username",
      placeholder: "Username",
      type: "string",
      required: true,
    },
    password: {
      label: "Acme Password",
      placeholder: "Password",
      type: "string",
      required: true,
    },
    acmeEnvironment,
  },
});

const apiKey = connection({
  key: "apiKey",
  display: {
    label: "Acme API Key",
    description: "Acme API key auth",
  },
  inputs: {
    username: {
      label: "Acme API Key",
      placeholder: "API Key",
      type: "string",
      required: true,
    },
    acmeEnvironment,
  },
});
After defining connections, include them in your component definition.
This allows users to enter connection information once and reuse it in actions that require that connection.
It also makes connections available to all inputs of type "connection" in your component:
import { component } from "@prismatic-io/spectral";

// ...

export default component({
  key: "acme",
  public: false,
  display: {
    label: "Acme Inc",
    description: "Interact with Acme Inc's API",
    iconPath: "icon.png",
  },
  actions: { myAction1, myAction2 },
  triggers: { myTrigger1 },
  connections: [basicAuth, apiKey],
});
The first connection listed in the connections: array becomes the default connection.
In this example, basicAuth would be the default connection for this component.
The default connection is recommended to users when they add an action from your component to their integration, but they can select other connection types as well.
Referencing connections as inputs in actions
Actions can reference connections like any other input.
To allow users to assign a connection to an action, create an input of type connection and add it as an input to your action:
import { action, input } from "@prismatic-io/spectral";

const connectionInput = input({ label: "Connection", type: "connection" });

export const getAcmeData = action({
  display: {
    label: "Get Item",
    description: "Get an Item from Acme",
  },
  inputs: { itemId: itemIdInput, myConnection: connectionInput },
  perform: async (context, { itemId, myConnection }) => {
    const response = axios({
      method: "get",
      url: `${myConnection.fields.acmeEnvironment}/item/${itemId}`,
      headers: {
        Authorization: `Bearer ${myConnection.fields.apiKey}`,
      },
    });
    return { data: response.data };
  },
});
Throwing connection errors
It's important to know whether a connection is valid and to track any connection failures.
Within your custom component, you can throw a ConnectionError to signal to Prismatic that there's a problem with the connection (such as inability to connect to an endpoint or invalid credentials).
For example, if you know the API returns a 401 "Unauthorized" response for invalid credentials, you could throw a ConnectionError when your HTTP client receives a status code 401:
import { action, ConnectionError, util } from "@prismatic-io/spectral";

const getItem = action({
  display: {
    label: "Get Item",
    description: "Get an item from Acme",
  },
  perform: async (context, { myConnection, itemId }) => {
    const apiKey = util.types.toString(myConnection.fields.apiKey);
    const response = await axios.get(`https://api.acme.com/items/${itemId}`, {
      headers: { Authorization: apiKey },
    });
    if (response.status === 401) {
      throw new ConnectionError(
        myConnection,
        "Invalid Acme credentials have been configured.",
      );
    }
    return {
      data: response.data,
    };
  },
  inputs: {
    myConnection: input({ label: "Connection", type: "connection" }),
    itemId: itemIdInput,
  },
});
The thrown error will be indicated by a red mark next to customers' connections on an instance, and messages will appear in logs.
Writing OAuth 2.0 connections
An OAuth 2.0 authorization code connection follows the OAuth 2.0 protocol and requires five inputs:
authorizeUrl- The URL where users authorize an OAuth 2.0 connectiontokenUrl- The URL for exchanging authorization codes for API keys and optional refresh tokens, and for refreshing API keys using refresh tokensscopes- A space-delimited list of required permissions (scopes) for your applicationclientId- Your OAuth 2.0 application's client IDclientSecret- Your OAuth 2.0 application's client secret
The first three fields are typically found in the API documentation of the service you're integrating with. Client ID and secret are created when you register an application with the third-party service.
You can allow integration builders to edit any of these fields.
Alternatively, you can mark fields as shown: false, in which case the default value will always be used and integration developers won't see the value.
For example, when writing an OAuth 2.0 connection to Google Drive, the authorizeUrl and tokenUrl are constant.
These can have default values and be marked as shown: false.
Integration developers typically need to adjust scopes, client ID, and client secret (though you may already know which scopes you need).
Here's an example connection:
import { oauth2Connection, OAuth2Type } from "@prismatic-io/spectral";

export const oauth2 = oauth2Connection({
  key: "googleDriveOauth",
  display: {
    label: "OAuth2",
    description: "OAuth2 Connection",
    icons: {
      oauth2ConnectionIconPath: "oauth-icon.png",
    },
  },
  required: true,
  oauth2Type: OAuth2Type.AuthorizationCode,
  inputs: {
    authorizeUrl: {
      label: "Authorize URL",
      placeholder: "Authorization URL",
      type: "string",
      required: true,
      shown: false,
      comments: "The Authorization URL for Google Drive.",
      default: "https://accounts.google.com/o/oauth2/v2/auth",
    },
    tokenUrl: {
      label: "Token URL",
      placeholder: "Token URL",
      type: "string",
      required: true,
      shown: false,
      comments: "The Token URL for Google Drive.",
      default: "https://oauth2.googleapis.com/token",
    },
    scopes: {
      label: "Scopes",
      placeholder: "Scopes",
      type: "string",
      required: true,
      comments:
        "Space delimited listing of scopes. https://developers.google.com/identity/protocols/oauth2/scopes#drive",
      default: "https://www.googleapis.com/auth/drive",
    },
    clientId: {
      label: "Client ID",
      placeholder: "Client Identifier",
      type: "password",
      required: true,
      comments: "The Google Drive app's Client Identifier.",
    },
    clientSecret: {
      label: "Client Secret",
      placeholder: "Client Secret",
      type: "password",
      required: true,
      comments: "The Google Drive app's Client Secret.",
    },
  },
});
oauth2Connection for OAuth ConnectionsNote that we used oauth2Connection() rather than connection() to define this OAuth connection.
That's because the oauth2Connection helper function gives us additional TypeScript hinting about what fields are required.
An oauth2Connection can be assigned to a component and referenced as an input just like a connection.
The input that is received by a perform function will have the form:
{
  "token": {
    "access_token": "EXAMPLE-TOKEN",
    "token_type": "bearer",
    "expires_in": 14400,
    "refresh_token": "EXAMPLE-REFRESH-TOKEN",
    "scope": "account_info.read account_info.write file_requests.read file_requests.write files.content.read files.content.write files.metadata.read files.metadata.write",
    "uid": "123456789",
    "account_id": "dbid:EXAMPLEIRNhsZ3wECJZ3aXK3Gm47Di74",
    "expires_at": "2021-12-07T01:54:38.096Z"
  },
  "context": {
    "code": "EXAMPLEqMEAAAAAAAAON5iBXhk_yOxjkfDeWy_vSE0",
    "state": "EXAMPLE2VDb25maWdWYXJpYWJsZTpmMDZlMDVkNy1kMjY0LTQ0YTgtYWI0Ni01MDhiOTNmZjU5ZjI="
  },
  "instanceConfigVarId": "EXAMPLE2VDb25maWdWYXJpYWJsZTpmMDZlMDVkNy1kMjY0LTQ0YTgtYWI0Ni01MDhiOTNmZjU5ZjI=",
  "key": "oauth",
  "fields": {
    "scopes": "",
    "clientId": "example-client-id",
    "tokenUrl": "https://api.dropboxapi.com/oauth2/token",
    "authorizeUrl": "https://www.dropbox.com/oauth2/authorize?token_access_type=offline",
    "clientSecret": "example-client-secret"
  }
}
You will likely want to reference myConnection.token.access_token.
You can specify what the OAuth 2.0 button looks like in the instance configuration page by specifying an optional display.icons.oauth2ConnectionIconPath (see the above example).
An icon must be a PNG file, and we recommend that it be wider than it is tall with text indicating what it does:
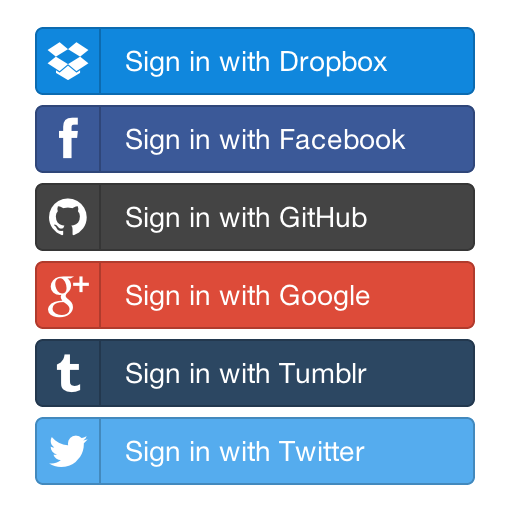
Without an oauth2ConnectionIconPath, a simple button that says CONNECT will be placed in the configuration page.
Supporting PKCE with OAuth 2.0
If the application that you are integrating with supports Proof Key for Code Exchange (PKCE), you can add PKCE to your OAuth 2.0 connection by adding a oauth2PkceMethod property.
You can specify either the plain or S256 method, or omit the property to specify "no PKCE".
export const oauth = oauth2Connection({
  oauth2Type: OAuth2Type.AuthorizationCode,
  oauth2PkceMethod: OAuth2PkceMethod.S256,
  key: "oauth",
  display: {
    label: "Airtable OAuth 2.0",
    description: "Airtable OAuth 2.0 Auth Code",
  },
  inputs: {
    // ...
  },
});
Overriding OAuth 2.0 token refresh URL
The OAuth 2.0 standard specifies that the refresh endpoint URL is the same as the token endpoint URL.
It is generally something like https://example.com/oauth2/token.
However, some OAuth 2.0 providers use a different URL for refreshing tokens.
For example, they may use /oauth2/token for the initial auth code exchange, but /oauth2/refresh for refreshing tokens.
To override the refresh endpoint URL, add a refreshUrl property to your OAuth 2.0 connection:
export const oauth = oauth2Connection({
  oauth2Type: OAuth2Type.AuthorizationCode,
  key: "oauth",
  display: {
    label: "Acme OAuth 2.0",
    description: "Acme OAuth 2.0 Auth Code",
  },
  inputs: {
    // ...
    refreshUrl: {
      label: "Refresh URL",
      placeholder: "Refresh URL",
      type: "string",
      required: true,
      shown: false,
      comments: "The Refresh URL for Acme Inc.",
      default: "https://example.com/oauth2/refresh",
    },
  },
});
Templating connection inputs
Some apps provide their customers with unique OAuth 2.0 authorization and token URLs.
When authenticating two of your customers, you may need to send one to https://hooli.acme.com/oauth/authorize and another to https://pied-piper.acme.com/oauth/authorize.
Shopify is an example of an app that provisions customers with unique OAuth endpoints.
Asking a customer to add their custom domain to several inputs (authorize URL, token URL, optional refresh URL, etc) is error-prone and not a good user experience.
That's where templated connection inputs are helpful (not to be confused with connection templates!).
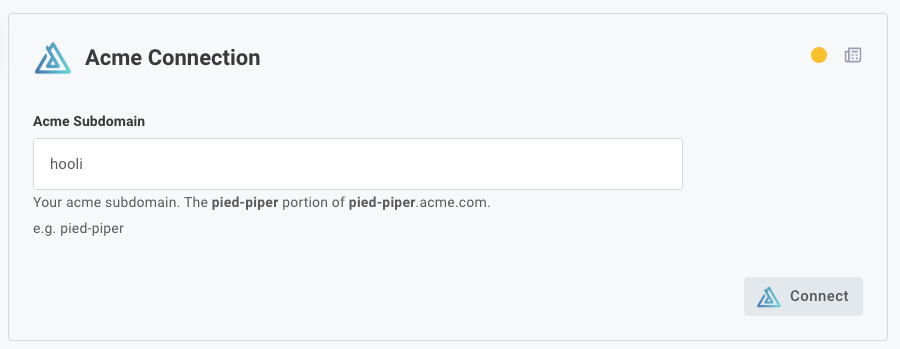
You can prompt a user for their custom domain (or other information) once, and generate other inputs' values automatically.
So, a user can enter pied-piper once, and a connection could derive an authorization URL https://pied-piper.acme.com/oauth/authorize and token URL https://pied-piper.acme.com/oauth/token automatically.
To add templated connection inputs to your custom connector, import templateConnectionInputs.
Provide user-specified or global inputs as the function's first parameter, and templated inputs as the second parameter.
In this example, we prompt a user for their Acme domain, and authorizeUrl and tokenURL are derived using domain.
import {
  OAuth2Type,
  oauth2Connection,
  templateConnectionInputs,
} from "@prismatic-io/spectral";

export const acmeOAuth = oauth2Connection({
  key: "acmeOauth",
  display: {
    label: "Acme OAuth 2.0",
    description: "Connect to Acme with OAuth 2.0 auth code flow",
  },
  oauth2Type: OAuth2Type.AuthorizationCode,
  inputs: templateConnectionInputs(
    {
      domain: {
        label: "Acme Subdomain",
        example: "pied-piper",
        type: "string",
        required: true,
        shown: true,
        comments:
          "Your acme subdomain. The **pied-piper** portion of **pied-piper**.acme.com.",
      },
      clientId: {
        label: "Client ID",
        type: "string",
        required: true,
        shown: true,
        comments:
          "Obtain by creating an OAuth app [here](https://partners.acme.com/)",
      },
      clientSecret: {
        label: "Client Secret",
        type: "password",
        required: true,
        shown: true,
        comments:
          "Obtain by creating an OAuth app [here](https://partners.acme.com/)",
      },
      scopes: {
        label: "Scopes",
        example: "widgets.read widgets.write offline_access",
        default: "widgets.read widgets.write offline_access",
        type: "string",
        required: false,
        shown: true,
        comments:
          "A space-delimited set scopes (permissions) to request from your user. Read more [here](https://acme.dev/api/usage/access-scopes#authenticated-access-scopes)",
      },
    },
    {
      authorizeUrl: {
        label: "Authorize URL",
        placeholder: "Authorize URL",
        type: "template",
        comments: "The OAuth 2.0 Authorization URL for Acme",
        templateValue: "https://{{#domain}}.acme.com/oauth/authorize/",
      },
      tokenUrl: {
        label: "Token URL",
        placeholder: "Token URL",
        type: "template",
        comments: "The OAuth 2.0 Token URL for Acme",
        templateValue: "https://{{#domain}}.acme.com/oauth/token/",
      },
    },
    OAuth2Type.AuthorizationCode,
  ),
});
Templated connection inputs are not only for OAuth 2.0 authorize and token URLs. You can use templated connection inputs for any connection type. You can also use multiple inputs within a template.
Suppose, for example, you need to build a URL using several inputs.
You could prompt a user for their username, password, host, and serviceName and template a value of https://{{#username}}:{{#password}}@{{#host}}/api/{{#serviceName}}.
Using connections with HTTP clients
While the majority of APIs you'll interact with are HTTP based, and most present a RESTful interface, not all are the same. Some APIs (like Prismatic's!) use GraphQL. Others use remote procedure calls (RPCs), like gRPC, XML RPC, or SOAP.
Luckily, there is an NPM package for almost any protocol.
- If you are working with an HTTP-based REST API, we recommend using Spectral's built-in
createClientfunction, which creates an Axios HTTP client behind the scenes with some useful settings pre-configured (see example below). If your team is more comfortable with vanilla Axios or node-fetch, you can certainly use those, too. - For GraphQL APIs, we recommend using graphql-request.
You can use a generic HTTP client, but
graphql-requestprovides a handygqlstring literal tag. - For XML RPC APIs, you can import xmlrpc into your component project, or you can reach for soap if it's a SOAP API.
- It's far less common for HTTP API integrations, but @grpc/grpc-js can be used for gRPC APIs.
Regardless of which client you use, you will likely need to set some HTTP headers for authentication, content type, etc.
Using the built-in createClient HTTP client
Spectral comes with a built-in HTTP client for integrating with REST APIs.
Behind the scenes, createClient creates an Axios-based HTTP client with some timeout, retry, and debug logic built on top of it.
You can see the source code for createClient in Spectral's GitHub repo.
To create an HTTP client, feed the client a base URL for your API along with the header information you need for authentication. You can fetch authentication values from a connection. It may look something like this:
import { createClient } from "@prismatic-io/spectral/dist/clients/http";

action({
  perform: async (context, params) => {
    // Create the authenticated HTTP client
    const myClient = createClient({
      baseUrl: "https://example.com/api",
      debug: false,
      headers: {
        "X-API-Key": params.connection.fields.apiKey,
        Accept: "application/json",
      },
      responseType: "json",
    });

    // Use the HTTP client to POST data to the API
    const response = await myClient.post("/items", {
      sku: "12345",
      quantity: 3,
      price: 20.25,
    });

    // Return the response as the action's result
    return { data: response.data };
  },
});
If you would like to see the full contents of the HTTP request and response, set debug: true.
You will see all endpoints, headers, response codes, etc. in the integration logs.
Just remember to turn off debugging for production!
Adding retry logic to your HTTP client
APIs can be unreliable. Servers go down, networks hiccup, and sometimes requests time out. An API may also return a 429 "Too Many Requests" response if your integration is sending too many requests in a short period of time.
The built-in createClient function supports automatic retries for failed requests.
You can configure retry behavior by passing a retryConfig object with the following options:
retries- The number of times to retry a failed requestretryDelay- The number of milliseconds to wait between retry attemptsuseExponentialBackoff- Whentrue, doubles the retry delay after each attempt (e.g., 2000ms, 4000ms, 8000ms, 16000ms)retryAllErrors- Whentrue, retries all errors. Whenfalse, uses theretryConditionfunctionretryCondition- A custom function that determines whether to retry based on the error. The function receives the error object and should returntrueto retry orfalseto fail immediately.
Here's a basic example that retries failed requests after 2 seconds with exponential backoff:
import { createClient } from "@prismatic-io/spectral/dist/clients/http";

action({
  perform: async (context, params) => {
    const myClient = createClient({
      baseUrl: "https://example.com/api",
      headers: {
        "X-API-Key": params.connection.fields.apiKey,
        Accept: "application/json",
      },
      responseType: "json",
      retryConfig: {
        retries: 3, // Retry up to 3 times
        retryDelay: 2000, // Start with 2 second delay
        useExponentialBackoff: true, // 2s, 4s, 8s delays
      },
    });

    const response = await myClient.post("/items", {
      sku: "12345",
      quantity: 3,
    });

    return { data: response.data };
  },
});
You can also configure retries to occur only for specific error conditions. For example, if you want to retry only when the API returns a 429 "Too Many Requests" status code:
import { createClient } from "@prismatic-io/spectral/dist/clients/http";

action({
  perform: async (context, params) => {
    const myClient = createClient({
      baseUrl: "https://example.com/api",
      headers: {
        "X-API-Key": params.connection.fields.apiKey,
        Accept: "application/json",
      },
      responseType: "json",
      retryConfig: {
        retries: 5, // Retry up to 5 times for rate limiting
        retryDelay: 1000, // Wait 1 second between retries
        retryCondition: (error) => {
          // Only retry if we get a 429 status code
          return error.response?.status === 429;
        },
      },
    });

    const response = await myClient.post("/items", {
      sku: "12345",
      quantity: 3,
    });

    return { data: response.data };
  },
});
You can combine useExponentialBackoff with retryCondition to implement sophisticated retry logic.
For example, you could use exponential backoff specifically for rate limiting errors while letting other errors fail immediately.
Using existing component connections in data sources
You may want to extend an existing component to populate a config variable. For example, you may want to fetch and filter specific information from a CRM or ERP and present the data to your user as a picklist menu. Your data source can reference any existing connection config variable - including those from built-in components.
To use an existing component's connection, reference its connection's key names.
The AWS Glue component , for example, has an accessKeyId and secretAccessKey.
Your data source can reference those with:
{
  perform: async (context, params) => {
    const { accessKeyId, secretAccessKey } = params.myConnection.fields;
  };
}
The field that you likely need to use for OAuth 2.0 connections is the connection's access_token, which is nested under token like this:
{
  perform: async (context, params) => {
    const myAccessToken = params.myConnection.token.access_token;
  };
}
An example of reusing existing connections is available in the Building a Field Mapper Data Source tutorial which covers pulling down custom fields from Salesforce.