Connections
Connections contain the information necessary for the steps in your integration to connect to third-party apps and services. They're a special type of config variable that is made up of fields for things like usernames, passwords, API keys, OAuth 2.0 secrets, host endpoints, API versions, and more - whatever a component needs to know to connect to an outside service.
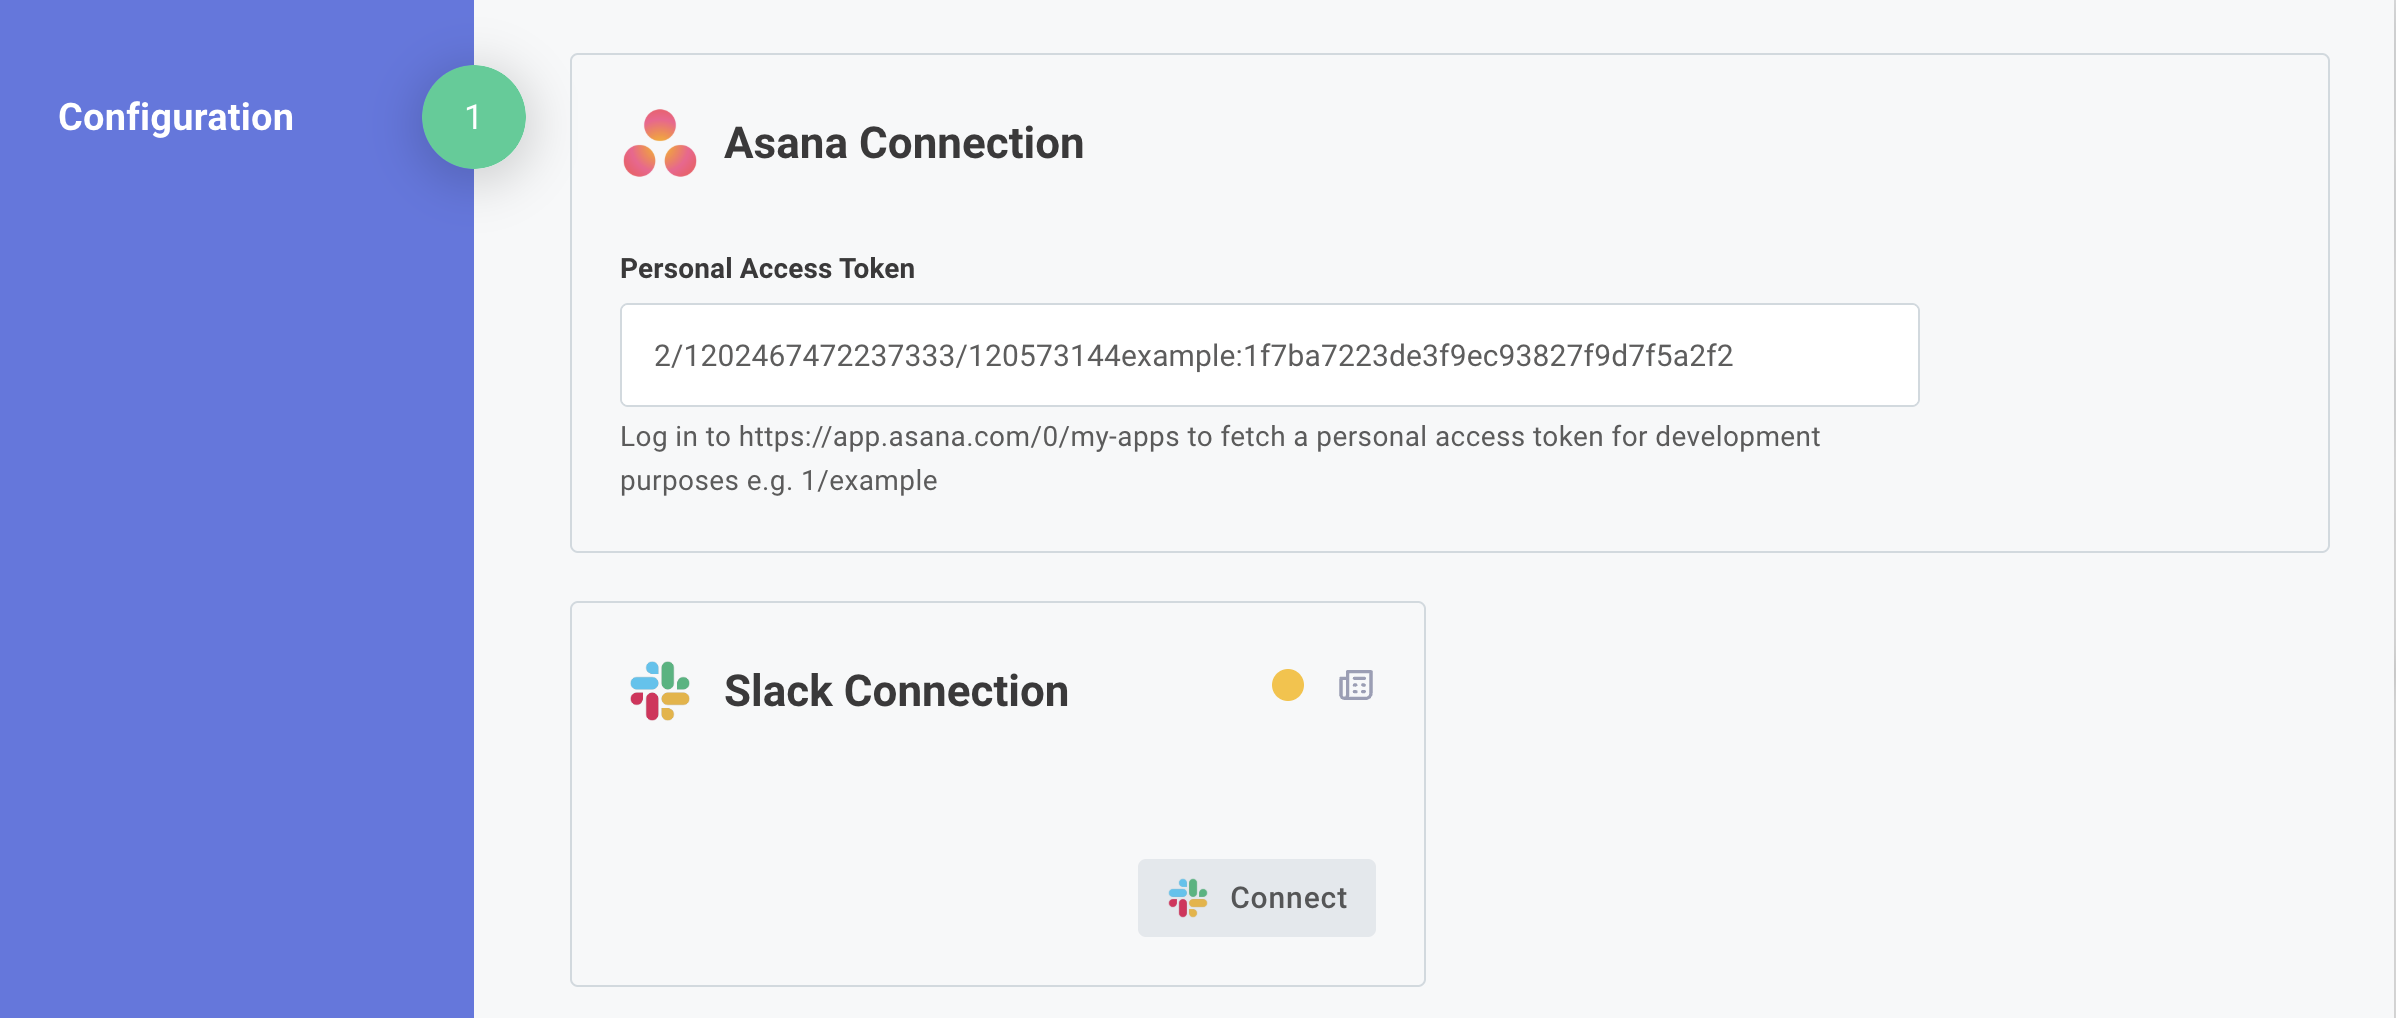
For example, the Amazon S3 component requires an access key ID and secret access key as part of its connection, and the the Tableau component requires a host name, site ID, token, and token name.
#
Adding a connection to an integrationWhen you add a step to your integration that requires a connection, that step will be bound to a connection config variable that represents that connection. If a connection config variable for that component doesn't exist yet, a new one will be created. One connection config variable can be used for multiple steps (so, all of your Amazon S3 steps can reference a single connection config variable).

The config variable that is referenced will contain the information necessary for the step to connect to the outside app or service. You can provide default values for the connection's input fields, or you can choose to have customers enter their own values when they deploy an instance of the integration.

You can control the visibility of each field of a connection config variable by clicking the
icon. You can choose to show the field to customer users, make it setable programmatically in embedded, or hide it entirely from customers.#
Configuring connections for instancesWhen your team member configures an instance for a customer, or the customer enables the integration for themselves, they are prompted to enter values for each connection input field.

You can click the
icon to see logs related to that particular connection. The connection will be marked with a green if the connection has been used successfully in an execution of the instance, yellow if it has been configured (but not used), and red if the component using the connection threw a connection-related error.#
OAuth 2.0 in IntegrationsOAuth 2.0 is a special type of connection that is ubiquitous in integration development. OAuth 2.0 allows your customers to authorize your integration to perform certain functions on their behalf, without needing to give you their username or password. For example, customers can authorize your integration to fetch their Salesforce leads, create Slack channels, or generate Quickbooks invoices for them.
You've probably come across OAuth 2.0 at some point - any time you click "Log in with my Google Account" or "Log in with Facebook" on a website, that website leverages OAuth to fetch information about you (your email address, friend's list, etc) on your behalf. You don't enter your Google or Facebook credentials into the website. Instead, you enter your credentials on a Google, Facebook, etc. page and the OAuth provider generates a unique code that grants the website a set of your permissions.
In the integration world, it's common to use OAuth to authenticate third-party services. You set up an "OAuth 2.0 App" in a third-party service, like Salesforce, Quickbooks, Jira or Dropbox, and your customers can then click a button, enter their credentials in the OAuth provider, and your Prismatic integration is granted the necessary access to perform actions in the third-party service on the customer's behalf.
#
Creating an OAuth 2.0 "app" in a third-party serviceTo use OAuth to authenticate users with a third party, you will need to work with the third-party service to create an "OAuth App". Most common SaaS platforms have documentation on how to create an OAuth app, and we link to that documentation on our component docs pages. It's usually found in an "API Access" section of a settings page, or on a page similarly named.
When you configure your OAuth app, you'll likely need to set up an authorized callback URL. That's the URL that the app is allowed to send a special code to when a user authenticates with them. The callback URL for Prismatic is https://oauth2.prismatic.io/callback .

Also take note of the OAuth app's client ID and client secret. These are sometimes called "App ID", "App Key" or something similar. You'll use those to configure your Prismatic integration's connection.
Within the OAuth app you may also need to configure permissions that can be granted. For example, you can say the an app gives integrations the ability to list files and read files, but not write files, or the ability to generate invoices on behalf of your customer. These permissions in the OAuth world are called scopes.
#
Adding an OAuth 2.0 connection to an integrationOnce you have an OAuth 2.0 App configured in a third-party service, add a new connection in your Prismatic integration for the third-party you're integrating with. You can do that by either adding a step for the third-party (add a Salesforce step to automatically create a Salesforce connection, etc.), or open the Configuration Wizard Designer by clicking Configuration Wizard and create a new config variable of type Connection.
Enter the client ID and client secret that you noted in the previous step. You may need to enter an Auth URL or Token URL if those are different for different tenants. You can find those in the third-party apps' docs. There's a good chance the URLs are the same for everyone, so are hidden in the Prismatic UI. Mark fields that you don't want your customers to see "hidden" by clicking the
icon. You probably want to hide your client ID and client secret.
If the app you're connecting with allows you to override scopes on a per-connection basis, you'll be prompted for scopes here, too.
#
Custom OAuth 2.0 redirectsNormally, a user who completes an OAuth 2.0 flow finds themselves on an "Authorization Complete" screen - https://app.prismatic.io/app/authorization-complete/.
If you would like to customize where a customer is redirected after a successful or failed OAuth 2.0 flow, toggle the Custom OAuth Redirects option on the connection and enter URLs for OAuth Success Redirect URI and OAuth Failure Redirect URI.

Your user will be redirected to those URLs, with URL search parameters representing:
- The instance's name and ID
- The integration's name and ID
- The connection config variable's name and ID

#
Configuring OAuth 2.0 connectionsIf you've created an integration with an OAuth 2.0 connection, customers will see a CONNECT button button when they enable the integration. When they click the CONNECT button they will be brought to the third-party app's OAuth service, and will be prompted to verify that they want to grant permissions to your integration. Once they are done, they'll see a "Authorization completed successfully" page, which they can close to return to the instance configuration screen.

To change an OAuth connection (for example, if you logged in as the incorrect person when you clicked CONNECT), you can click DISCONNECT and then CONNECT again to reauthenticate against the OAuth provider.
If any problems occur during the OAuth flow (incorrect Auth or Token URL, incorrect scopes, etc), you can view related connection logs by clicking the
button to the right of the connection config variable.#
Disconnecting an OAuth 2.0 connectionWhen you disconnect an OAuth 2.0 connection, two things (and one optional thing) happen:
- Prismatic stops periodically refreshing the access token
- Prismatic deletes the access and refresh tokens from its database, so steps can't reference it
- [Optional] It's not common, but some OAuth 2.0 providers allow you to revoke a token. Quickbooks is a prominent example of an API that supports revocation. If a revocation endpoint is present in a component's connection, Prismatic reaches out to that endpoint to revoke the token with the third-party's API.
To disconnect an active OAuth 2.0 connection, click the DISCONNECT button under the config variable name:

#
Referencing connections in a code componentIf you need to access some connection values in a code component, you can by referencing the connection config variable. See the Code Component Usage article for more information and an example.
#
Adding a connection to a custom componentIf you're writing your own custom component, you can declare a new connection type that contains any set of fields (host URL, username, password, API key, etc). You can also create OAuth connections and override field names (an app might call a "Client ID" an "App ID" for example). See the Writing Custom Components article for more information and examples.